
PX File Manager is a fast file manager and code editor for the Joomla administrator. Browse, search, edit, upload, zip and set permissions on any file in your site without FTP or a hosting control panel.
Overview
PX File Manager adds a full-screen file explorer to Components » PX File. It works on the files of the Joomla site it is installed on and never goes outside the site root. In the Joomla administrator it is listed as PX File.
- Explorer: folder tree, sortable file list, breadcrumb and an instant filter.
- Site-wide search: find files or folders by path tokens, e.g.
com_content article. - Code editor: the Monaco editor (the editor behind VS Code) with syntax highlighting for PHP, JS, TS/TSX, CSS/SCSS, XML, INI, SQL, YAML and more.
- Tabs: open several files at once and switch between them.
- File operations: new file/folder, upload, rename, copy, cut, paste, delete, download.
- Zip tools: compress a selection to
.zipand extract archives in place. - Permissions: change file modes (chmod) with a checkbox grid.
- Image preview and file properties (size, dates, paths, mode).
- Joomla ACL: separate permissions for view, create, edit and delete.
Installation
System requirement
- Joomla 4.4, 5.x or 6.x
- PHP 8.1 or later
- PHP
zipextension (ZipArchive), needed for Compress and Extract - A modern browser: the latest Chrome, Firefox, Safari or Edge
Install the package
- Download the
com_pxfile.zippackage from your account on thepixel.dev. - In the Joomla administrator, go to System » Install » Extensions.
- Open the Upload Package File tab 1 and drop the zip file into the upload area 2.
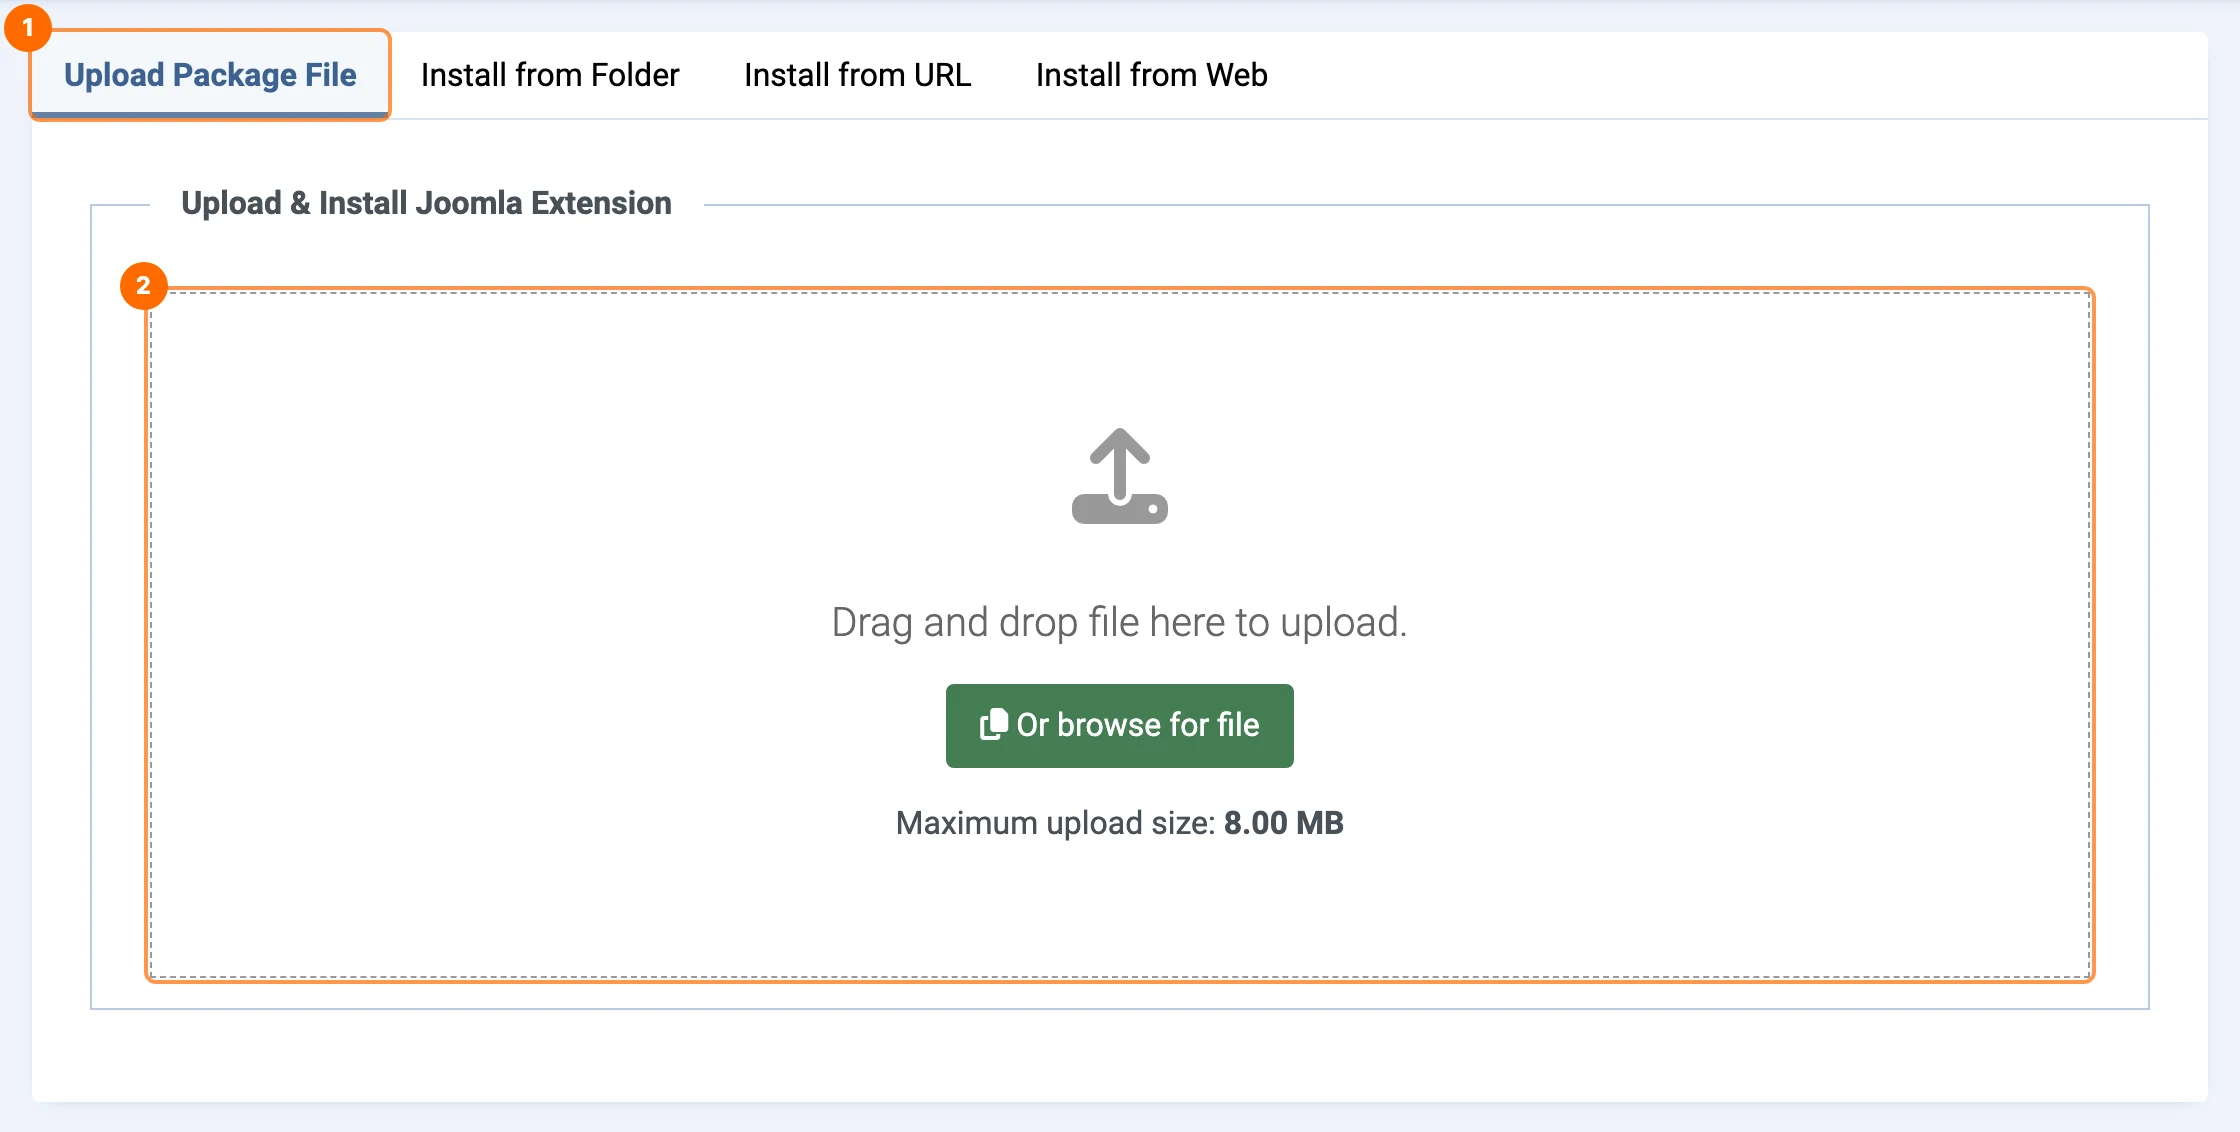
com_pxfile.zip in System » Install » Extensions.Open PX File Manager
After installation, open Components » PX File.
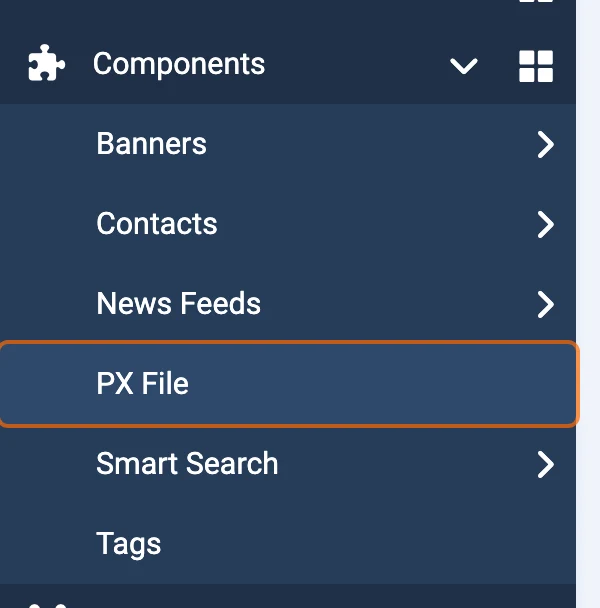
By default only Super Users can open PX File Manager. To give other groups access, see Permissions (ACL).
The interface
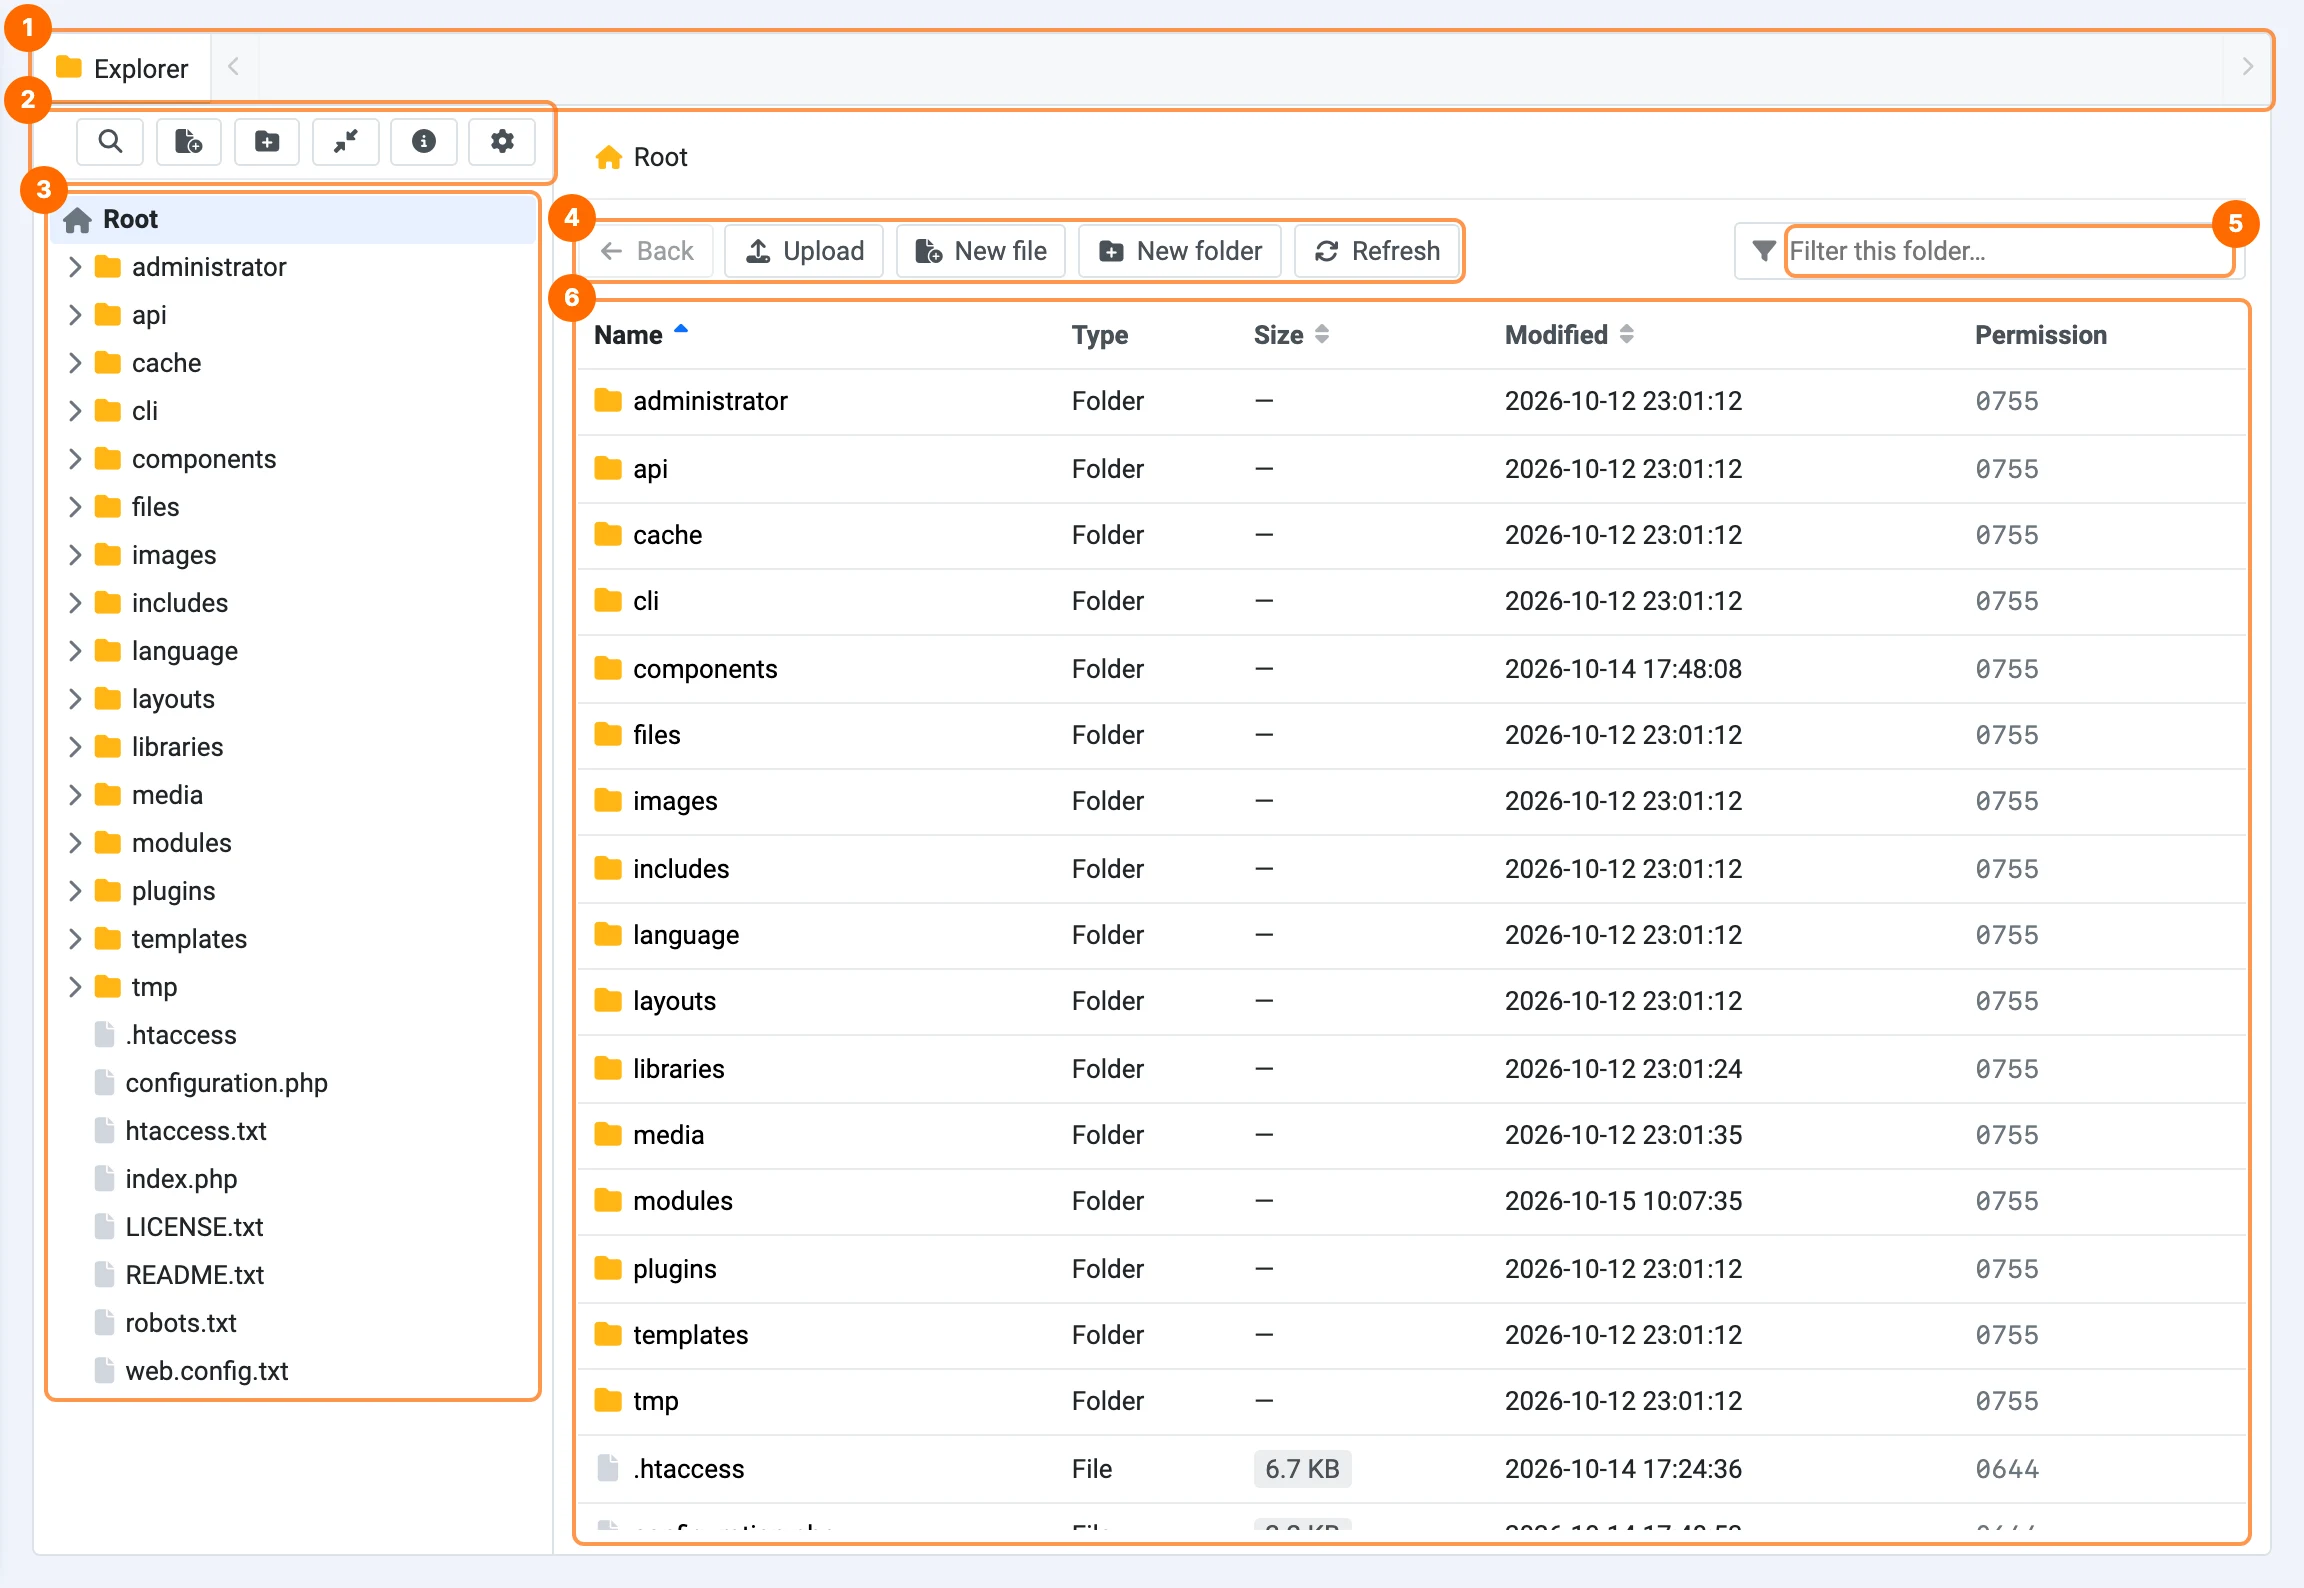
- 1Tabs: Explorer is always the first tab. Every file you open gets its own tab.
- 2Sidebar toolbar: search, create, collapse tree, help and settings.
- 3Folder tree: the whole site from Root. Click the arrow to expand a folder, click a name to open it, right-click for the context menu.
- 4Explorer toolbar: Back, Upload, New file, New folder, Refresh. A Paste button appears here when you copy or cut items.
- 5Filter: narrows the list of the current folder as you type.
- 6File list: name, type, size, modified date and permission of each item. Click a column header to sort.
Sidebar toolbar

- 1Search files: search the whole site (see Search).
- 2New file: create a file in the current folder.
- 3New folder: create a folder in the current folder.
- 4Collapse all: close every expanded folder in the tree.
- 5Keyboard and mouse guide: list of shortcuts (see Keyboard & mouse).
- 6Component settings: opens the PX File Options.
Browsing files
- Double-click a folder to open it, or a file to open it in a new tab.
- Use the breadcrumb above the toolbar to jump to any parent folder, or Back to return to the previous folder.
- Click Name, Size or Modified to sort the list. Click again to reverse the order.
- Refresh reloads the current folder from disk.
Filter the current folder
Type in Filter this folder… to show only the items whose name contains the text. Press Esc or click × to clear it. The filter only looks at the folder you are in; to look through the whole site, use Search.
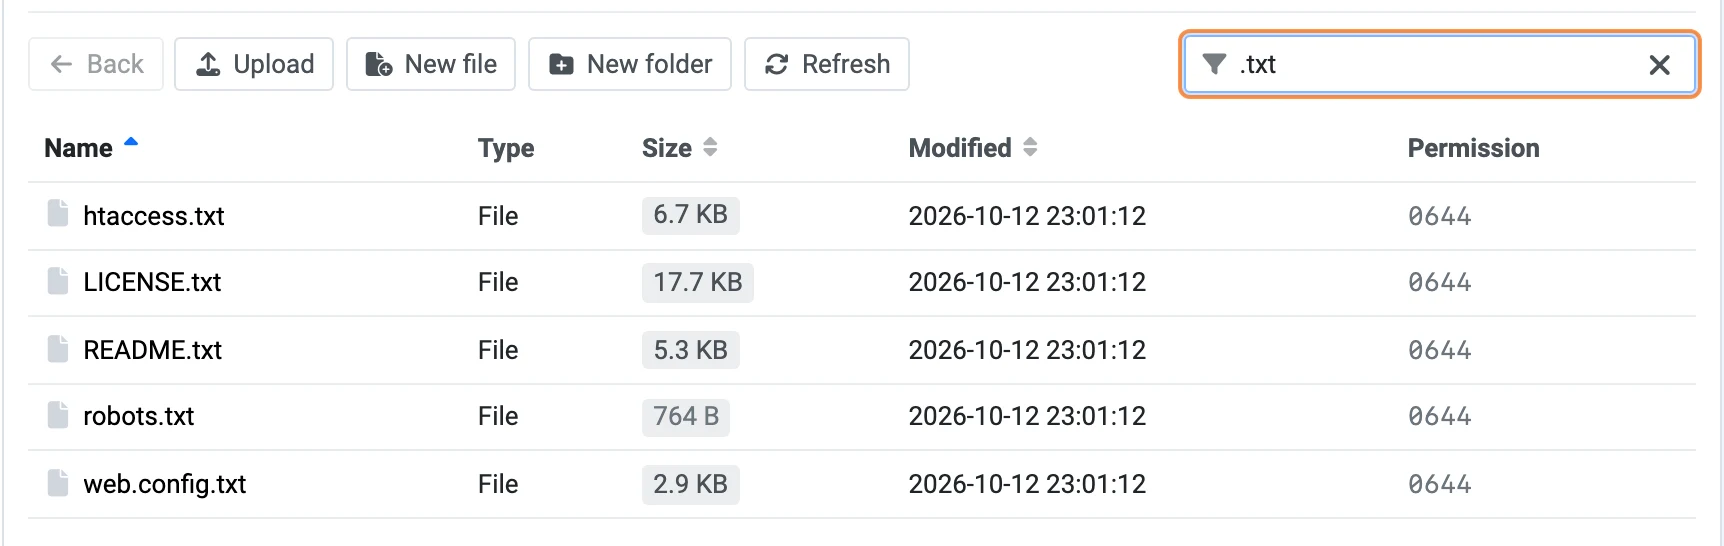
.txt keeps only the text files of the current folder.Search
Click the search icon in the sidebar toolbar to search every file of the site.
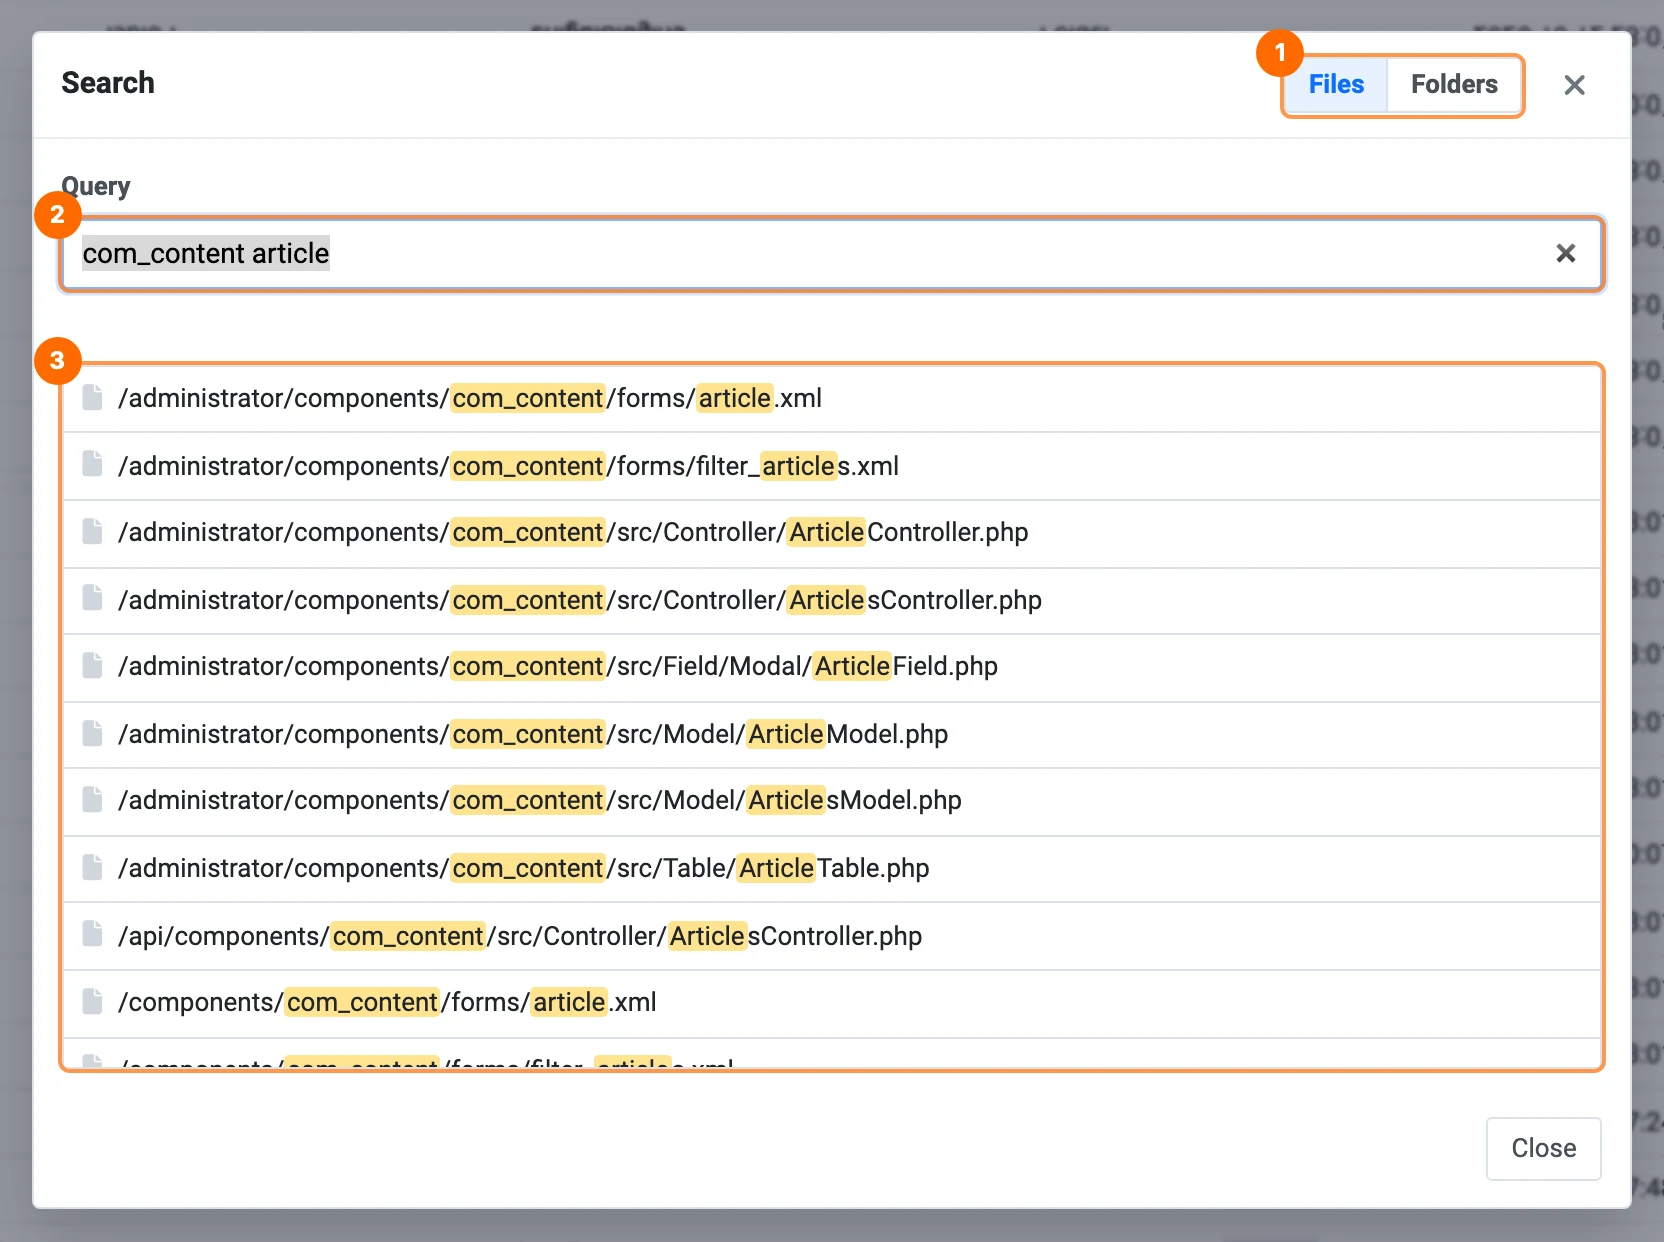
com_content article. Matching parts of each path are highlighted.- 1Files / Folders: choose what to look for.
- 2Query: type a path or a few words separated by spaces or
/, then press Enter. Every word must appear in the path, in any order. Example:src/components/SearchModal.tsxorcom_content article. - 3Results: click a file to open it in a tab, or a folder to open it in the Explorer.
If you get too many results, the list is cut and a note asks you to add more words. Folders such as /cache and /.git are skipped; you can change this list in Options » Search.
Create and upload
New file and new folder
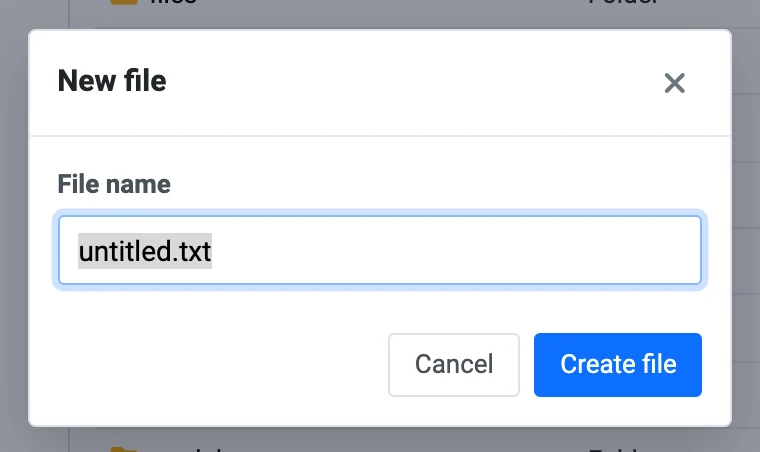
Click New file or New folder in the toolbar, type a name and confirm. The item is created in the folder you are viewing. Double-click the new file to start editing it.
Upload files
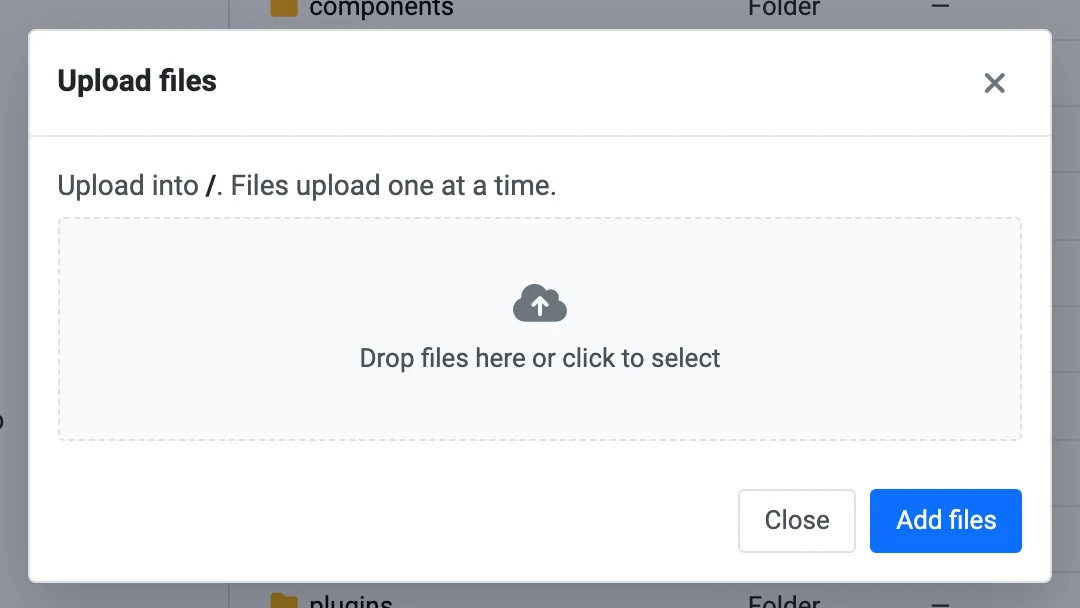
Click Upload, then drop files into the box or click it to pick files. Files upload one at a time into the current folder and each one shows its own progress and status. A file whose name already exists in the folder is not replaced; it is marked Failed. Rename or delete the existing file first.
upload_max_filesize).Select, copy and move
- Click selects one item.
- Ctrl/⌘ + Click adds an item to the selection or removes it.
- Shift + Click selects a range, following the current sort and filter.
Press Ctrl/⌘+C to copy or Ctrl/⌘+X to cut (you can also use the context menu). A blue Paste (n) button appears in the toolbar. Open the destination folder and click it, or press Ctrl/⌘+V.

- If a name already exists in the destination, choose Override or Keep both (the new copy gets
- Copyadded to its name). - Cutting and pasting into the same folder does nothing; open another folder first.
- A folder cannot be pasted into itself or one of its subfolders.
- Esc clears the selection and the clipboard.
Context menu
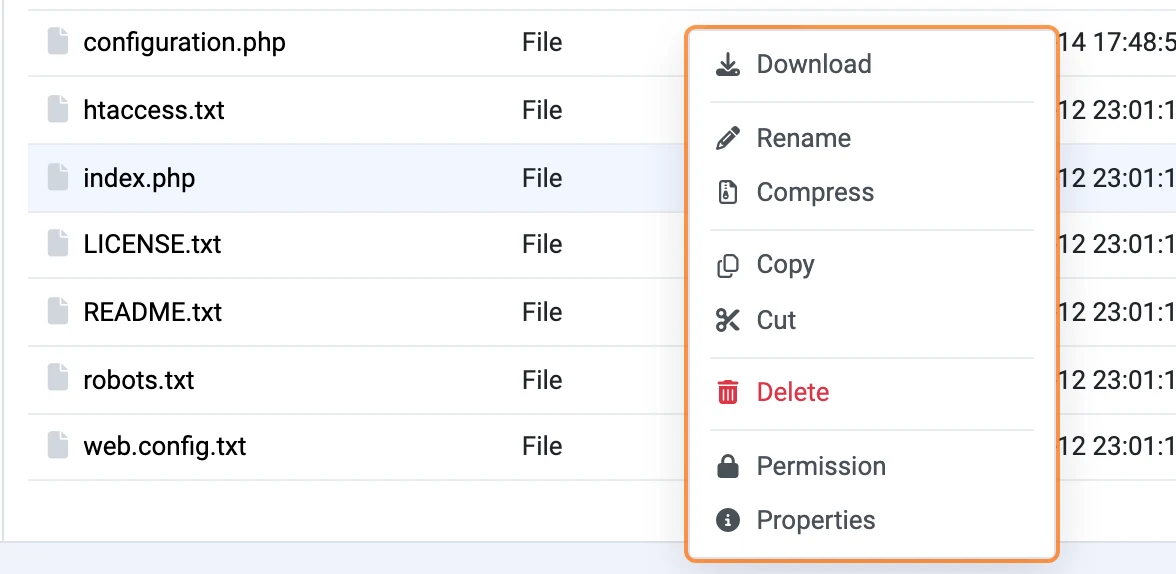
Right-click any file or folder, in the list or in the tree, to see what you can do with it.
| Item | What it does |
|---|---|
| Download | Downloads the file to your computer. |
| Rename | Renames the file or folder. |
| Compress | Creates a .zip of the selected items (see Zip). |
| Extract | Shown on .zip files. Unpacks the archive. |
| Copy / Cut | Puts the selection on the clipboard. |
| Delete | Deletes the selected items. Folders must be empty. |
| Force delete | Shown on folders. Deletes the folder and everything inside it, after two confirmations. |
| Permission | Changes the file mode (see File permissions). |
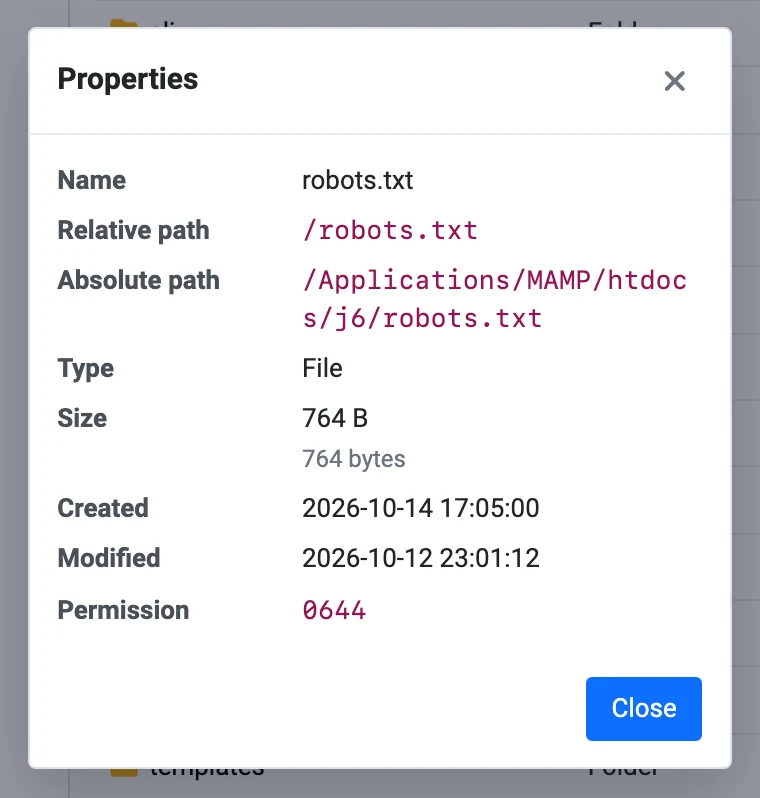
| Properties | Shows name, paths, type, size, dates and mode. |
Deleting cannot be undone
PX File Manager has no recycle bin. Deleted files are removed from the server for good, so download or zip anything you may need first.
Compress and extract
Compress
Select one or more items, right-click and choose Compress. Enter a name for the archive and click Compress. The zip is saved in the current folder.
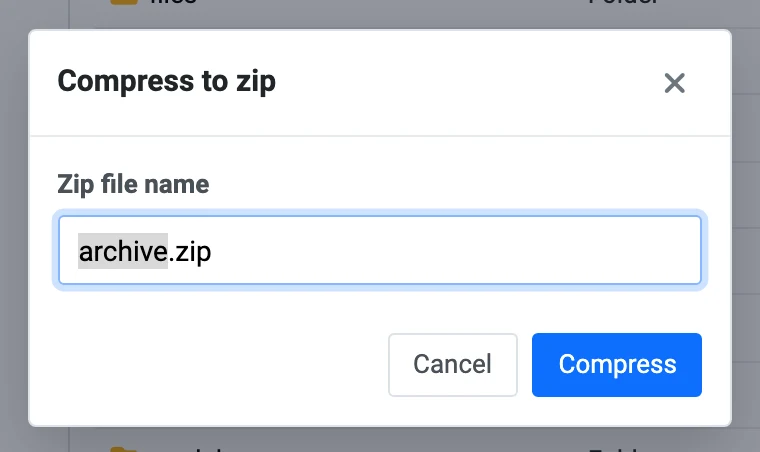
Very large selections can hit the PHP memory_limit of your server. If that happens, compress fewer files at a time.
Extract
Right-click a .zip file and choose Extract. Leave the destination name empty to extract into the current folder, or enter a folder name to extract into a new folder. If files from the zip already exist, you can Overwrite them or Keep both (the extracted file gets a number, e.g. name (1).txt).
Editing files
Double-click a text file to open it in a new tab with the code editor.
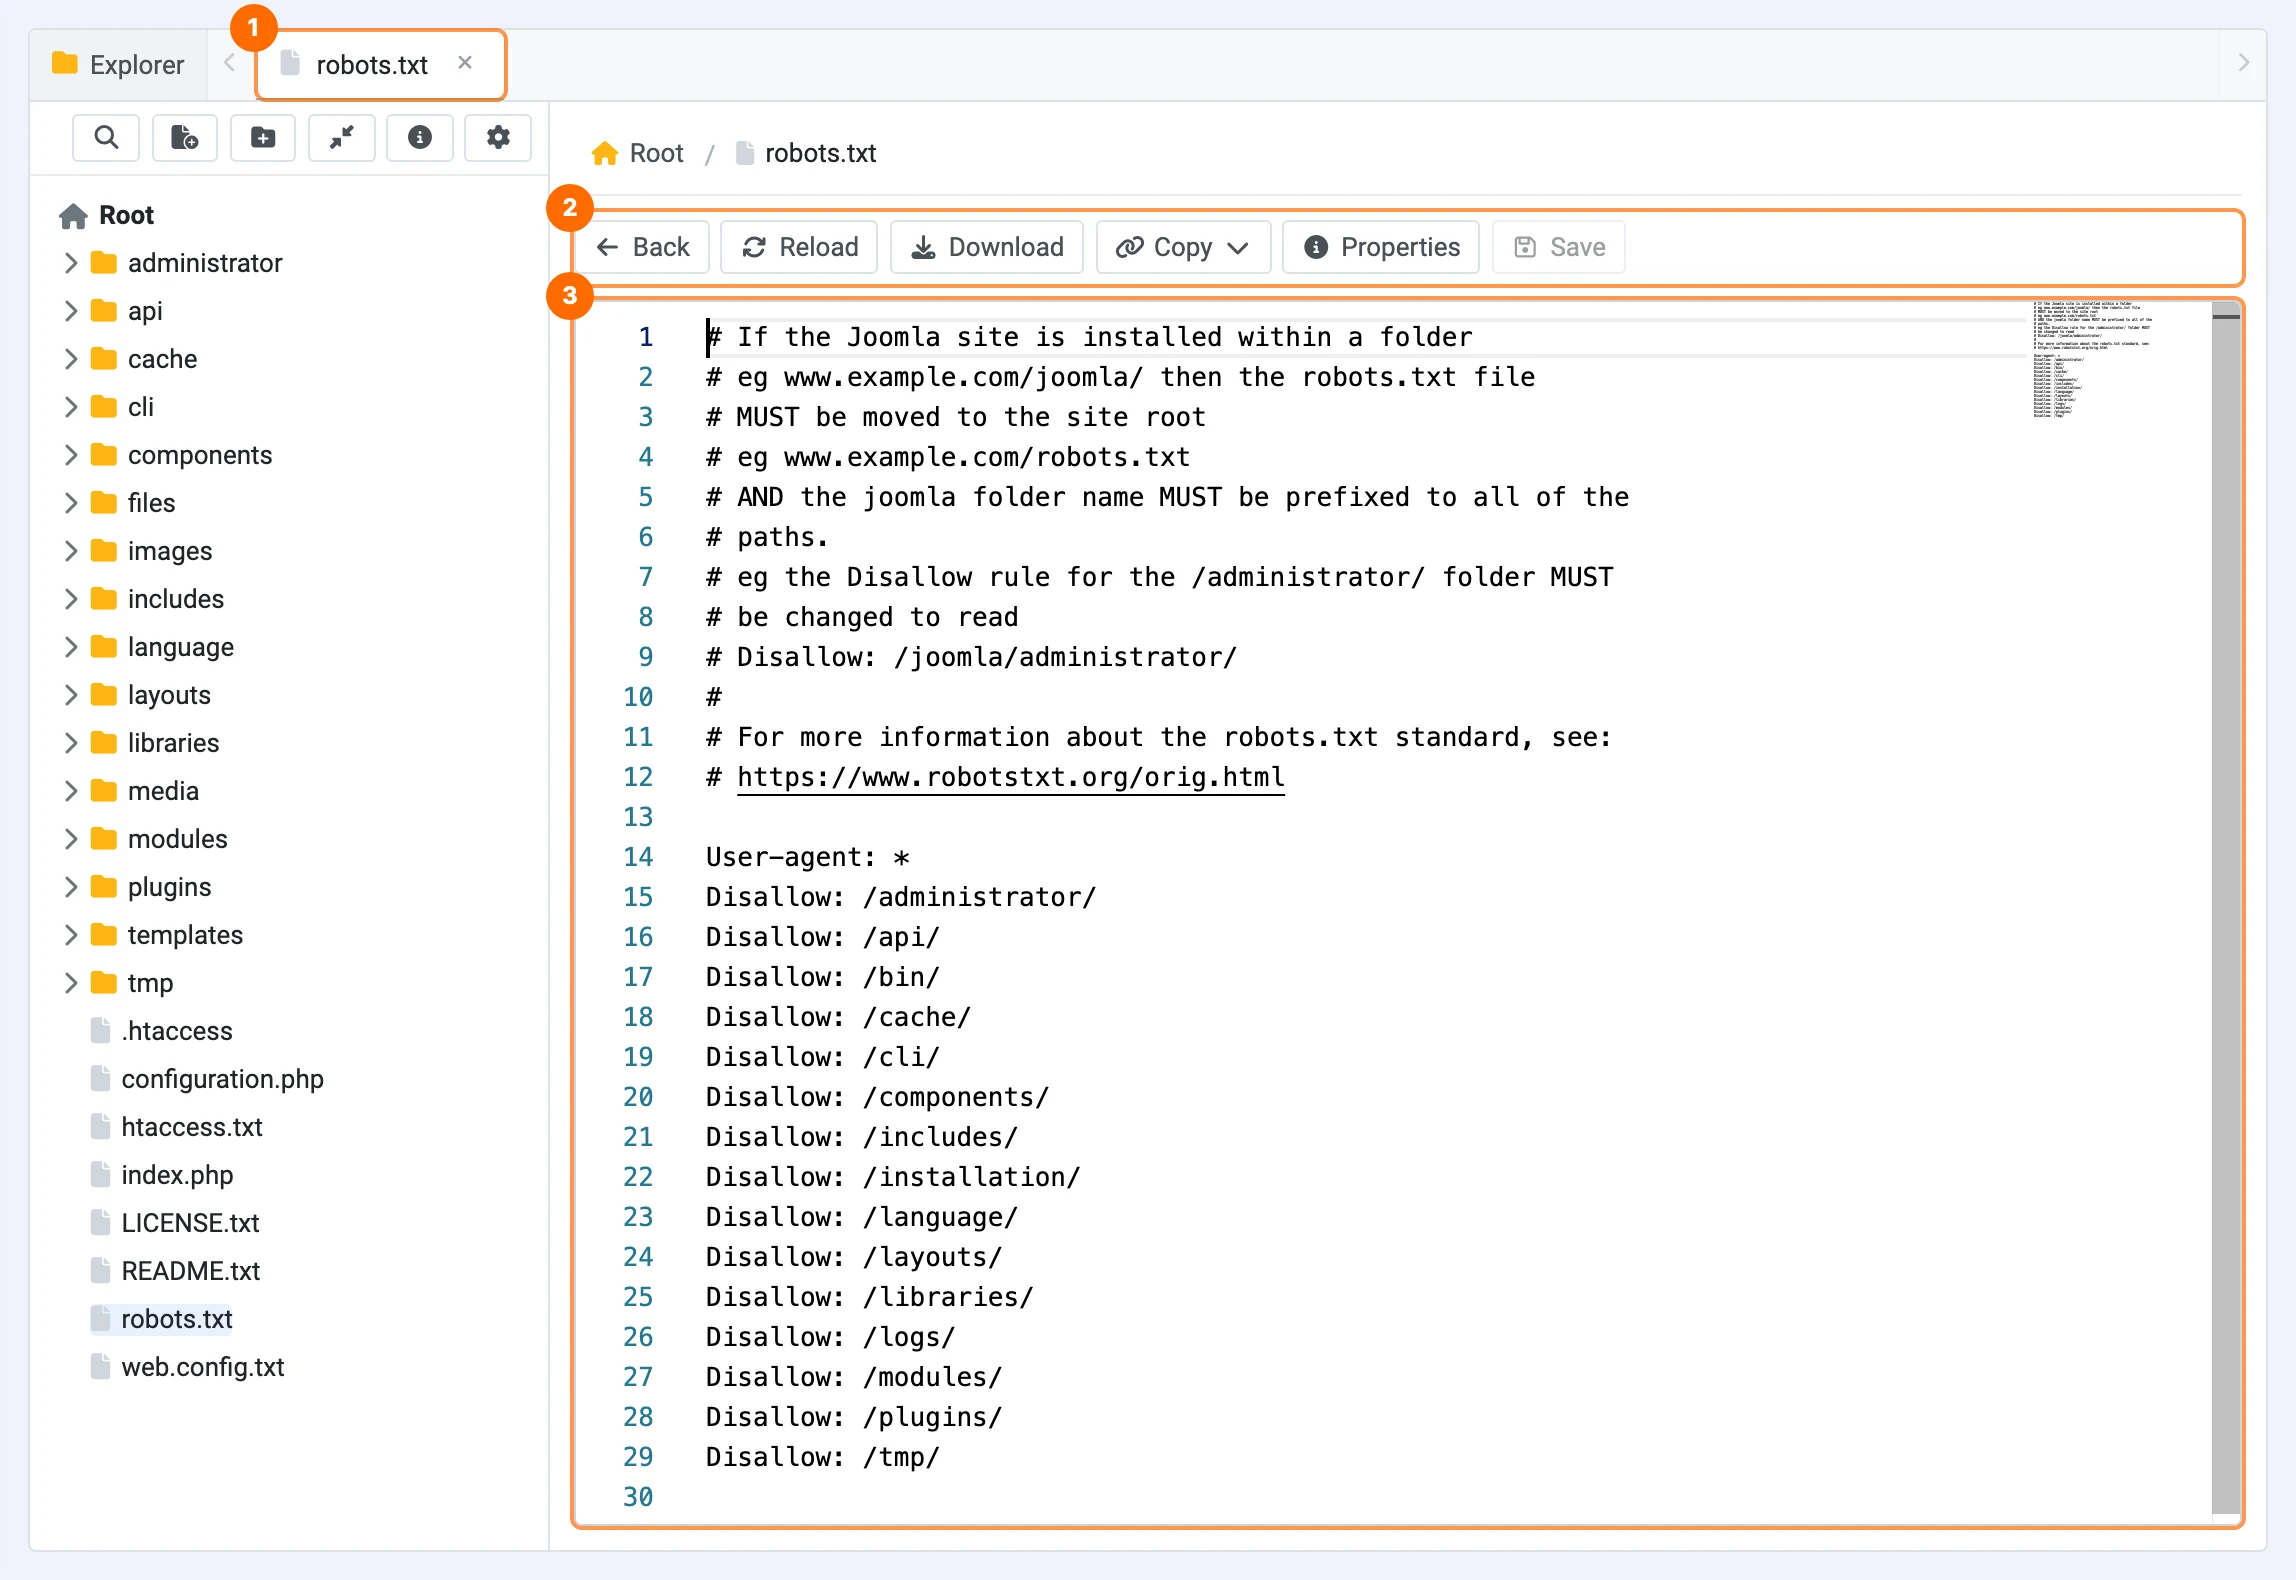
File toolbar

| Button | What it does |
|---|---|
| Back | Returns to the Explorer tab. |
| Reload | Reloads the file from disk. Unsaved changes are discarded after a confirmation. |
| Download | Downloads the file. |
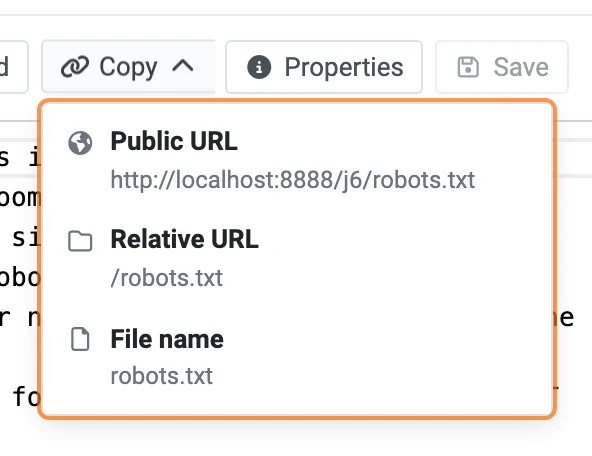
| Copy | Copies the public URL, relative URL or file name. |
| Properties | Shows the file properties. |
| Save | Saves the file. Shortcut: Ctrl/⌘+S while the editor is focused. |
- A tab with unsaved changes shows a dot; closing it asks before discarding the changes.
- Middle-click a tab to close it. Use the arrows at both ends of the tab bar when many tabs are open.
- Images (JPG, PNG, GIF, WebP, AVIF, BMP, ICO…) open as a preview. SVG files open as text because they can contain scripts.
- Binary files cannot be opened in the editor. Use Download instead.
Copy a file URL
Properties
File permissions
Right-click a file or folder and choose Permission. Tick Read, Write and Execute for Owner, Group and Other; the octal mode (e.g. 0644) updates as you click. Setuid, Setgid and Sticky are available for advanced cases.
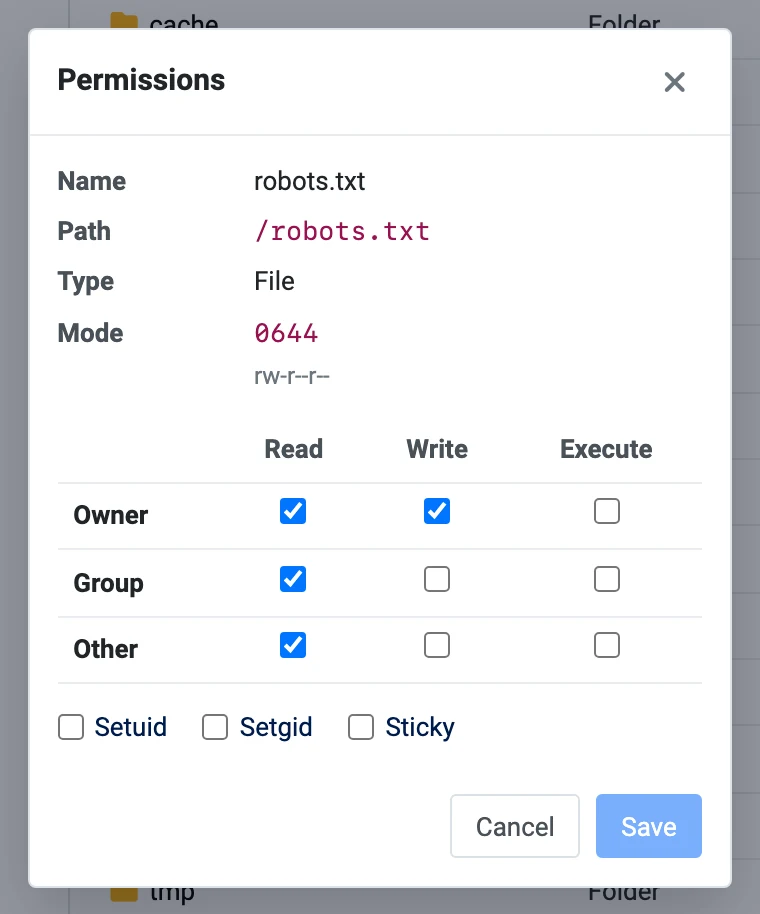
0644 for files and 0755 for folders.Changing permissions only works if the web server user owns the file. On some hosts this is not allowed and PX File Manager shows an error.
Keyboard & mouse
Click the i icon in the sidebar toolbar any time to see this guide. On Mac use ⌘; on Windows and Linux use Ctrl.
| Shortcut | Action |
|---|---|
| Ctrl/⌘+C | Copy the selected items |
| Ctrl/⌘+X | Cut the selected items |
| Ctrl/⌘+V | Paste into the current folder |
| Delete | Delete the selected items |
| Esc | Clear the selection and clipboard, or close the open dialog |
| Ctrl/⌘+S | Save the active file |
| Double-click | Open a folder or file |
| Right-click | Open the context menu |
| Middle-click a tab | Close the tab |
Explorer shortcuts are paused while you type in a field or in the editor.
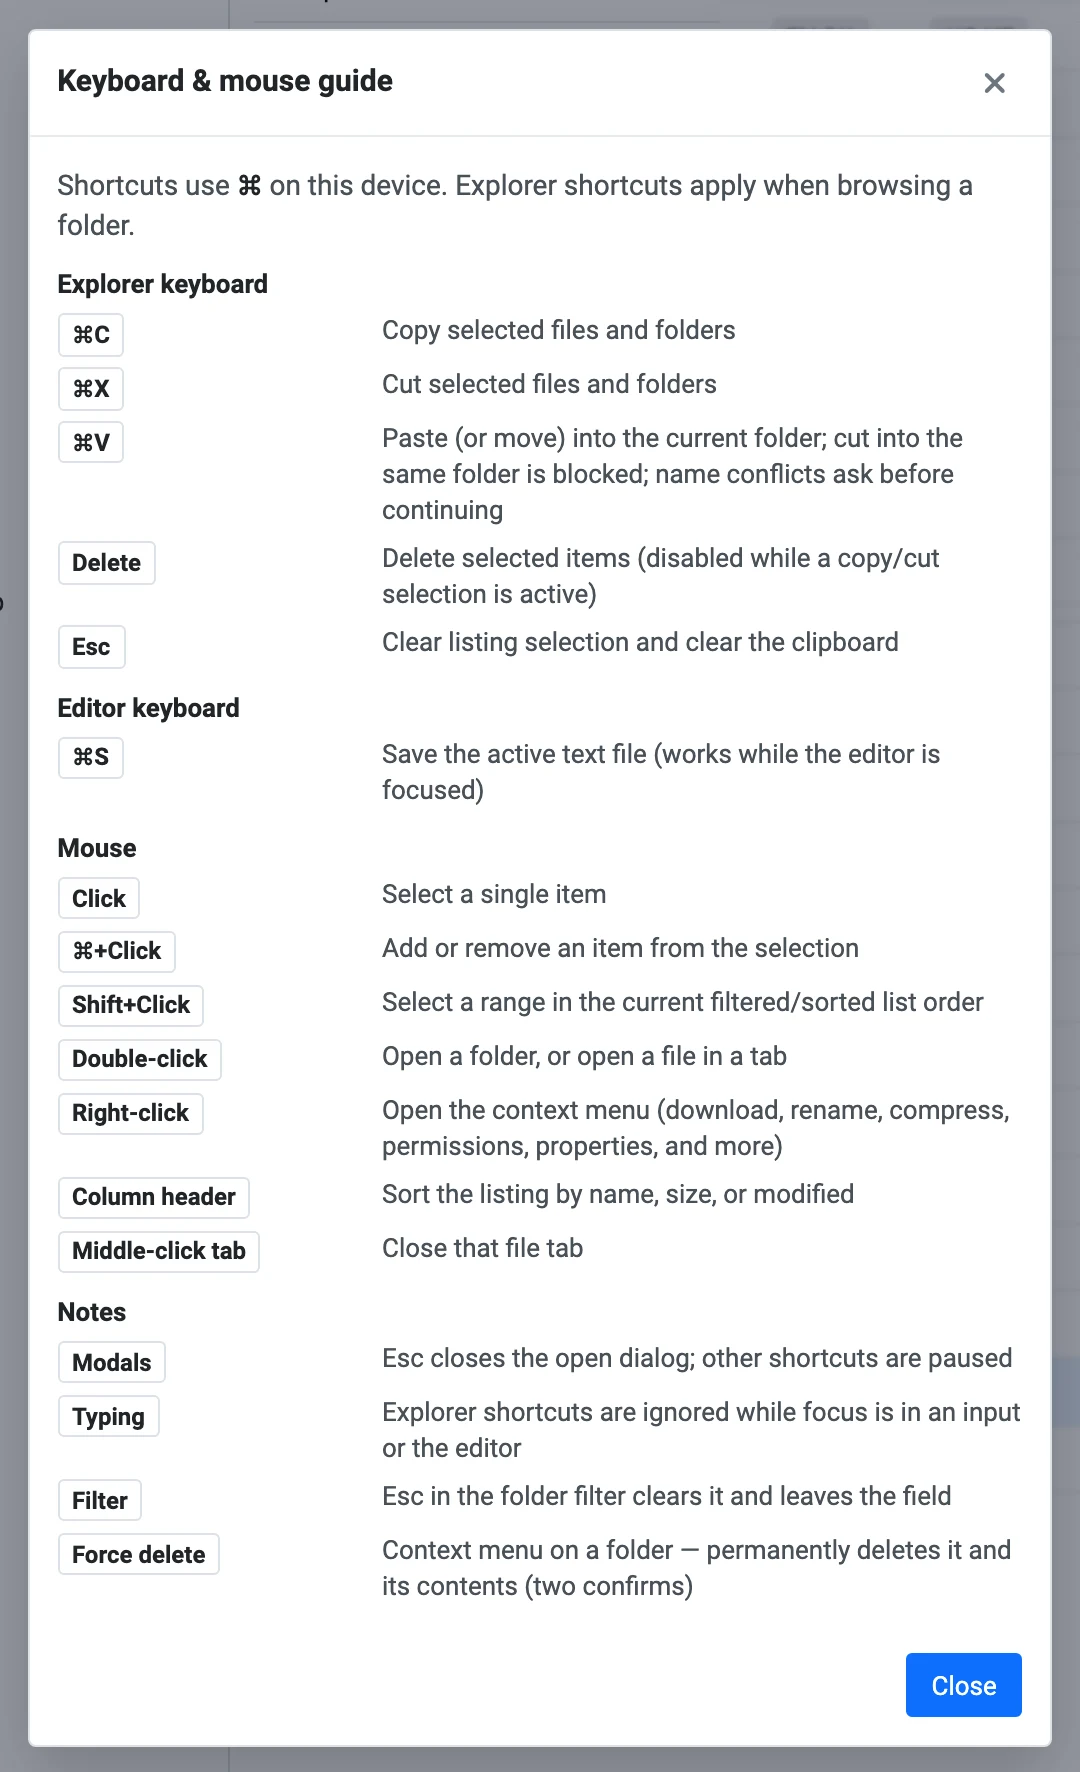
Configuration
Click the gear icon in the sidebar toolbar, or go to System » Global Configuration » PX File.
Search
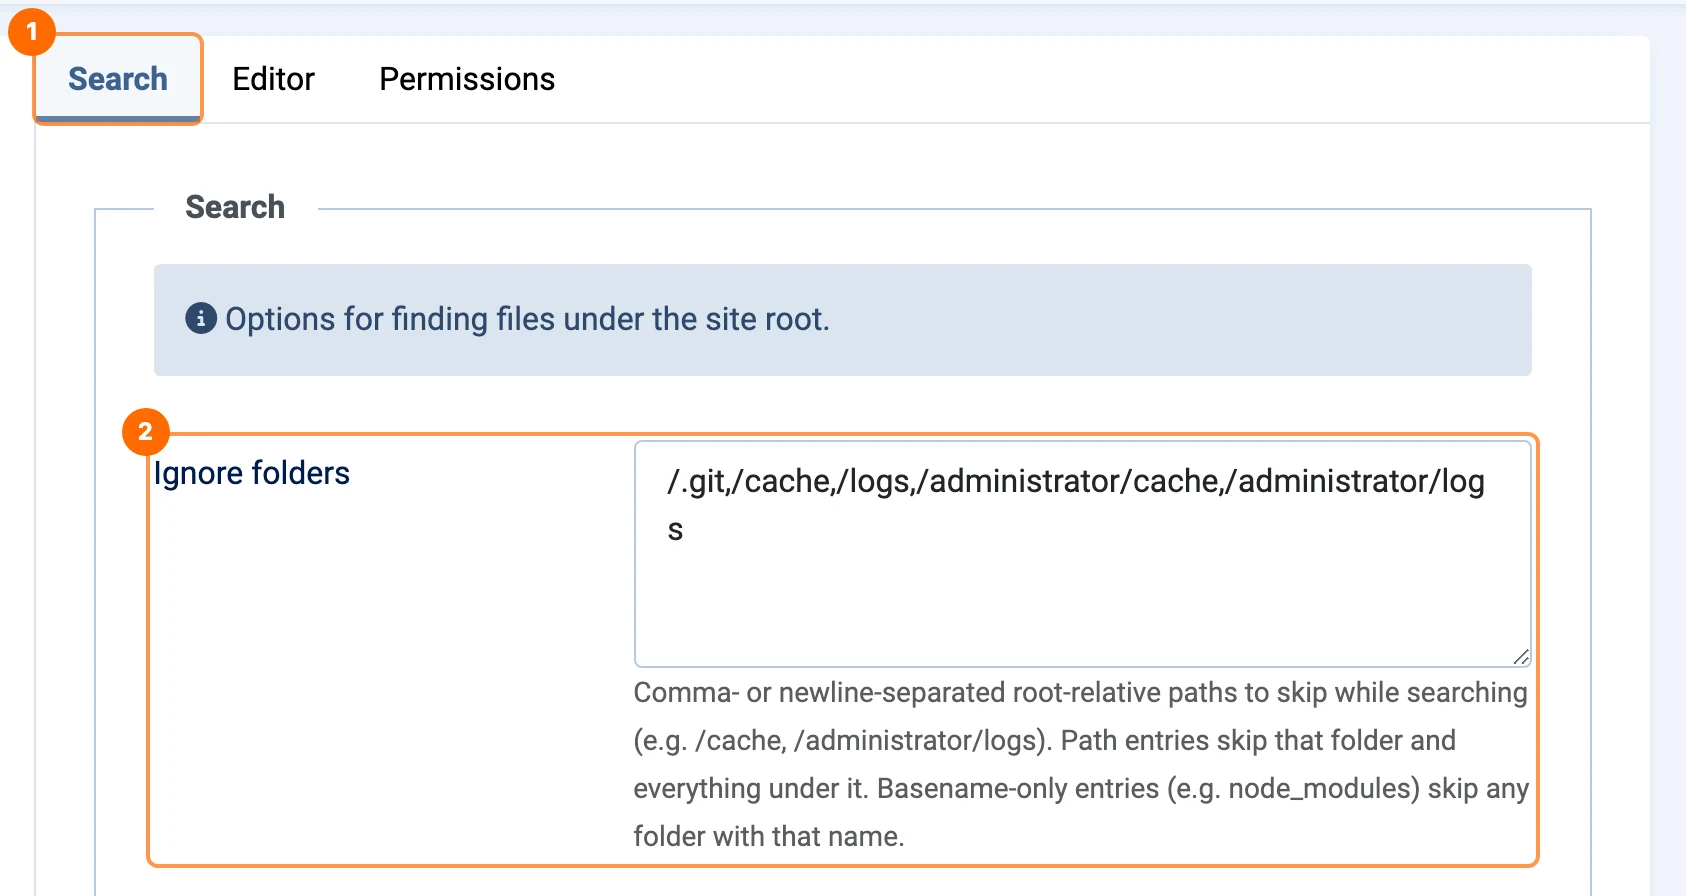
Ignore folders: folders that Search skips. Separate entries with commas or new lines.
- A path such as
/cacheor/administrator/logsskips that folder and everything under it. - A plain name such as
node_modulesskips every folder with that name. - Default:
/.git,/cache,/logs,/administrator/cache,/administrator/logs
Editor
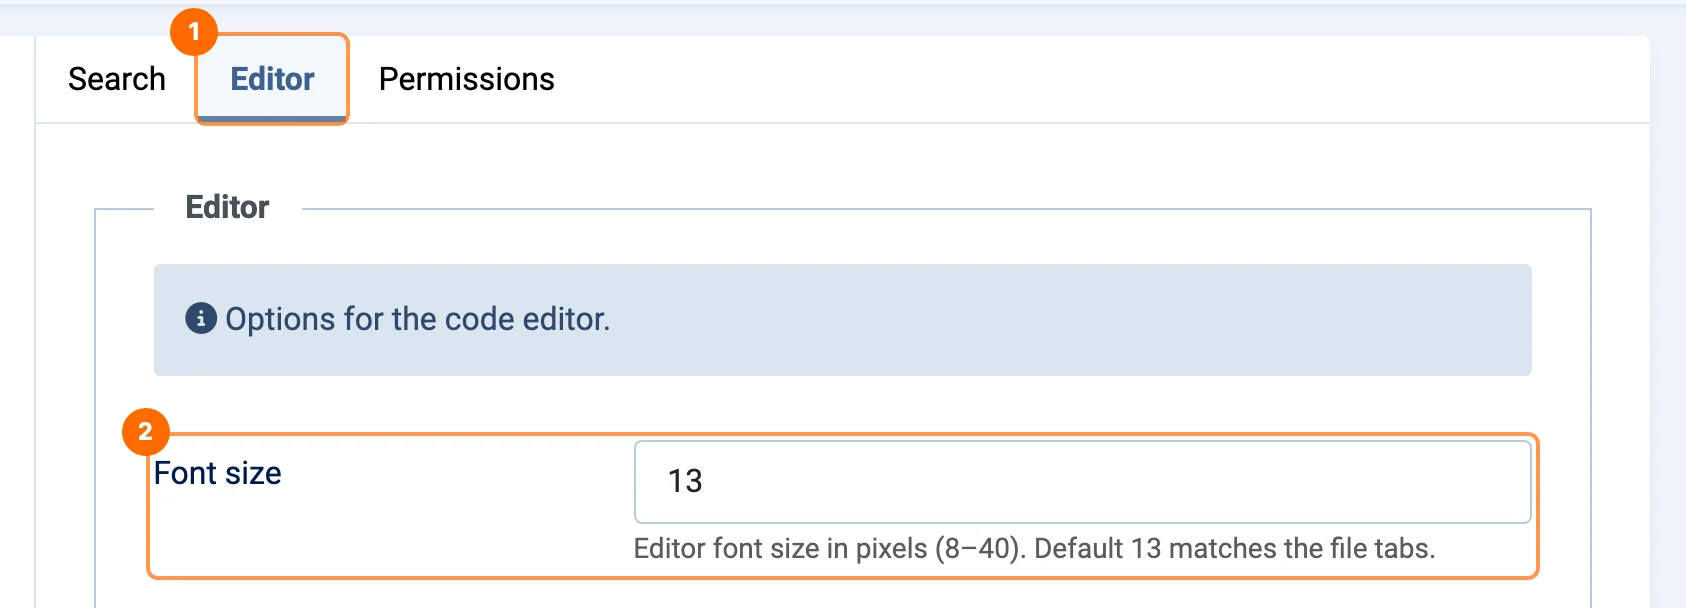
Font size: editor font size in pixels, from 8 to 40. Default: 13.
Permissions (ACL)
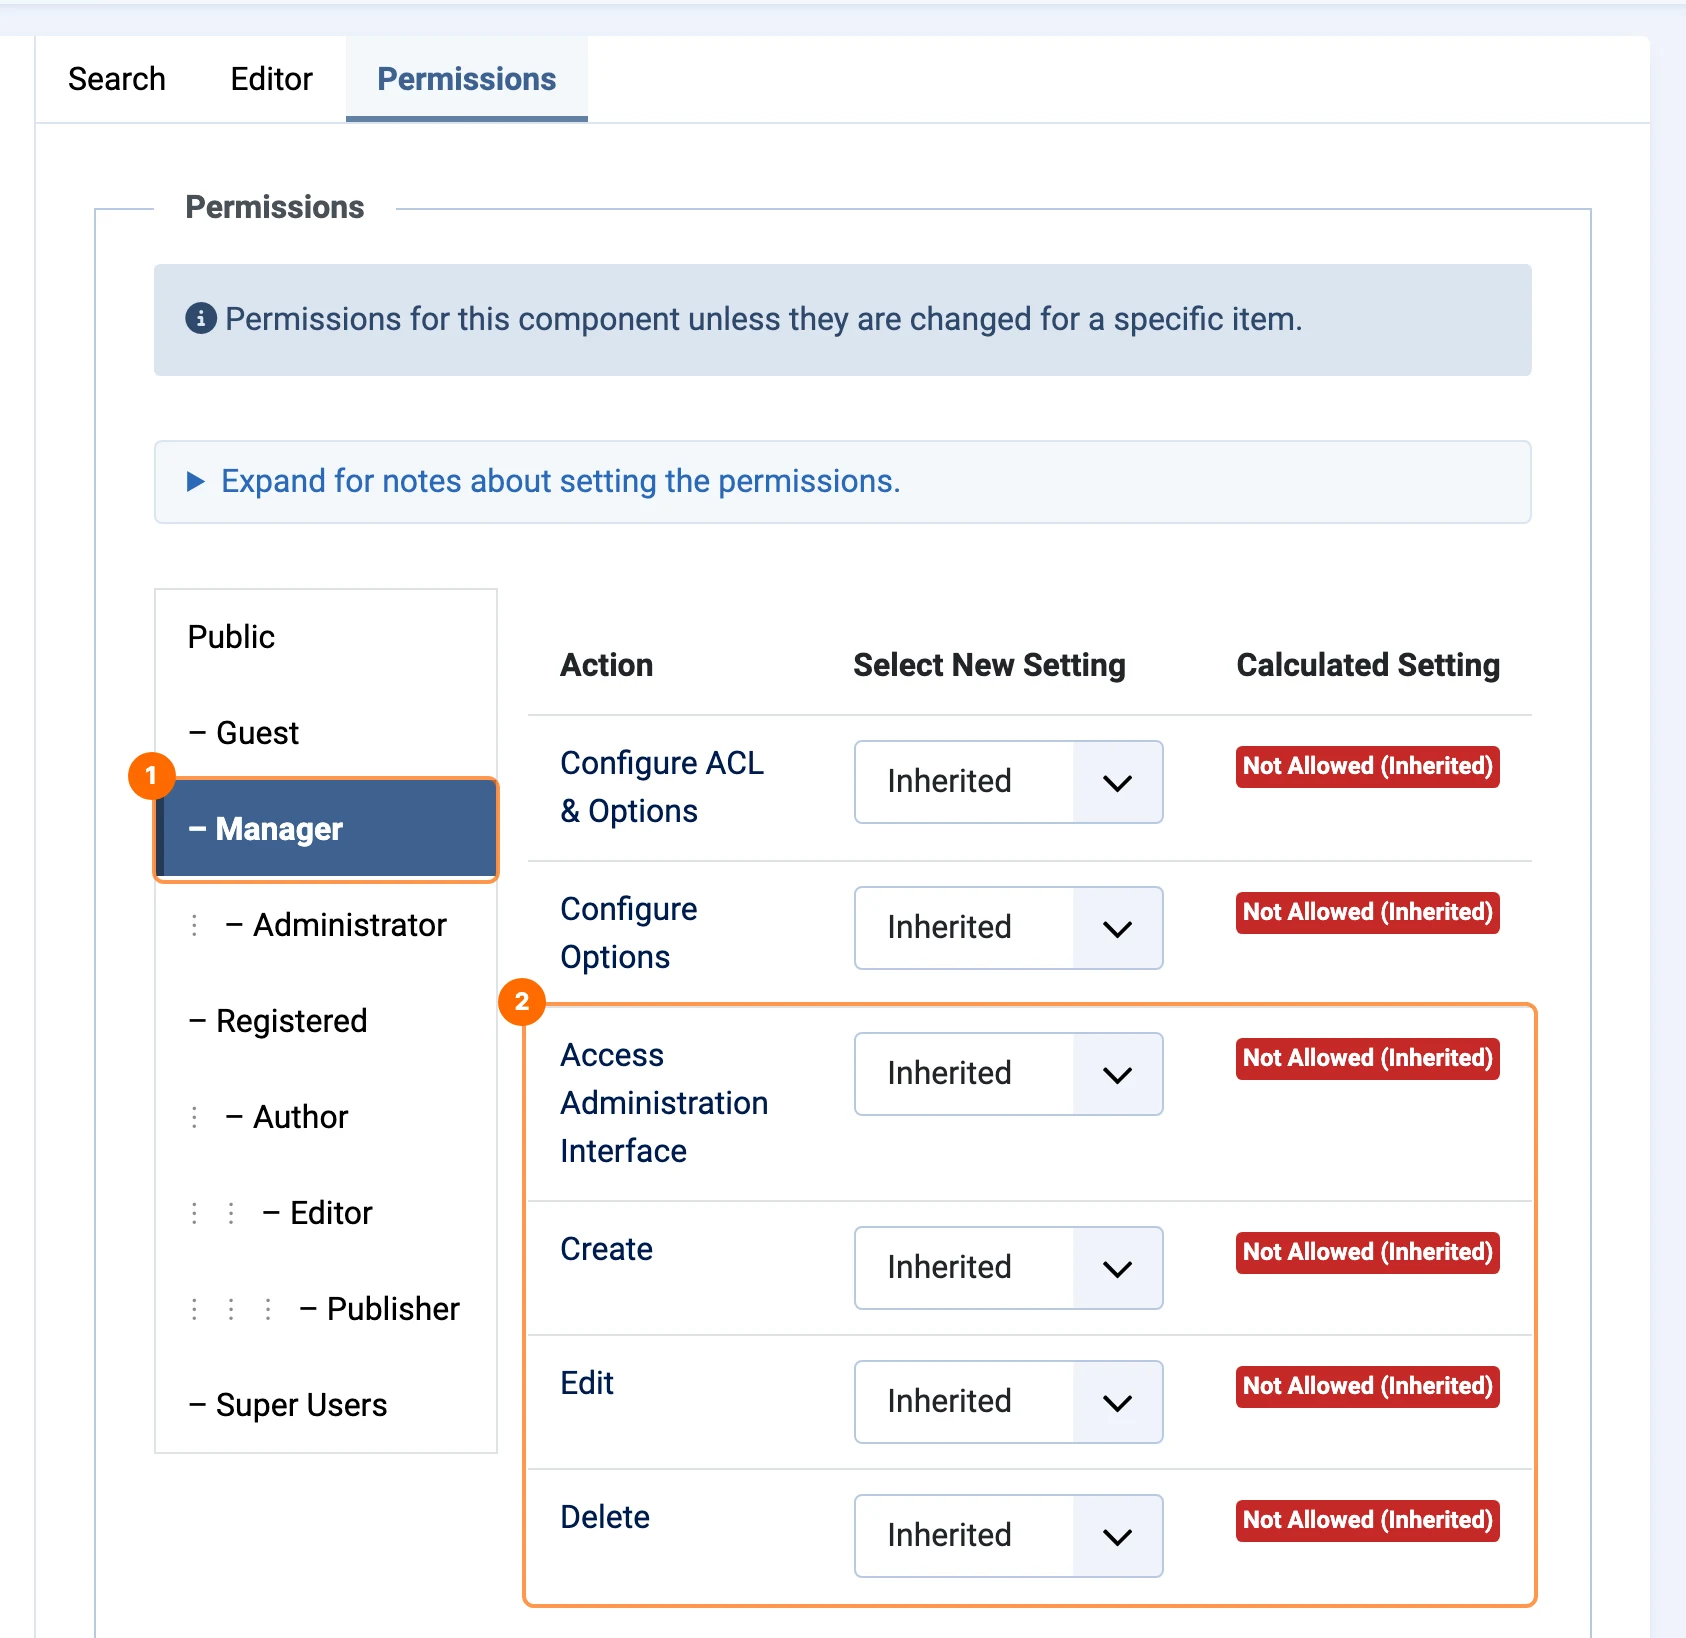
Choose who can use PX File Manager and what they can do. Select a user group 1, then set the PX File Manager actions 2.
| Action | Allows |
|---|---|
| Access Administration Interface | Open PX File Manager, browse, search, preview, download and view properties. Required for everything else. |
| Create | New file and folder, upload, compress, extract, copy and paste. |
| Edit | Save files, rename and change permissions. |
| Delete | Delete and force delete. |
- Move (cut and paste) needs both Create and Delete.
- Override on paste needs Delete; overwriting files while extracting needs Edit and Delete.
Grant access with care
Anyone who can edit files with PX File Manager can change the PHP code of your site, including configuration.php. Give Edit, Create and Delete only to people you trust as much as a Super User.
Upgrade
To upgrade, install the new com_pxfile.zip through System » Install » Extensions, exactly as in Install the package. Your Options and permissions are kept.