
Expert Joomla guides
Tutorials, upgrade notes and AI workflows for people who build and run Joomla sites.
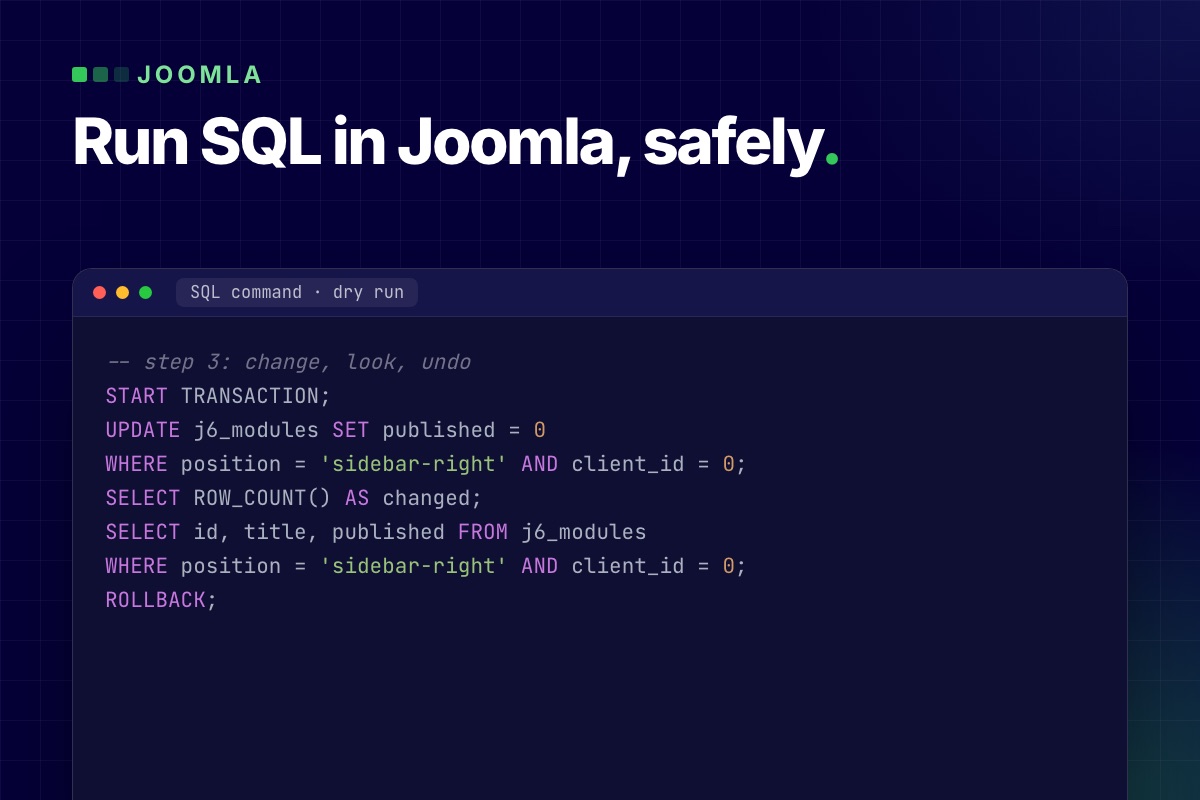

Joomla has no screen for typing SQL, so to run a SQL query in the Joomla admin you need a database tool that lives in the backend. With the free PX Adminer component it is Components → PX Adminer → SQL command. The safe way to use it is a fixed routine: run a SELECT with the same WHERE first, copy the rows you are about to change, try the change inside a transaction that ends in ROLLBACK, and only then run it with COMMIT. Below is that routine with the output from a Joomla 6.2 test site, and four things that can undo a change you wanted or keep one you did not.
Where a SQL statement can be run
Joomla's own database screen (System → Maintenance → Database) only compares your tables with the update scripts and fixes the structure. It has no input for a statement. That leaves three places:
- The host's phpMyAdmin, if you have the hosting login and the host offers it.
- The
mysqlclient over SSH, if you have shell access. - A database tool inside the Joomla administrator. PX Adminer puts Adminer 6 behind the Joomla login. Only Super Users can open it, and it connects with the database settings Joomla already has, so there is no second password to keep.
The routine below works the same in all three. The details about separate runs and "Stop on error" are specific to Adminer.
One thing before the first statement: SQL you copy from a forum often writes table names as #__content. #__ is Joomla's placeholder for the table prefix. A database tool does not replace it, so type the real prefix from $dbprefix in configuration.php. On our test site that is j6_.
The routine: five steps
The example job: unpublish every site module at the position sidebar-right. You could do this under Content → Site Modules; the point here is the order of the steps, which stays the same for any UPDATE. Step 5 has a second form for a DELETE.
1. Run a SELECT with the same WHERE
-- step 1: look at the rows the change will touch
SELECT id, title, published
FROM j6_modules
WHERE position = 'sidebar-right' AND client_id = 0;
On the test site this lists 5 modules, all published. The UPDATE may report at most that number later: MySQL counts the rows it really changed, so a row that already holds the new value is not counted. If the list holds a row you did not expect, fix the WHERE now. client_id = 0 keeps the administrator modules out of it.
2. Copy the rows you are about to change
-- step 2: keep the current rows in a dated table
CREATE TABLE j6_bak_modules_20261111 AS
SELECT * FROM j6_modules
WHERE position = 'sidebar-right' AND client_id = 0;
Adminer answers Query executed OK, 5 rows affected. The copy has the data and no indexes, which is fine for a table you will drop again. Run this statement on its own, never inside the transaction of step 3: CREATE TABLE commits whatever is open. If the table holds personal data (users, for example), the copy holds it too until you drop it. For a change across many tables, take a full dump instead: the Back up database link in PX Adminer downloads the whole database as a dated .sql.gz file.
3. Dry run inside a transaction
Tick Stop on error under the SQL box, then run the whole script in one go:
-- step 3: change, look, undo
START TRANSACTION;
UPDATE j6_modules SET published = 0
WHERE position = 'sidebar-right' AND client_id = 0;
SELECT id, title, published FROM j6_modules
WHERE position = 'sidebar-right' AND client_id = 0;
ROLLBACK;
The UPDATE reports 5 rows affected, the same 5 as in step 1, and the SELECT after it shows them unpublished. After ROLLBACK the table is as it was; we read it again over a separate connection and all five were still published. Visitors never saw the change, because other connections do not see a transaction that has not been committed.
4. Run it for real
-- step 4: the same change, kept
START TRANSACTION;
UPDATE j6_modules SET published = 0
WHERE position = 'sidebar-right' AND client_id = 0;
COMMIT;
Keep Stop on error ticked here too. The reason is in the next section. Then open the site and check the result where a visitor would see it.
5. If it was wrong, put the old values back
-- step 5: restore one column from the copy
UPDATE j6_modules m
JOIN j6_bak_modules_20261111 b ON b.id = m.id
SET m.published = b.published;
On the test site this set the 5 modules back, and a comparison with the state before step 1 showed no difference. List every column your change touched in the SET part. After a DELETE there is no row left to join, so the way back is to insert the copied rows again:
-- step 5 after a DELETE: put the copied rows back
INSERT INTO j6_modules
SELECT * FROM j6_bak_modules_20261111
WHERE id NOT IN (SELECT id FROM j6_modules);
The last line skips rows that still exist; without it one duplicate id stops the whole insert with error 1062. Rows that a foreign key deleted along with yours in other tables are not in the copy. When you are sure the change is good, remove the copy with DROP TABLE j6_bak_modules_20261111;. Leftover bak_ tables are clutter, and every full backup carries them along.
Four things that break the routine
We ran each of these on the same test site.
Every run is its own connection
Two runs of SELECT CONNECTION_ID() gave two different ids (162, then 169). So a transaction cannot span two runs. We ran START TRANSACTION and an UPDATE, then COMMIT as a second run: both reported OK, and the table was unchanged. Adminer rolls back whatever is still open at the end of a run, and the connection closes with it, so the later COMMIT had nothing to commit. Put START TRANSACTION, the changes and the COMMIT or ROLLBACK in one script.
"Stop on error" is off by default
Without it, Adminer keeps going after a failed statement. We put a typo in the second of two updates:
-- test: second statement fails
START TRANSACTION;
UPDATE j6_c12_demo SET state = 0 WHERE title LIKE 'Old%';
UPDATE j6_c12_demo SET nosuchcol = 1;
COMMIT;
With the box unticked, the first update ran, the second failed with error 1054, and COMMIT still ran: half the script was now permanent. With Stop on error ticked, the script stopped at the error and the first update was rolled back at the end of the run. The table was untouched.
ALTER, CREATE, DROP and TRUNCATE commit on the spot
Statements that change structure end the current transaction, a behavior the MySQL manual lists under statements that cause an implicit commit. In our test an UPDATE followed by ALTER TABLE … ADD and then ROLLBACK kept both the update and the new column. A transaction protects INSERT, UPDATE and DELETE. For structure changes and for TRUNCATE, the copy from step 2 or a dump is the only way back.
MyISAM tables ignore ROLLBACK
Joomla's own tables are InnoDB, but older extensions still bring MyISAM tables. On a MyISAM copy of the test table, ROLLBACK reported OK and the rows stayed changed. The only hint was a small Warnings link next to the ROLLBACK line in the result; it opens warning 1196, Some non-transactional changed tables couldn't be rolled back. Check the Engine column in the table list before you rely on a transaction.
An extra guard: sql_safe_updates
For statements that pick rows by id, start the script with SET sql_safe_updates = 1;. MySQL then refuses an UPDATE or DELETE whose WHERE does not use an indexed column (error 1175) instead of changing every row. It lasts for that one run. It is strict: the module example above is refused too, because position has no index.
What PX Adminer Pro automates
Steps 2 and 5 are the ones people skip when they are in a hurry. PX Adminer Pro, the paid add-on, does them on every change:
- A snapshot before each change. For an
UPDATEorDELETEwith aWHERE, Pro copies only the matching rows; in our test the snapshot of theUPDATE … WHERE title LIKE 'Old%'held 1 row. For aDELETEwithoutWHEREit copied the whole table (4 rows). A table you drop is moved into the snapshot instead of deleted (copied, if it has triggers or foreign keys). - Restore from a list. Components → PX Adminer → Snapshots shows each snapshot with the statement that caused it. Restoring the delete snapshot brought the 4 rows back, and Pro first saved the state before the restore as a new snapshot, so the restore itself can be undone.
- Write-protected core tables. By default the users, user group map, user groups, view levels, assets, extensions, schemas and multi-factor authentication tables cannot be changed from PX Adminer; reading them still works. An
UPDATEonj6_userswas refused with "PX Adminer Pro write-protects j6_users". - Read-only mode, for everyone or for chosen user groups. Browsing, export and
SELECTwork; ourUPDATEwas refused with "PX Adminer is in read-only mode, so changes are turned off". Useful when a colleague needs to look something up and should not be able to change anything.
Limits of the automatic part: a table larger than the snapshot limit (100 MB by default) is not copied and the change still runs, with a notice. By default the maintenance task deletes snapshots older than 30 days and all but the newest 100. And a snapshot is taken even for a script you roll back, so the list also holds dry runs. Setup and options are in the PX Adminer Pro documentation.
What SQL does not do on a Joomla site
- It does not clear the cache. If caching is on, a module or menu change may not show until you run System → Maintenance → Clear Cache.
- It skips Joomla's own logic. No plugin events run, so a change made in SQL has no entry in the article's version history and is not picked up by Smart Search until the next index run.
- Tree tables need more than one row changed. Assets, categories, menu items, tags and user groups store their position in
lftandrgtcolumns. Deleting or moving a row by hand leaves the tree inconsistent. Do those changes in the Joomla screens. Categories, menu items and tags have a Rebuild button in their managers that repairs the tree; assets and user groups do not. - It needs a working administrator. If the backend does not load, use SSH or the host's tools; our post on a Joomla site broken after a PHP upgrade covers that case.
- Your database user sets the limits. On shared hosting the user may not be allowed to create tables, and then step 2 fails. Take the dump instead.
Before a bigger job such as a Joomla upgrade, a full backup comes first; step one of our migration runbook describes it. We tested on MySQL 8.0.40 only; MariaDB has transactions and sql_safe_updates as well, but check the behavior on your version before you rely on it.
Get PX Adminer
PX Adminer is free with a free account on this site. Download it from the PX Adminer page, install it from System → Install → Extensions and open it under Components. It needs Track Session Metadata set to Yes under System → Global Configuration → System, which is the Joomla default. If you would rather not run SQL on a live site yourself, our maintenance and support service does it for you.
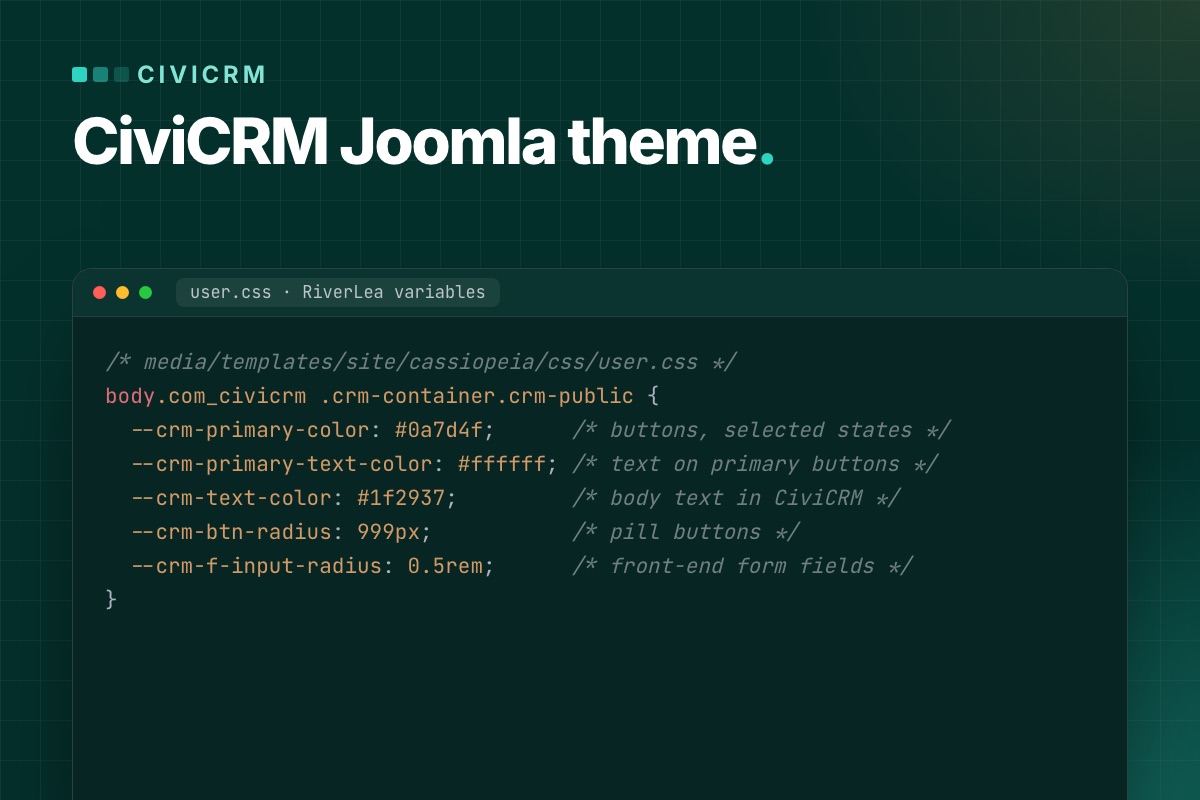
Your Joomla template does not style CiviCRM. CiviCRM pages bring their own theme, RiverLea, and its CSS loads after your template's CSS. For a CiviCRM Joomla theme that matches the rest of your site, keep RiverLea and change its CSS variables from your template's user.css, scoped to body.com_civicrm .crm-container.crm-public. Five variables were enough to give the donate page in our test the site's colors and button shape. Below is the snippet, three things that made our first attempts fail, and what to do when CSS is not enough.
Why your template does not reach CiviCRM pages
A CiviCRM page in Joomla is the CiviCRM component (option=com_civicrm) printing its own Smarty templates inside <div id="crm-container">. Joomla layout overrides in html/com_civicrm/ do nothing, because there is no Joomla layout to override.
The CSS order is the bigger surprise. On our test page (CiviCRM 6.19.2 on Joomla 6.2 with Cassiopeia) the template's user.css was the 5th stylesheet. All 27 stylesheets after it were CiviCRM's: icons, jQuery UI, select2, the RiverLea files and, last, RiverLea's generated river.css. When your rule and CiviCRM's rule have the same specificity, CiviCRM wins.
Step 1: check which CiviCRM theme the front end uses
New CiviCRM 6.x installs enable the RiverLea extension and set the Minetta stream for both front end and back end. A site upgraded from an older CiviCRM may still be on Greenwich, the old theme. Check under Administer → Customize Data and Screens → Display Preferences → Frontend Theme. The options:
- Minetta, Walbrook, Hackney Brook, Thames: the four RiverLea streams. They share the same CSS and differ in their variable values. Everything in this post works with them.
- Greenwich: the CiviCRM 4.x look, without the variables. You would have to override selectors one by one.
- Automatic: resolves to Greenwich in CiviCRM's code unless an extension picks another theme.
- None (Unstyled): leaves out
civicrm.cssandbootstrap.css. Only worth it if you want to write every CiviCRM style yourself.
Pick the stream closest to your site and leave the rest to variables. Dark mode is a separate setting under Administer → Customize Data and Screens → Theme Settings: Frontend Dark Mode Setting defaults to "Always use light mode". Keep that unless your Joomla template has a dark mode too: with "Inherit from browser/OS", visitors whose system runs in dark mode get dark CiviCRM forms inside a light page. If you do switch it on, the colors you set in step 2 apply in both modes, so give the dark mode its own values: inside @media (prefers-color-scheme: dark) with "Inherit from browser/OS", or in place of the light values if you choose "Always use dark mode".
Step 2: override RiverLea variables in your template
RiverLea defines more than 400 custom properties in ext/riverlea/core/css/_variables.css, all on :root. Buttons, fields, tables and alerts read their colors and shapes from them. You set your values on the CiviCRM container instead. This is the file we tested with Cassiopeia, which loads user.css on every page once the file exists:
/* media/templates/site/cassiopeia/css/user.css */
body.com_civicrm .crm-container.crm-public {
  --crm-primary-color: #0a7d4f;      /* buttons, selected states */
  --crm-primary-text-color: #ffffff; /* text on primary buttons */
  --crm-text-color: #1f2937;         /* body text in CiviCRM */
  --crm-btn-radius: 999px;           /* pill buttons */
  --crm-f-input-radius: 0.5rem;      /* front-end form fields */
}
The font needs no line on Minetta: RiverLea already sets --crm-font: inherit on public pages, so CiviCRM text uses your template's font. The other streams name their own font (Thames uses Lato, Walbrook Inter); with those, add --crm-font with your font stack.
Create the file under System → Site Templates → Cassiopeia Details and Files (New File, in media/templates/site/cassiopeia/css) or upload it. With another template, put the same rule in its custom CSS file (in a T4 template, custom.css), or use your template's own color variables as the values: --crm-primary-color: var(--your-brand-color);.

The selector matters for two reasons. body.com_civicrm limits the rule to CiviCRM pages (Cassiopeia and T4 templates both put the component name in the body class), and the extra weight keeps it ahead of RiverLea's own .crm-container.crm-public rule, which sets a few variables on the same element. .crm-public is added by CiviCRM only on public pages (contribution, event, petition and profile pages), so the CiviCRM screens in the Joomla administrator keep their theme.
Three things that failed in our test
1. Setting the variables on :root. The obvious :root { --crm-primary-color: #0a7d4f; } in user.css changed nothing: the button stayed gray (#696969). RiverLea's files declare the same variables on :root later in the page. Setting them on the container works, because an element takes a variable from its closest ancestor that sets it.
2. Setting a base variable and expecting the others to follow. Many RiverLea variables are built from other variables, for example --crm-text-color: var(--crm-text-dark-color). That line is worked out once, on :root. Setting --crm-text-dark-color on the container did not change the text color; setting --crm-text-color did. The same trap catches the radius: --crm-l-radius is the general corner size, but buttons use --crm-btn-radius (a fixed 3px in the core variables) and front-end fields use --crm-f-input-radius. Set the variable the element actually reads.
3. Guessing variable names. To find the right one, open the page with the browser's developer tools, select the element, and look at the rule that sets the property: it shows var(--crm-…). Then search _variables.css for that name to see its default. Note that the variable list can change between CiviCRM versions, so check your overrides after each CiviCRM update.
Another way: edit a stream inside CiviCRM
If the people who run the site should change colors without touching files, RiverLea has an editor. On the same Theme Settings page, click Copy and edit on a stream (the built-in streams are not edited directly), and set Colors, Font Size, Roundness and Custom CSS. Then click Set for Frontend on the copy.
The values are saved in the database and written to river.css, so there is no file to deploy. The trade-offs: they are not in your template's version control, they apply to the back end too if you set the stream for it, and the editor itself warns that custom CSS may need adjusting after CiviCRM updates. Roundness sets --crm-l-radius in river.css, so fields and boxes that are built from it follow, but buttons keep their fixed 3px --crm-btn-radius. We prefer the template file for a site whose design lives in the template, and the stream editor when the client wants to tweak colors themselves.
Custom CSS URL and "Disable CiviCRM css"
Administer → System Settings → Resource URLs has two older options. Custom CSS URL loads your stylesheet after CiviCRM's core CSS and before river.css, on admin screens as well as public pages, so scope it with .crm-public too. Disable CiviCRM css only removes civicrm.css. With a RiverLea stream active, the other core files are still added by RiverLea, so the page is not unstyled. If you want no CiviCRM styling at all, choose the None (Unstyled) theme instead.
When CSS is not enough: Smarty overrides
Some changes need different markup, such as an event list as dated rows or a two-column event page. CiviCRM looks for templates in its Custom Template Directory before its own templates/ folder. Set the directory under Administer → System Settings → Directories. Keeping it inside your Joomla template makes the overrides travel with it:
# Administer → System Settings → Directories → Custom Template Directory
[cms.root]/templates/your_template/civicrm/

# copy the core file to the same path below that folder, then edit the copy
administrator/components/com_civicrm/civicrm/templates/CRM/Event/Page/List.tpl
  → templates/your_template/civicrm/CRM/Event/Page/List.tpl
Two habits keep this manageable:
- Add instead of replacing when you can. A file named
List.extra.tplnext to the path is appended after the core template's output, with no copy of the original to maintain. - Clear the caches after adding an override. CiviCRM compiles Smarty files into
media/civicrm/templates_c/. With the default settings it notices edits to an existing override on the next request; after adding a new override file or changing the directory, run Administer → System Settings → Clear Caches so nothing old is served.
CiviCRM's developer docs describe the template system and themes in more detail. Every copied .tpl is a file you have to compare with the new core version on each CiviCRM update, so keep the list short and note at the top of each copy what you changed. Our CiviCRM update routine includes that check. For changes in behavior rather than markup, hooks in an extension are the better place; see keeping CiviCRM fixes out of core.
The Joomla side of a CiviCRM page
- Keep one H1. CiviCRM prints the page title as an
<h1>inside.crm-title. It is tempting to hide it and show the title elsewhere, but on Cassiopeia that left our page with no visible H1. Hide it only if your template prints its own page heading on CiviCRM pages. - Give each public CiviCRM page a menu item. The menu item decides which modules, template style and breadcrumbs the page gets, and gives it a clean URL. Our post on CiviCRM pages that return 404 after a Joomla upgrade covers the menu item types.
- Use a template style for wide forms. If a sidebar squeezes a long contribution form, assign a template style without the sidebar to those menu items.
Test every step, not only the first page
Contribution and event pages are several pages in a row, and each step has its own markup. After a change, clear the CiviCRM cache, reload without the browser cache, and walk through:
- a contribution page: form, confirmation and thank-you step, with and without "Other amount";
- a membership page, if you sell memberships: the plan choice is a different block from a donation amount;
- an event: the list, the information page, registration, confirmation and thank-you;
- a petition and a profile form;
- the same pages at phone width, and one form submitted with a missing required field, to see the error styles.
Or start from a template that already does this
PX Unity is our Joomla CiviCRM template for nonprofits and councils, built the way this post describes. It maps about 50 RiverLea variables to the template's own colors, fonts and spacing, all scoped to public CiviCRM pages. Four Smarty overrides change the event list, the event page, membership plan cards and personal campaign pages, and summary cards next to the forms show live CiviCRM numbers. The launch post shows the pages, and the PX Unity documentation lists what is covered. Already running CiviCRM on an older Joomla site? Our CiviCRM Joomla 6 upgrade service moves the site and its CiviCRM data first.
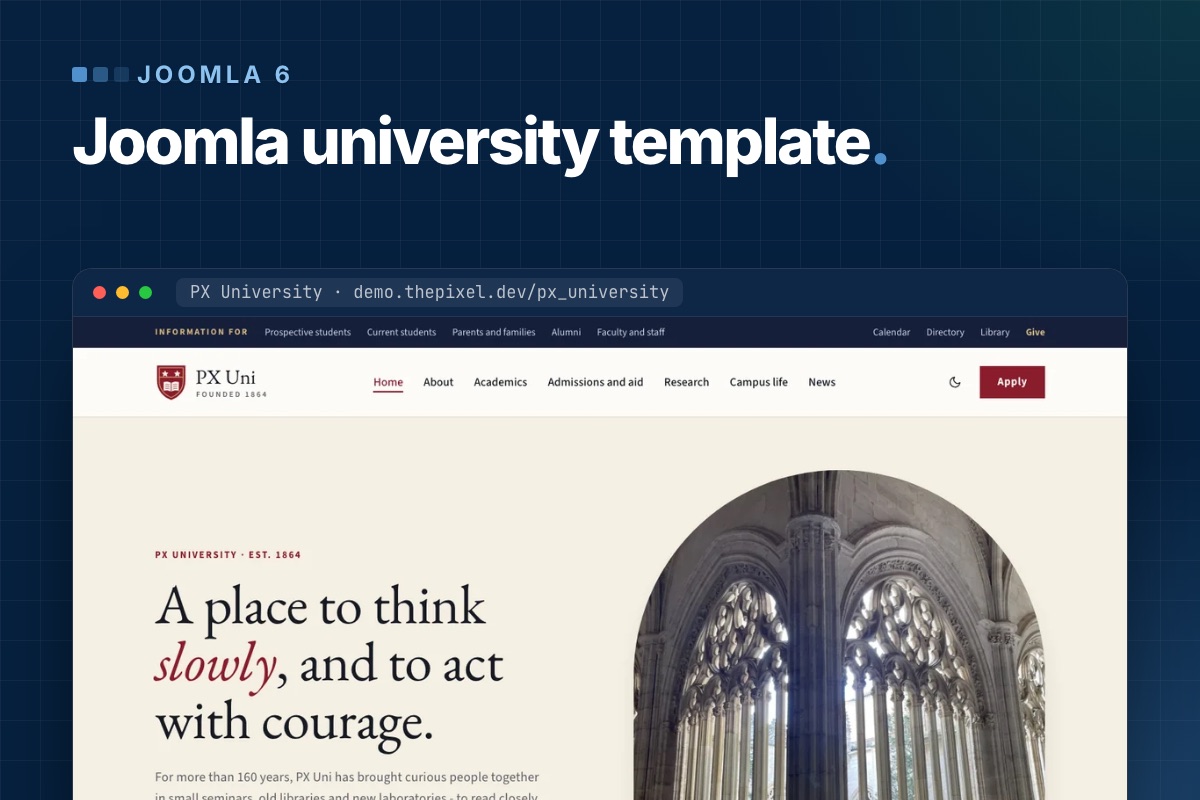
A Joomla university template gives you the look. What takes the time is the content behind it: programs, schools, admissions, events and news, kept up by people in different offices. This guide shows how the PX University quickstart (part of Pro, live demo) models that content with Joomla 6 core features: categories, nested tags, custom fields, list modules and Smart Search. There is no events or course component to learn. The page sections around the content are blocks of the bundled PX Content module, and the template runs on the T4 Framework. Then it shows how you replace the demo college with a real one.
What a university site has to do
Most visitors come with one of five questions. Each one maps to a page type, and each page type maps to something Joomla already has:
| Visitor asks | Page | Built with |
|---|---|---|
| What can I study? | Program pages, a program list, a finder | Articles with custom fields, tags, Smart Search |
| Which faculty is that? | School pages | A landing page per school plus a tag |
| How do I apply, what does it cost? | Admissions | Content blocks: steps, fees, FAQ |
| What is on? | Events | Articles with a date field |
| What is new? | News | A category with subcategories |
The template uses British spelling for its content names (Programmes, "Find a programme"). We keep those names where they are what you see in the administrator.
The content model in the quickstart
This is what the installer's SQL creates. Counts are the demo content you will replace:
# PX University 1.0.0 quickstart: content model
Categories
  News                 17 articles in 4 subcategories:
                       College news, Research, Arts and culture, Admissions
  Events                6 articles   fields: Event date, Time, Venue, Admission
  Programmes           20 articles   fields: Level, Duration, Starts,
                                             Entry requirements, Fees
  Pages                15 articles   page shells: About, Admissions, 6 schools ...
  Legal                 3 articles

Tags (nested)
  Schools              Humanities, Natural Sciences, Engineering,
                       Law and Policy, Music and Arts, Business
  Levels of study      Undergraduate, Graduate, Doctoral
  Topics               19 tags for news (Research, Campus, Alumni ...)

Template styles        Home, Inner (default), Full Width, Landing
The custom fields are assigned to their category, so the event fields only show on the edit form of an article in Events, and the program fields only in Programmes. You find them under Content → Fields.
Programs: one article each, five fields
A program is an article in the Programmes category with two tags: its school and its level. The five fields are plain text, so "3 years" or "4 years with a beginners' year" both work. The level is entered twice on purpose: the Level field is what the page shows ("Undergraduate (BA)"), the level tag is what puts the program on a level page.
The template decides the layout from the fields, not from the category. An article whose Level field has a value gets the program layout:
- a sticky "Key facts" panel with the five fields;
- the article's Link A as the apply button and Link B as a second button (the demo uses it for the open day), both from the article's Images and Links tab;
- an "On this page" list built from the
<h2 id="...">headings in the text, so give your headings an id; - up to three related programs: other articles in the same category that share the school tag, in title order.
The three level pages in the Academics menu (Undergraduate, Graduate, Doctoral) are tag menu items, and the full list is a category menu item for Programmes. Tag a new program and it shows up on its level page, in the full list and in the cards on its school page, without touching a module. The cards module shows up to 12 programs per school; raise the count in the module if a school has more.
Schools: a landing page plus a tag
A school is two things with the same alias: a tag under Schools, and a menu item of type Single Article with the style PX University - Landing. The program layout looks for a menu item whose alias matches the school tag's alias and links the program to it. If there is none, it links to the tag page instead. So when you rename "Humanities" to your own faculty, change the tag and the menu item alias together. Keep the parent tag titled Schools: the layout finds the school by that title, and without it the school link and the related programs disappear.
The school page itself is a stack of modules assigned to that menu item. The Humanities page has eight: a hero in hero, then numbers, a heading, the program cards, a quote, a heading, the news list and a call to action in page-top. The program cards are a core Articles - Category module: category Programmes, filtered by the school's tag, layout programme-cards, ordered by title. The news list works the same way with a topic tag (Humanities uses Library).
A seventh school therefore takes five things: a tag under Schools, an empty article in Pages as the page shell, a Single Article menu item with the Landing style and the tag's alias, copies of the eight modules with their tag filters and texts changed and assigned to the new menu item, and a card in the schools block on Home and on Academics. Those cards are kept by hand in the block settings.
The program finder runs on Smart Search
The search box on the home page and on Academics is part of a PX Content block (Features Intro, the style with arch cards). It is a plain form that sends the query to Joomla's Smart Search. The level dropdown is not a filter: the script adds the chosen word, for example "Undergraduate", to the search text. The levels are a comma-separated list in the block settings, next to the label, the placeholder and the page the form submits to.
Two things follow from that. First, a program is found by its title and text. Joomla's content plugin for Smart Search does not index an article's tags, and a custom field is only indexed when its Search Index option is set, which it is not for the five program fields. Smart Search also wants every word of the query, so a search for "history undergraduate" only finds the History program if the word "undergraduate" is in its text. Write the level into the first paragraph of every program.
Second, Smart Search only finds what is in its index. The installer's SQL ships with an empty index, so build it once after installing and after any bulk import:
# in the site root; builds the Smart Search index
php cli/joomla.php finder:index
After that, the Smart Search content plugin keeps the index current when you save an article. Check the result under Components → Smart Search → Index.
Events: articles with a date field
An event is an article in Events. The Event date field is a calendar field with time; Time, Venue and Admission are text. An article with an event date gets the event layout: a date block beside the title, an "Event details" panel, Link A as the booking button, add-to-calendar links and up to three other events from the same category, earliest first.
Event lists (home, Visit, the sidebar) are Articles - Category modules with the events layout. Know how the order works before you rely on it:
- The module picks its articles first (on the home page: four, by article ordering). The layout then sorts those by event date. An event without a date falls back to its publish date.
- Nothing hides an event automatically once it is over. Setting Finish Publishing on the article takes it out of the module lists, but in 1.0.0 the "more events" list on an event page does not check that date and would link to a page that is gone. Until that is fixed, unpublish past events.
The six demo events are dated October and November 2026, so replace or unpublish them first.
News and who edits what
News is one category with four subcategories, each with its own Category Blog menu item, plus topic tags. Rename the subcategories to match your communications team: a research office and an admissions office usually want their own.
That split is also how you hand out editing rights, with three things to set up:
- A group per office. The default groups are in the quickstart (an Author creates articles and edits their own, an Editor edits any article, a Publisher can also publish), but their rights apply to the whole site. To keep the admissions office to the Admissions news category and Events, create a group for it under Registered and allow Create, Edit and Edit State on the Permissions tab of those two categories only.
- A way to add articles. Author, Editor and Publisher cannot log in to the administrator, and the quickstart menu has no Create Article item. Add one for the office, or give it administrator access.
- Who may edit page sections. The heroes, statistics, fees and FAQ are PX Content modules, and editing them on the page is open to anyone who may edit modules. With the default permissions that includes Editors and Publishers. If only the web team should change those, deny Edit for the other groups under Content → Site Modules → Options → Permissions.
Build order for a real site
- Install the quickstart on staging and remove the installation folder. It needs Joomla 6 hosting: PHP 8.3+, MySQL 8.0.13+ or MariaDB 10.4+.
- Logo, name, two colors. System → Site Template Styles, open a style, then Site Settings and Theme Color. The four styles share the same site and color profiles, so one change covers all of them.
- Schools. Rename the six tags, menu items, page shells, module titles and the cards in the schools block; add or unpublish schools.
- Programs. Replace the 20 demo articles, tag each with school and level, fill the five fields and name the level in the text.
- Admissions. Rewrite the steps, fee cards and FAQ blocks. The demo fees are invented.
- Events and news. Replace the demo articles and unpublish events as they pass.
- Run the indexer again (add
purgeto the command if you removed content outside the administrator) and test the finder with a subject and a level. - Permissions. Create the office groups and accounts, set category and module permissions, then go live.
Screenshots of the template settings, styles, module positions and blocks are in the PX University documentation.
Limits you should know
- Joomla 6 and PHP 8.3+ only. On Joomla 5, read Joomla 5 vs Joomla 6 and plan the upgrade first.
- Events are articles, not a calendar. No recurring events, no registration or ticketing. Link A can point to your booking system.
- Program data is free text. Fees and durations are not structured, so you cannot sort or filter by them.
- The finder's level is a search word, not a filter. Smart Search matches word stems, so test each level with your own program texts.
- What we checked. Everything above was read from the 1.0.0 quickstart source and its installer SQL. We did not run a fresh install for this post.
Get PX University
PX University is part of Pro ($99 for the first year, every template and extension, unlimited sites). See the design on the Joomla university template page and its live demo. Short on time? With Pro + Launch we install the template and demo and set your logo, colors and fonts.
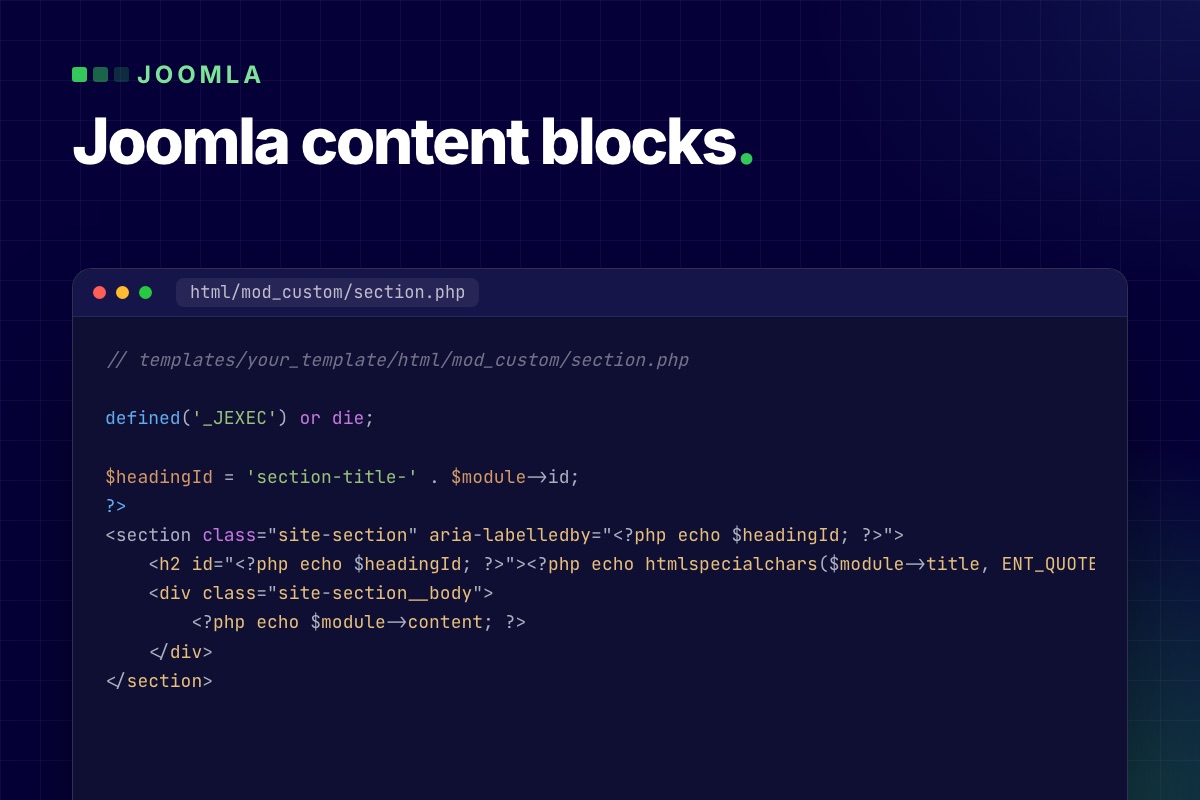
You can build a landing page from Joomla content blocks without a page builder. Joomla 6 ships three ways to do it, and a free block module adds a fourth where the editor changes the text on the page itself. We ran three of them on a Joomla 6.2 site with Cassiopeia and read the fourth, the Articles module, from the core source. Below is what each one takes, where it breaks and what it loads.
The four ways at a glance
| Way | The editor changes text in | The markup lives in | Use it for |
|---|---|---|---|
| Custom module + layout override | The module form | A template file | A few fixed sections with simple text |
{loadmoduleid} in an article | The module form | The module or its override | A section in the middle of an article |
| Articles + custom fields + a list module | The article form | A module layout override | Repeating items: team, services, FAQ |
| Block module (PX Content) | The page itself | A block template | Whole landing pages a client keeps editing |
A section is a layout plus the content in it. The four ways differ in how far apart they keep the two. The further apart, the less an editor can break.
A Custom module with a layout override
Cassiopeia already does this. Its banner is a Custom module with the layout banner, a short file in templates/cassiopeia/html/mod_custom/banner.php that wraps whatever the editor typed in the overlay markup. You can use the same pattern for your own sections. This is the override we tested. Save it with <?php on its own first line, above the comment:
// templates/your_template/html/mod_custom/section.php

defined('_JEXEC') or die;

$headingId = 'section-title-' . $module->id;
?>
<section class="site-section" aria-labelledby="<?php echo $headingId; ?>">
    <h2 id="<?php echo $headingId; ?>"><?php echo htmlspecialchars($module->title, ENT_QUOTES, 'UTF-8'); ?></h2>
    <div class="site-section__body">
        <?php echo $module->content; ?>
    </div>
</section>
Then create the module under Content → Site Modules → New → Custom and set three things:
- Title: hide it in the module form. The layout prints it as the section heading.
- Advanced → Layout: pick section. Joomla lists the files in the template's
html/mod_custom/folder, except those with an underscore in the name, somy_section.phpwould not show up. - Advanced → Module Style: none, so the template's card wrapper does not go around your section.
On our test site the module in position top-a came out as one clean <section> with the heading and the paragraph, nothing else. The editor types a paragraph. The section, the heading level and the classes stay in the file. Put the override in your own template or a child template, not in Cassiopeia itself.
Where it breaks
- Anything with structure. A row of three cards is still HTML in the editor. The first time a client deletes a card or pastes from Word, the wrapper divs and their classes go with it.
- Inline CSS and scripts. Module text goes through Joomla's text filters (Global Configuration → Text Filters). On a default install only Super Users are set to No Filtering. Managers, Administrators, Editors and the other editing groups get the Default Forbidden List, which removes
<style>,<script>,<iframe>and<link>among others when they save. A section that a Super User built with a<style>block loses its styling the day an Administrator edits it. Keep the CSS in the template. - Finding the module. The editor has to know which of 30 modules holds the headline. Joomla's Frontend Editing (Global Configuration → Site, set to Modules by default) helps: it adds an edit link to each module in a template position, for users who have the Frontend Editing permission on modules. A module loaded into an article, as in the next section, gets no such link.
A module inside an article with {loadmoduleid}
The Content - Load Modules plugin puts a module in the middle of an article. It understands three tags (the # lines are notes, not part of the tag):
# every module published in position "faq"
{loadposition faq}

# one module by type and title
{loadmodule mod_custom,Opening hours}

# one module by its ID
{loadmoduleid 149}
Use the ID. A title changes the day somebody renames the module, and the tag then loads nothing. The module has to be published, assigned to the page under Menu Assignment and visible to the visitor's access level, but it does not need a position.
We loaded the section module from the previous step into an article and it rendered, with one flaw. The editor wraps the tag in a paragraph, so the page source was <p><section>…</section></p>. A <section> is not allowed inside a <p>, so the browser closes the paragraph early and you get an empty paragraph above and below the section. Switch the editor to its code view and change that one wrapper from <p> to <div>.
Tags also work inside a module. A Custom module has a Prepare Content option, which runs content plugins on the module text, so a module can load another module or use any other content plugin tag.
Articles and custom fields behind a list module
Team members, services, FAQ entries: when a section repeats the same item, make each item an article and let a module print the list. The editor then works in the article form, which is the part of Joomla they already know, and permissions follow the category.
- One category per section type, for example Team.
- Custom fields for that category under Content → Fields: role, photo, profile link. Assign the fields to the category so they only show up there.
- An Articles module (the
mod_articlesmodule that Joomla 6 ships) filtered to the category, with your own layout inhtml/mod_articles/that prints the cards.
One switch decides whether this works. The Articles module has an option Trigger Plugin Events, and it is off by default. The field values reach your layout as $item->jcfields, and the Fields plugin only fills that when the module triggers the content events. Leave the option off and your override gets articles with no fields. We read this from the module's helper and the Fields plugin in Joomla 6.2; it is the first thing to check when a card comes out empty.
For rows inside one article, such as the questions of one FAQ, the core Subform field type gives the editor repeatable rows. The trade-off of this whole approach: a developer writes one override per section type, and the page is still a stack of modules.
A block module: fields in, section out
A block module takes the idea of the layout override to the end. The layout is a block template that the editor never sees. The content is a set of fields: a heading, an intro, a list of rows. PX Content is our free module built this way. One module shows one block, you pick the block and its style from a library (12 blocks in 20 styles in version 1.0.1), and each block opens with sample content.
The part a client notices is the editing. A logged-in user with edit permission on that module clicks Edit content on the page, double-clicks a heading or a paragraph and types. The editor cannot break the layout markup: only the fields the block declares can be saved, and rich text goes through Joomla's input filter. The release post covers the block list, the save rules and how a template adds its own blocks.
What it loads
We put one FAQ block (Accordion, four questions) on the Cassiopeia test site, with no ThePixel template involved, and looked at the page source:
| Page | Block CSS | Block JavaScript |
|---|---|---|
| Cassiopeia + one Accordion block | 2 files, 10.7 KB (3.1 KB gzipped) | None. The FAQ is native <details> |
| PX Base demo home, 12 blocks of 8 types | 18 files, 81.8 KB (21.3 KB gzipped) | 3 files, 159.7 KB (45.1 KB gzipped) |
Each block type loads its stylesheet once, however many blocks of that type are on the page, plus one shared file of 7.9 KB. A template can add its own stylesheet per block type, and PX Base does. The 18 files are 8 from the module, 8 from the template, the shared file and Swiper's stylesheet (18.5 KB). Almost all of the JavaScript on the demo home is the Swiper slider (154.6 KB, 43.1 KB gzipped), which is loaded only when a Testimonials block is on the page. Leave that block out and the page would carry 3.5 KB of block script, and Swiper's stylesheet would go too. The cost on that page is the number of requests: 18 CSS files, most of them small. Sizes are the files on disk; the gzipped figure is gzip at its default level.
What you give up
- A fixed set of blocks. A layout that is not in the library means a new block: a folder with a config file and a PHP and XML pair per style, not a drag in a canvas.
- One block per module. A page is a stack of modules in template positions, so the template needs enough positions, and the page order is the module order.
- No free placement. Editors change content and a few settings such as spacing and alignment. They cannot move a column.
When a page builder is the right tool
Use a page builder when people who do not write code have to invent new layouts: a marketing team that ships a different campaign page every week, or a site where every page is a one-off. None of the four ways above gives a non-developer a blank canvas.
We did not install or measure any page builder for this post, so here is what to check instead of a verdict:
- Where is a page stored? If the layout and the text sit in the builder's own table or format, find out what is left of the content when the builder is uninstalled.
- What loads on pages that do not use it? Open a plain article in the browser's network tab and look for the builder's CSS and JavaScript.
- Does it run on your Joomla version without the backward compatibility plugin, and how fast did it support the last major release?
- Who can edit? Check that it follows Joomla's permissions, so an Author cannot change the home page.
Which one to pick
- One or two static sections on a site you maintain yourself: a Custom module with a layout override.
- A box in the middle of a long article:
{loadmoduleid}, wrapped in a<div>. - Lists that grow (team, services, case studies): articles with custom fields and an Articles module.
- A landing page of standard sections that a client edits: a block module.
- New layouts every week from non-developers: a page builder, after the four checks above.
They mix well. Our own free template works that way: PX Base builds its home page from blocks and leaves the blog to plain Joomla articles.
Limits of this test
- What we ran. The Custom module layout override,
{loadmoduleid}and one PX Content block on Joomla 6.2.0 with Cassiopeia; the 12-block page on a local PX Base demo (Joomla 6.1.1, PX Content 1.0.0, same asset loading as 1.0.1). - What we read from source. The text filter list, the Frontend Editing default and the whole Articles module approach, including its plugin events. We did not build that one.
- Not measured. Load time. File sizes say what a block adds, not how fast your page is.
- Older Joomla. PX Content runs on Joomla 4.4 and 5.x too, but we only tested the core steps on 6.2.
Get PX Content
PX Content is free with a ThePixel.dev account and works with any template. Download it from the PX Content page and follow the documentation for the first block. Need a block that is not in the library, or a set designed for your brand? We build them as part of template customization.
- Details
- Category: Performance & optimization
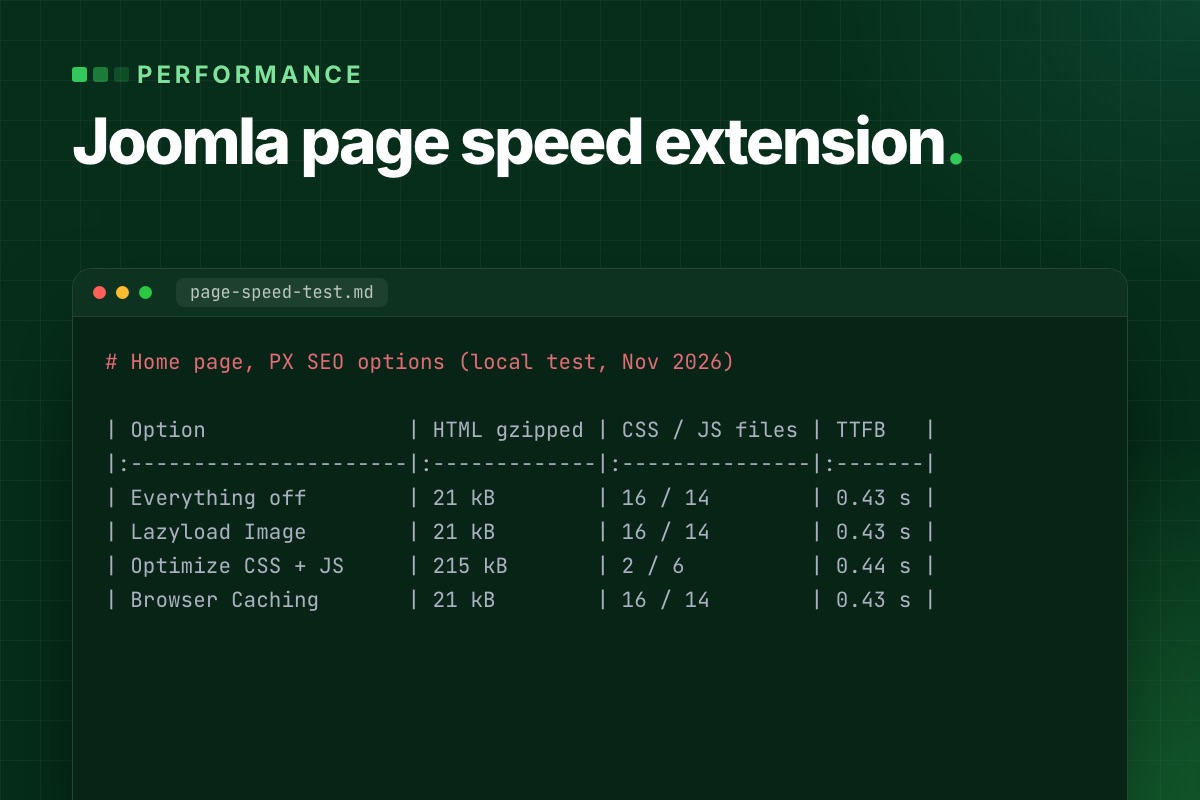
A Joomla page speed extension changes what the browser receives: it minifies CSS and JavaScript, defers stylesheets, lazy-loads images and sets cache headers. It cannot make Joomla build the page faster, shrink an image that is too big, or remove a third-party script. Which of those is your problem decides whether an extension helps at all.
We tested the options of one such extension, PX SEO, one at a time on a real page and measured what changed. The numbers are below, including two results we did not expect. PX SEO is not released yet, so read this as a test of what these options do, not as a download recommendation.
Which problem do you have?
Split the delay in two before you install anything. First, how long does Joomla take to answer? Time to first byte (TTFB) shows it:
# terminal
curl -o /dev/null -s -w "TTFB %{time_starttransfer}s  total %{time_total}s\n" https://example.com/
A high TTFB is server work (around 0.8 s or more on a normal page is worth chasing; the number includes DNS and TLS time, so run it twice): queries, plugins that run on every request, a missing page cache, a slow host. No front-end extension touches it. Start with our Joomla performance guide and the FAQ on which cache setting to use.
If TTFB is fine and the page still feels slow, the weight is in the front end: many CSS and JS files, images without sizes, a hero image that loads late. That is the part an extension can work on.
What an extension can change
- CSS and JavaScript files: minify them and put them in the page, so there are fewer requests.
- Render-blocking CSS: load a stylesheet after the first paint instead of before it.
- Images: add
widthandheightso the layout does not jump, and lazy-load the ones below the fold. - Response headers: tell the browser it may keep a page.
What we measured
We used the home page of our own site on a local Joomla 6.2 install (T4 template, Apache, no page cache), and switched PX SEO's options on one at a time. Same page, same server, configuration restored afterwards. This is one page and one run per option, with no front-end timing, so your numbers will differ.
| PX SEO option | HTML (raw / gzipped) | CSS files / JS files | Images with width and height | Lazy-loaded images | TTFB (median of 5) |
|---|---|---|---|---|---|
| Everything off | 98 kB / 21 kB | 16 / 14 | 24 of 50 | 35 of 50 | 0.43 s |
| Lazyload Image | 99 kB / 21 kB | 16 / 14 | 47 of 50 | 45 of 50 | 0.43 s |
| Optimize CSS + Optimize JS | 1,192 kB / 215 kB | 2 / 6 | 24 of 50 | 35 of 50 | 0.44 s |
| Browser Caching | 98 kB / 21 kB | 16 / 14 | 24 of 50 | 35 of 50 | 0.43 s |
Gzipped sizes are the saved HTML compressed with gzip -9, not what a particular server sends.
Lazy-loading and image sizes: attributes added, one catch
The plugin reads each local image, adds its real width and height, and sets loading="lazy". On our page the number of images with dimensions went from 24 to 47 of 50, and lazy-loaded ones from 35 to 45 (our template already lazy-loaded 35). With dimensions the browser can reserve the space before an image arrives. We counted attributes; we did not measure layout shift or load time.
The catch is the first image on the page. A lazy-loaded hero is fetched later than it should be. PX SEO has an ignore list for exactly this: any image whose path contains a listed string, or that already has fetchpriority="high", stays eager and gets fetchpriority="high". Put your hero image there before you switch lazy-loading on, and write the path in lowercase.
Minify and inline: fewer requests, a much bigger page
With CSS and JS optimization on, our 16 stylesheets became 2 and the 14 script files became 6. Each file is minified and written into the HTML. That is the trade-off: the HTML grew from 98 kB to 1,192 kB, or from 21 kB to 215 kB gzipped. Every page now carries the full CSS again, and the browser can no longer keep it from one page to the next.
That can still be a good deal for a site where most visits are one page long. For a site where people click through, it may not be. Test both on your own pages. Things to know about how it works:
- It only touches files on your own domain. External files are left as they are (our page had one, a Google Fonts stylesheet). It also finds stylesheets by pattern, and one local stylesheet on our page was skipped because its
relcomes before itshref. - Scripts that already have
async,deferortype="module"are skipped. Scripts that only getdeferlater, as some of our template's did, are still inlined and then run in place without it. Test the page after switching JS optimization on; the plugin also has an exclude list for script files. - A stylesheet that uses
@importis deferred, not inlined. - It minifies each file; it does not merge them.
Browser caching: read the headers, not the label
Switching on Browser Caching removed Joomla's Cache-Control: no-store, no-cache and Pragma: no-cache headers and left an Expires header 15 minutes ahead. There was no Cache-Control or max-age, and you cannot change the 15 minutes from the plugin. It applies to the HTML page, so use it only on public, mostly static pages: a cached page with a form or a logged-in view is the wrong thing to keep. For long cache lifetimes on static files, set them in your web server or CDN.
Deferring CSS
The defer option takes a list of strings. Any stylesheet whose URL contains one of them is loaded with media="print" and switched to all when it has loaded, so it no longer blocks the first paint. There is no <noscript> fallback, so with JavaScript off the stylesheet never applies. Use it for CSS the first screen does not need, such as a font stylesheet or a slider. If you defer your main template CSS, the page flashes unstyled.
What an extension cannot fix
- Server time. TTFB was 0.43 to 0.44 s in all four runs, within noise. Nothing in the table moved it.
- Image weight. The plugin adds dimensions, it does not resize or convert anything. A 3 MB photo is still 3 MB. Resize before you upload, and serve
srcsetwhere the template supports it. - Third-party scripts. Chat widgets, tag managers and embeds come from other domains and are left alone.
- A heavy template. Sixteen stylesheets minified are still sixteen stylesheets of rules the page may not use.
A safe order to switch things on
- Measure first: TTFB with the command above, and the PageSpeed Insights report for your slowest template page. Write the numbers down.
- Fix server time first if TTFB is high.
- Add the hero image to the lazy-load ignore list, then switch on lazy-loading. Reload and check the layout.
- Defer one non-critical stylesheet and look at the page with the cache cleared.
- Switch on CSS optimization, then JS optimization, one at a time. After each, test menus, forms, search and login.
- Measure again. If a step made things worse, switch that option off; each can be turned off on its own. Leave Browser Caching for public pages only.
What to check in any speed extension
- Does it inline CSS or JS, and what does that do to your HTML size?
- Which headers does it change, and for how long?
- Can you exclude the hero image, a script or a stylesheet?
- Can you switch each feature off on its own?
PX SEO and what to do now
PX SEO is the plugin and component we use on ThePixel.dev. It is not released yet, so there is nothing to download today; the options above are what it does. The PX SEO page shows where it stands.
If your site is slow now and you would rather have someone measure it and fix the real cause, whether that is the server, the template or the images, that is our SEO and speed service.
- Details
- Category: News & updates
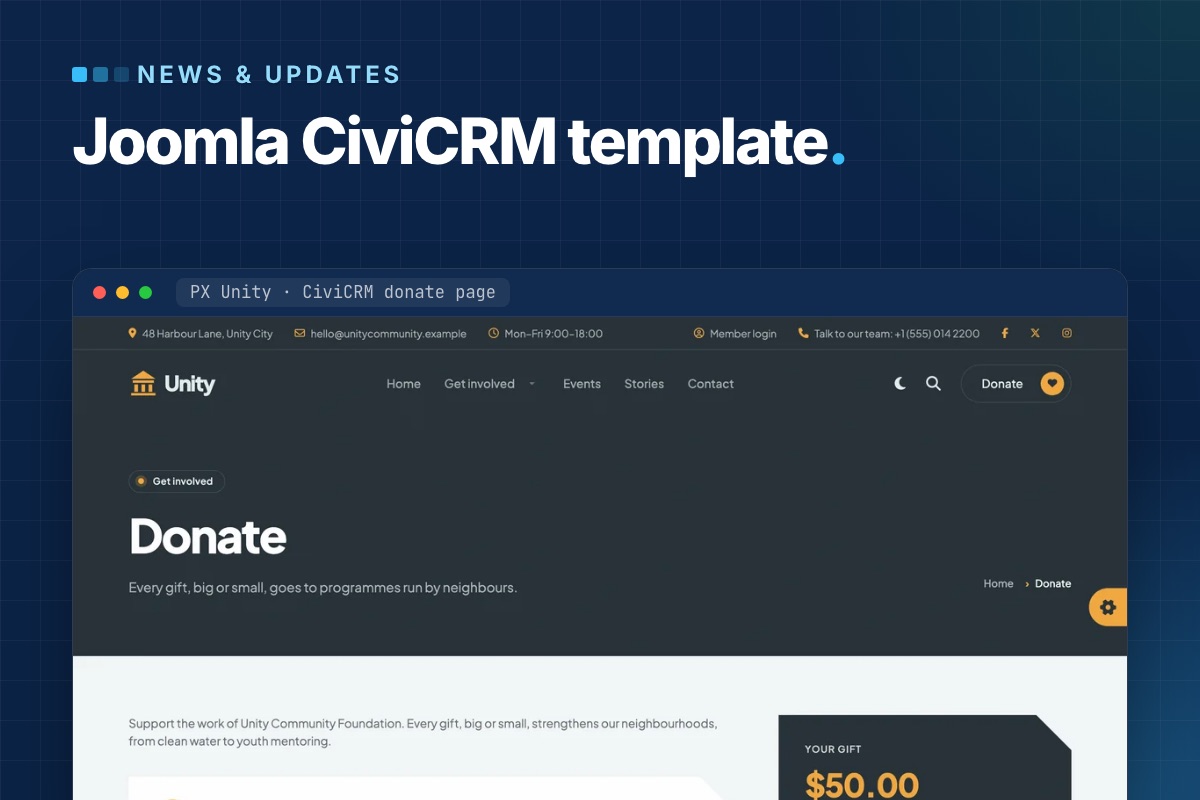
PX Unity is out: a Joomla CiviCRM template for nonprofits, councils and city halls. It styles CiviCRM's donation, membership, event and petition pages like the rest of the site, and its home page blocks read live numbers from CiviCRM – amount raised, places left, membership prices, signatures. The quickstart installs Joomla, CiviCRM, the template and the demo content in one go.
Why a template for CiviCRM sites
Out of the box, CiviCRM's forms come with CiviCRM's own styles. On a typical Joomla template the donate page ends up looking like a different website from the pages around it, and the numbers on the home page – amount raised, places left – are typed in by hand and go stale.
PX Unity handles both: the CiviCRM pages get the site's design, and the blocks that show CiviCRM numbers read them from CiviCRM itself.
CiviCRM pages in the site's design
PX Unity styles the CiviCRM pages visitors see: contribution pages (donations and memberships), event lists, event information and registration, petitions and profiles. They get the same page header and breadcrumbs as every other page, rounded fields, a summary card next to the form and buttons in your brand color.
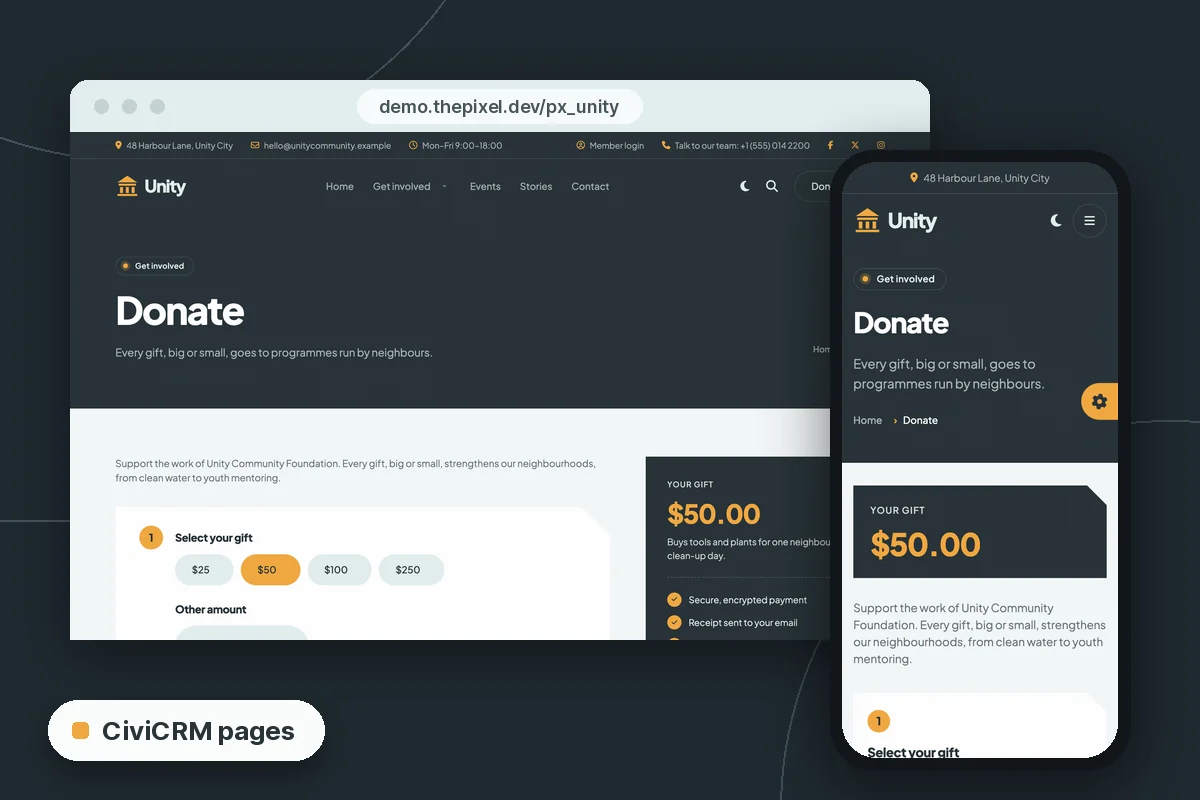
Try it on the demo donate page or the demo events list.
Home page blocks with live CiviCRM numbers
Four PX Content blocks (plus the donation hero) take a CiviCRM ID in their settings and read the rest from CiviCRM. You find the IDs in CiviCRM itself, for example the id= in a contribution page link under Contributions » Manage Contribution Pages.
| Block | Setting | Shows |
|---|---|---|
| Hero, style 2 | Contribution page ID | The donation amounts of that page; the form opens it |
| Campaign | Campaign ID, contribution page ID (optional) | Amount raised, goal, donors and days left |
| Events | Number of upcoming events, or event IDs | Date, place, places left; a waitlist button when an event is full |
| Pricing | Membership type IDs, signup contribution page ID | Plan names and prices |
| Petition | Petition (survey) ID | Signatures and goal; the form signs the petition |
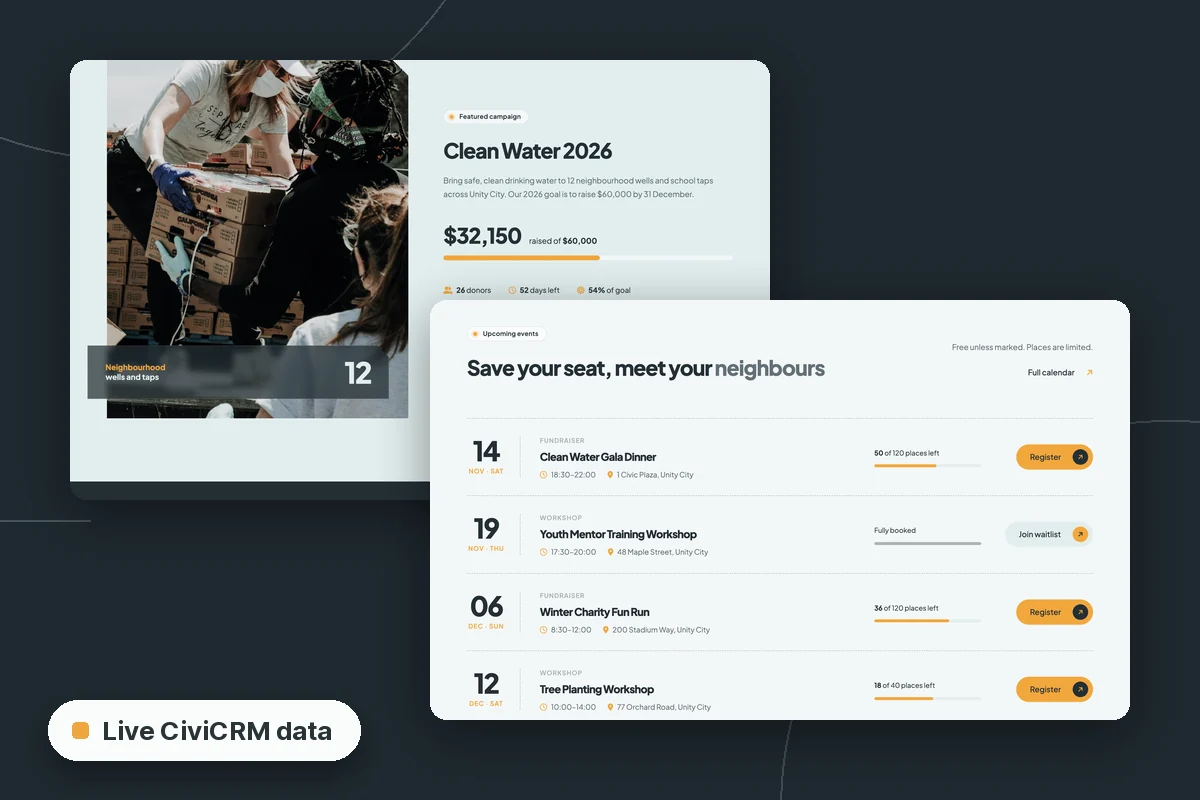
Numbers are cached for a short time, so a new donation can take a few minutes to show. Without CiviCRM – or with an empty or unknown ID – each block shows the texts typed in its other fields, so the template works on sites that don't run CiviCRM at all.
Two home pages: city hall and community foundation
The demo is Unity City, with two home pages built from the same blocks, colors and fonts:
- City hall – services, alerts, departments and public documents first. The documents list (a Category Blog layout) shows budgets, plans and council minutes with a date and a download button from the article's Link A.
- Community foundation – donations, volunteering, events and membership, with its own menu, top bar and a "Donate" header button.
Every section is a PX Content block – 18 blocks in 26 styles made for PX Unity. Editors click Edit content, double-click a heading or paragraph and change it in place. Light and dark mode come with a toggle in the header; in the template settings you choose light, dark, the visitor's system setting, or no toggle.
The quickstart sets up CiviCRM for you
The quickstart is a full Joomla install with CiviCRM 6.19.2, the template, its extensions and the demo contacts, contribution pages, events, membership types and a petition. A few details that save time on a CiviCRM install:
- CiviCRM reads its database, paths, site address and keys from Joomla's
configuration.php. There is nothing to edit after the install, and the site keeps working when you move it to another folder or domain. - The CiviCRM keys are made from the Joomla secret, which is unique to your site.
- On your first visit to the administrator, the site finishes the CiviCRM set-up (menus, caches, database triggers) and turns that step off.
- Demo contacts use example.org addresses and the demo mailings are not queued, so the new site sends nothing. For real mailings and reminders, set up the CiviCRM scheduled jobs – see CiviCRM scheduled jobs not running on Joomla.
Requirements: PHP 8.1.2+ for Joomla 5.4 or PHP 8.3+ for Joomla 6, MySQL 8.0.13+ or MariaDB 10.4+, and about 350 MB of disk space (CiviCRM is most of it).
Joomla 5.4 or Joomla 6?
There are two quickstarts with the same template, CiviCRM version and demo content: Joomla 5.4.10 and Joomla 6.2.0. The PX Unity page marks the Joomla 5.4 one as recommended, and the Joomla 6 one needs PHP 8.3+. As of November 2026, CiviCRM's Joomla package is still labeled "Joomla 5+" – what that means for a Joomla 6 site is tracked in Is CiviCRM compatible with Joomla 6?, updated with each CiviCRM release.
Already running CiviCRM on Joomla?
Install the T4 Framework plugin, the PX Unity template and the PX Content module, in that order, through System » Install » Extensions. Your CiviCRM pages pick up the styles; the home page blocks need the IDs of your own campaigns, events and membership types. A manual install doesn't bring the demo pages and modules, so you build the pages from the blocks – the PX Unity documentation walks through it.
If the site is still on Joomla 3 or 4, move it first: Upgrade a Joomla site with CiviCRM to Joomla 6 covers the route, and the CiviCRM on Joomla 6 guide collects the rest.
Get PX Unity
PX Unity is part of the Pro membership ($99/year), with every ThePixel.dev template and extension. Open the PX Unity page for the downloads, and click through the live demo first. With Pro + Launch ($199/year) our developers install it with your logo, colors and fonts, plus two hours of changes, in two business days.
Moving a CiviCRM site to Joomla 6 – and want the new design too? Tell us your Joomla and CiviCRM versions. We reply with a plan and a fixed quote – no CiviCRM core edits.
CiviCRM Joomla 6 upgrade →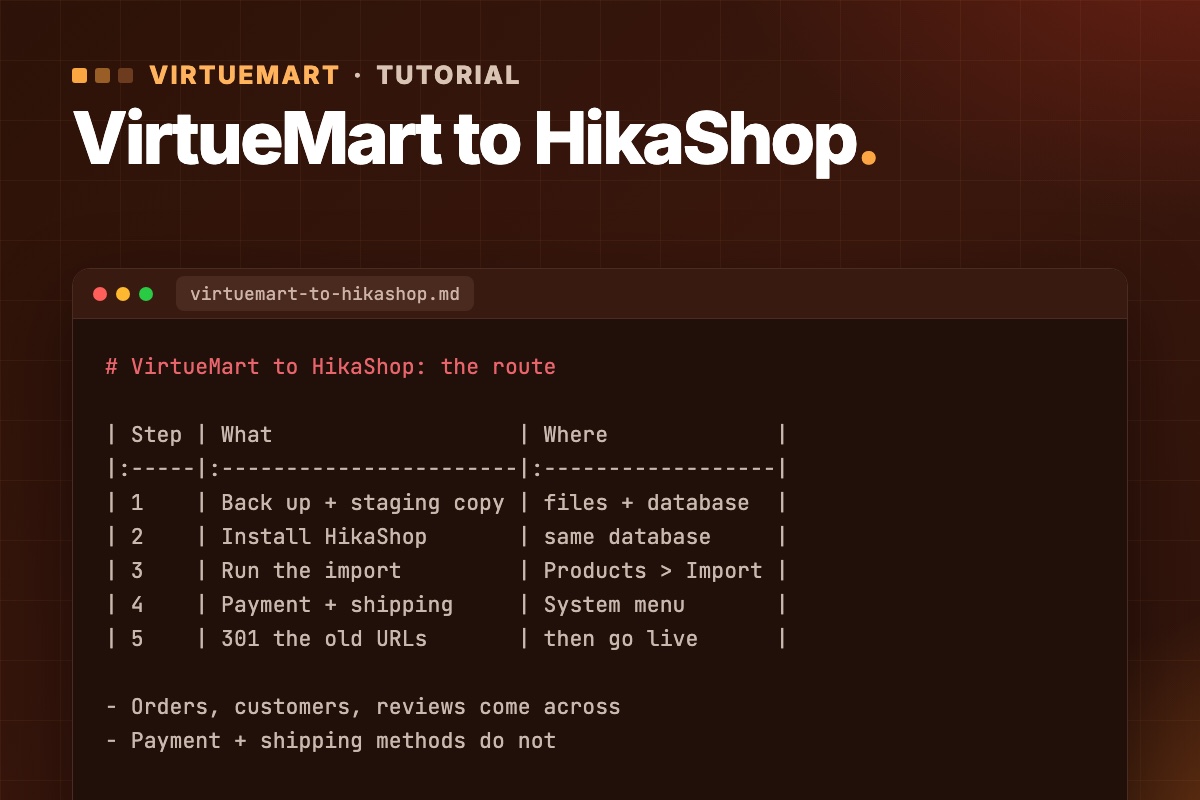

- Details
- Category: VirtueMart
VirtueMart 4 does not run on Joomla 6, and VirtueMart 5 is still in beta. HikaShop supports Joomla 4, 5 and 6, and it ships with an importer written for VirtueMart shops. This guide shows how to migrate VirtueMart to HikaShop: what moves across, how to run the import step by step, and how to keep your product URLs and rankings.
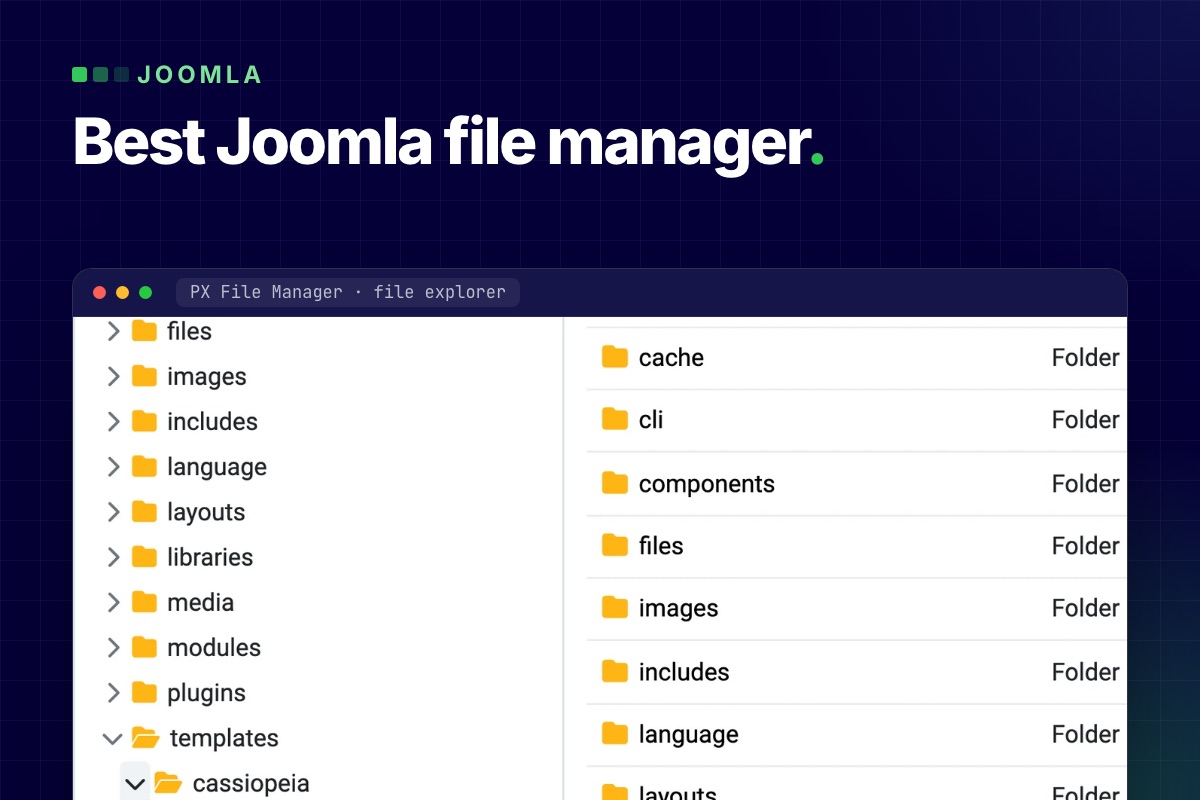
The best Joomla file manager depends on the job. For editing site files from the administrator (configuration.php, .htaccess, a plugin file), pick a site file manager such as PX File Manager, Phoca Commander or JMP File Manager. For images and documents inside articles, a media manager such as Quantum Manager or Joomla's own Media Manager is enough. For giving visitors a download area, you want a document manager like FILEman, not a file manager at all.
We make PX File Manager, so read that row with that in mind. This page compares what each tool's own listing says, as of November 2026.
How we compared
- Tested by us: PX File Manager 1.2.1 on Joomla 6.2. Its features below come from the extension itself.
- Read, not tested: every other tool. Versions, prices and features come from the Joomla Extensions Directory (JED) listing or the vendor page, opened on 4 November 2026. Listings change, so check the version line for your Joomla before you install anything.
- Tools that only manage media or downloads are included because they show up in the same searches. We did not audit any other tool's security; the checklist further down is what we would look at before installing one.
What Joomla core already does
- Template files: System → Site Templates → your template → Customise opens files inside that template's folder. By default it handles
txt, less, ini, xml, js, php, css, sass, scss, jsonfiles (Templates options). - Media Manager: works inside the folders set in the Filesystem – Local plugin. In Joomla 6.2 the defaults are
imagesandfiles.
Neither opens configuration.php, .htaccess or a file in /plugins. That gap is what a site file manager fills. For the step-by-step version, see how to edit Joomla files without FTP.
Joomla file managers compared (November 2026)
| Tool | What it is | Joomla (per listing) | Price | Worth knowing |
|---|---|---|---|---|
| PX File Manager | Site file manager: tree and list, tabbed code editor, search, trash, zip and tar.gz | 5.4 and 6 (1.2.1); 1.1 covers 4.4 to 5.3 | Free with a site account | Super Users only by default; view, create, edit and delete per user group. PHP 8.1+ |
| Phoca Commander | Dual-panel file manager | 3 to 6; 6.0.0, updated December 2025 | Free, GPL | Edit, upload, zip and unzip, chmod, copy and move |
| JMP File Manager | Site file manager built on elFinder | 3 to 6; 1.3.3, updated November 2026 | Paid (price not on the listing) | Edits and reads text files in the browser, zip and unzip, search, preview |
| Quantum Manager | File and media manager for editor and media fields | 5 and 6 in the tags (the text says 4 and 5); 3.3.0, updated May 2026 | Free, GPL | Bulk upload, resize and crop, watermark. A media tool, not a code editor |
| FILEman | File, video and image manager for visitors and editors | Not listed on the vendor page | $49 for 6 months for FILEman alone; or $99 a year and up for the Joomlatools suite | Galleries, public or private downloads. A document and media manager, not a site file editor |
| Joomla core | Template editor and Media Manager | Built in | Free | Template folder and media folders only |
We left out eXtplorer. Its JED listing is currently unpublished with the reason "UR3: Vulnerable Extension", and we found no Joomla 4, 5 or 6 compatibility statement for it. If you still run it from an old install, replace it.
Pick by job
- Small, urgent edits on one site: a site file manager. Phoca Commander is free and has a familiar two-panel layout. PX File Manager adds a tabbed Monaco editor (the VS Code engine), a syntax check for PHP, JSON, XML and INI before saving, and a trash you can restore from for 30 days.
- Prefer an elFinder-style interface: JMP File Manager.
- Editors who need to upload and resize images: Quantum Manager or the core Media Manager. A site file manager is the wrong tool and gives editors more access than they need.
- A download area with public and private files: FILEman. In PX File Manager the "Folder listing" menu item can list one folder of downloads, read-only, but it is not a gallery or document library.
- Client sites and teams: PX File Pro adds a folder and rules per user group, protected core files, an activity log, share links with expiry, file versions and an image optimizer. It comes with the Pro membership ($99 a year at the time of writing, every product, unlimited sites).
What to check before you install a file manager
A tool that can edit PHP in the browser is a way into your site. Before you install any of them:
- Who can open it? It should respect Joomla's user groups, and the default should be Super Users only. Anyone who can edit can write PHP, which is full control of the site.
- Is it locked to the site folder? Paths with
..or links that lead outside the Joomla root should be refused. - Does it check a session token on every action? Without it, a link on another website can trigger a delete or an edit while you are logged in.
- Can you undo a delete? PX File Manager moves deleted files to a trash folder first. Check what yours does before you need it.
- Does it update through Joomla? An extension that is not updated is a risk. Check the "last updated" date and the Joomla version on its JED listing, and that it is still listed.
- Does it match your Joomla and PHP version? PX File Manager 1.2 needs Joomla 5.4 or 6; on Joomla 4.4 to 5.3 use 1.1. Check the same for the others.
The login still matters most: a strong Super User password and two-factor authentication. Our Joomla hardening guide covers that side. And none of these can help when the administrator is down; keep SFTP or your host's panel for that.
Get PX File Manager
PX File Manager is free for registered users. Download it, install it from System → Install → Extensions and open it under Components. Teams and agencies can compare it with PX File Pro on the same page. For a database instead of files, there is PX Adminer, and if you would rather have someone else look after the site, see our maintenance and security service.
A free template for Joomla 6 is only useful if you end up with a site. PX Base comes with a quickstart that installs Joomla 6.2, the template, the PX Content module, the T4 Framework plugin and seven demo pages, and you replace the content instead of building the layout. This walkthrough goes from download to a page of your own, and says where the template stops. It needs a free account on this site and PHP 8.3 or later.
What you need
- Joomla 6.x and PHP 8.3 or later. PX Base does not run on Joomla 5. On a Joomla 5 site, read Joomla 5 vs Joomla 6 first.
- MySQL 8.0.13+ or MariaDB 10.4+, and Apache 2.4+ or Nginx 1.21+.
- A ThePixel.dev account. It is free; the downloads sit behind the login.
Quickstart or template?
The product page offers four downloads. Which one you need depends on whether the site exists yet:
| Download | Use it when |
|---|---|
| Quickstart | New site. Installs Joomla 6.2, the template, PX Content, T4 Framework and the demo content in one go. |
| Template | You add PX Base to a site you already have. |
| PX Content module | Needed with the template package; already in the quickstart. |
| T4 Framework plugin | Needed with the template package; already in the quickstart. |
Step 1: install the quickstart
- Log in on this site, open the PX Base page and download the Quickstart zip.
- Create an empty database and a database user on your hosting.
- Upload the quickstart zip to the folder where the site will live and extract it.
- Open the domain. The Joomla installer starts.
- Enter the site name, your admin account and the database details, then click Install Joomla.
- Click Remove "installation" folder when it finishes.
The demo users are not included. You log in with the admin account you just created. After this you have a working copy of the demo site, which is the starting point for everything below.
How the demo pages are built
Before you change anything, it helps to know the pattern, because every page follows it. We looked at the installed quickstart:
- Home, About, Services, Projects and Pricing use the template style PX Base - Home. Blog and Contact use PX Base - Default. A third style, PX Base - No sidebar, is for plain content pages. Open them under System → Site Template Styles.
- Each page of the first group has its own header module in the
slideshowposition (PX Home Hero, PX About Header, PX Services Header, PX Projects Header, PX Pricing Header), followed by section modules insection-1tosection-11. - Almost all of these modules are the same type, PX Content. One module shows one block: a hero, a pricing table, an FAQ. Some modules are assigned to several pages; PX Home Testimonials, for example, shows on Home, About, Services, Projects and Pricing, and you change that on the module's Menu Assignment tab.
PX Content has 12 block types in 20 styles: Hero (2), Features Intro (4), Clients (3), Gallery (2), Accordion (2, the FAQ), and Pricing, Testimonials, Team, Stats, Timeline, Contact Info and Call To Action (1 each). Timeline is not used on the demo pages, so it is free for your own steps or milestones. Why we built it this way is in the PX Base release post.
Step 2: logo, name and colors
In System → Site Template Styles, click a style name. That opens the T4 settings screen with a live preview next to it.
- Site Settings → Logo Settings holds the site name, slogan, logo image and a smaller logo for phones.
- Theme Color sets Primary (the lime green of the buttons and highlights) and Secondary, plus base, main menu and footer colors.
The three styles share the default site, navigation and theme profiles, so a new logo or color shows on every page, not just the one you edited. For small design changes use Tools → Edit Custom CSS; that CSS survives template updates.
Step 3: replace the demo content
Go to Content → Site Modules and type the page name in the search box: PX Home, PX About, PX Pricing. You get the sections of that page, with their position and type. Open one to change the block, its style, texts, images and buttons. The tab Advanced JSON holds all settings of a block as text, so you can copy a section to another module or another site.
The pricing, testimonials and client logos in the demo are ThePixel's own. Unpublish those modules or rewrite them before the site goes public, or your visitors read someone else's reviews.
Step 4: edit on the page
Most texts and images can be changed without opening the module:
- Log in on the site (the demo links the login page in the footer, under Resources) and click Edit content at the bottom right.
- Double-click a heading or paragraph, change it, and press Ctrl/⌘ + Enter to save.
- Use the Img and BG buttons to pick an image or background from the Media Manager.
- Settings on a block opens spacing, alignment and button styles. Click Done when you finish.
It works for users who are allowed to edit modules, so Joomla permissions decide who gets it. You can switch it off per module with Frontend Inline Edit on the Advanced tab.
Step 5: add a page of your own
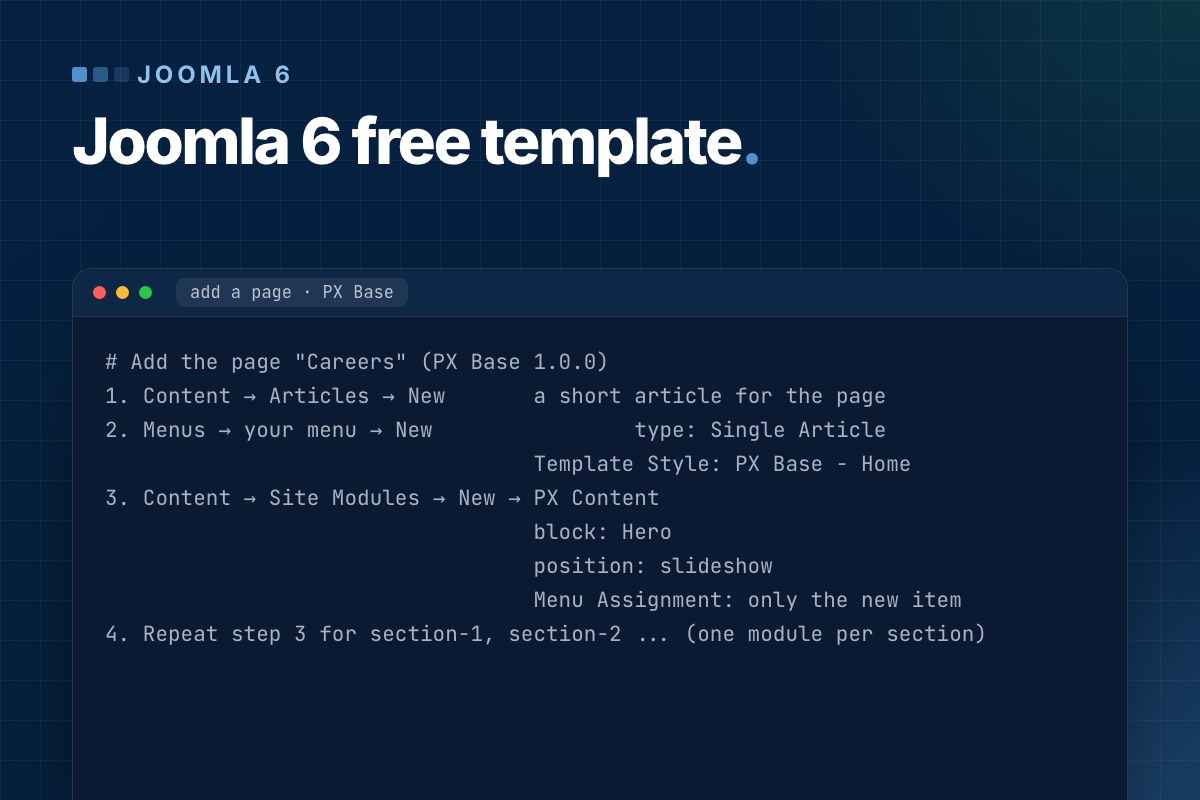
A new page is an article, a menu item and a few PX Content modules. This is the recipe from the PX Base documentation, and it is how the quickstart builds its own Services page: a Single Article menu item with the style PX Base - Home, and a Hero module in slideshow that is assigned to that one menu item. We read that structure from the installed quickstart; we did not click through the steps for a new page.
# Add the page "Careers" (PX Base 1.0.0)
1. Content → Articles → New       a short article for the page
2. Menus → your menu → New                type: Single Article
                                  Template Style: PX Base - Home
3. Content → Site Modules → New → PX Content
                                  block: Hero
                                  position: slideshow
                                  Menu Assignment: only the new item
4. Repeat step 3 for section-1, section-2 ... (one module per section)
The Blog menu item is a Category Blog of the Blog category and uses the default style. Contact details live in Components → Contacts, and the FAQ under the contact form is a PX Content module in contact-bottom.
Already have a Joomla 6 site?
Install the downloads in this order under System → Install → Extensions: the T4 Framework plugin (check that System - T4 Framework is enabled in System → Plugins), then the PX Base template, then the PX Content module. A manual install gives you the template and its styles but not the demo pages and modules, so build your pages with the recipe above.
Limits you should know
- Joomla 6 and PHP 8.3+ only. There is no Joomla 5 build.
- Do not edit the template files. An update overwrites them; put changes in Custom CSS.
- Changes not showing? Clear the cache under System → Clear Cache. With CSS & JS Optimization on in the T4 Global Settings, also reload with Ctrl/⌘ + Shift + R after changing Custom CSS.
- Back up before every update. New versions show in System → Update → Extensions. If a release needs a newer T4 Framework or PX Content, its release notes say so.
The full reference, with screenshots of every settings screen, is the PX Base documentation. Joomla 6.2 itself is covered in What's new in Joomla 6.
Get PX Base
Download the quickstart from the PX Base page; you can use it on as many sites as you like. If the design has to match a brand beyond colors and blocks, our template customization service builds on top of it.
Joomla database repair in short: if the error is 1194 or 1195 ("marked as crashed"), take a backup, run CHECK TABLE, and only then REPAIR TABLE, which works on MyISAM, ARCHIVE and CSV tables and does nothing on InnoDB, where you restore the backup instead. A missing table or column (errors 1146, 1054) is a different problem with a different fix. Below: how to tell them apart, and how to run the check and repair from the Joomla administrator with PX Adminer (free) or from SSH with mysqlcheck.
First: what kind of broken is it?
Read the exact error before you touch anything. The MySQL numbers show in the PHP or Joomla error log, or on the page itself when Error Reporting in Global Configuration is set to Maximum; visitors normally see a generic error. A damaged MyISAM table often reports Got error 145 from storage engine, which is the same crashed-table problem (MySQL error 145).
- Error 1194 / 1195, "marked as crashed". The server's own wording is Table '%s' is marked as crashed and should be repaired (1194) and …and last (automatic?) repair failed (1195). This is the case
REPAIR TABLEexists for. - Error 1146 (table doesn't exist) or 1054 (unknown column). The table or column is missing, usually after a half-finished extension update or an import that stopped early. A repair does nothing here; the structure has to be brought up to date. See the Joomla section below.
- The site loads but one item is wrong (a module that will not render, an article stuck as checked out). That is bad data, not a damaged table. Edit the row, or for a locked item use System → Global Check-in.
- Everything is down, including the admin. Start with the host's tools or SSH, and read Joomla broken after a PHP upgrade, because a PHP version problem looks the same from outside.
Back up before you repair
The MySQL documentation for REPAIR TABLE says to back up a table before repairing it, because a repair can lose data. Do it even when the table looks small. In PX Adminer 1.1.0 there is a Back up database link next to Export; it downloads the whole database as a dated .sql.gz file. On the command line the equivalent is mysqldump. Keep the file outside the web root. If the dump stops on the crashed table itself, copy that table's files (.frm, .MYD, .MYI on MyISAM) from the data directory first; that needs server access, so ask your host if you do not have it. If you are about to upgrade Joomla as well, step one of our migration runbook covers the same backup.
Check the storage engine: REPAIR TABLE does not work on InnoDB
REPAIR TABLE works only for MyISAM, ARCHIVE and CSV tables. Current Joomla installs create InnoDB tables, so on a normal Joomla table the statement answers with a note instead of repairing anything. We ran both on a scratch database (MySQL 8.0.40):
-- MySQL 8.0.40, scratch database (Table column left out)
REPAIR TABLE pixel_demo_inno;
+--------+----------+---------------------------------------------------------+
| Op     | Msg_type | Msg_text                                                |
+--------+----------+---------------------------------------------------------+
| repair | note     | The storage engine for the table doesn't support repair |
+--------+----------+---------------------------------------------------------+
List the tables that are not InnoDB on your site:
-- Tables that are not InnoDB
SELECT table_name, engine
FROM information_schema.tables
WHERE table_schema = DATABASE() AND engine <> 'InnoDB';
On a test copy of thepixel.dev, none of Joomla's core tables are in that list: 31 of its 290 tables are MyISAM, and all of them belong to one third-party subscription extension. That is the usual picture: the list is short and points at one extension. Those are the tables a "marked as crashed" error can come from, and the only ones REPAIR TABLE can fix.
Check, then repair a MyISAM table
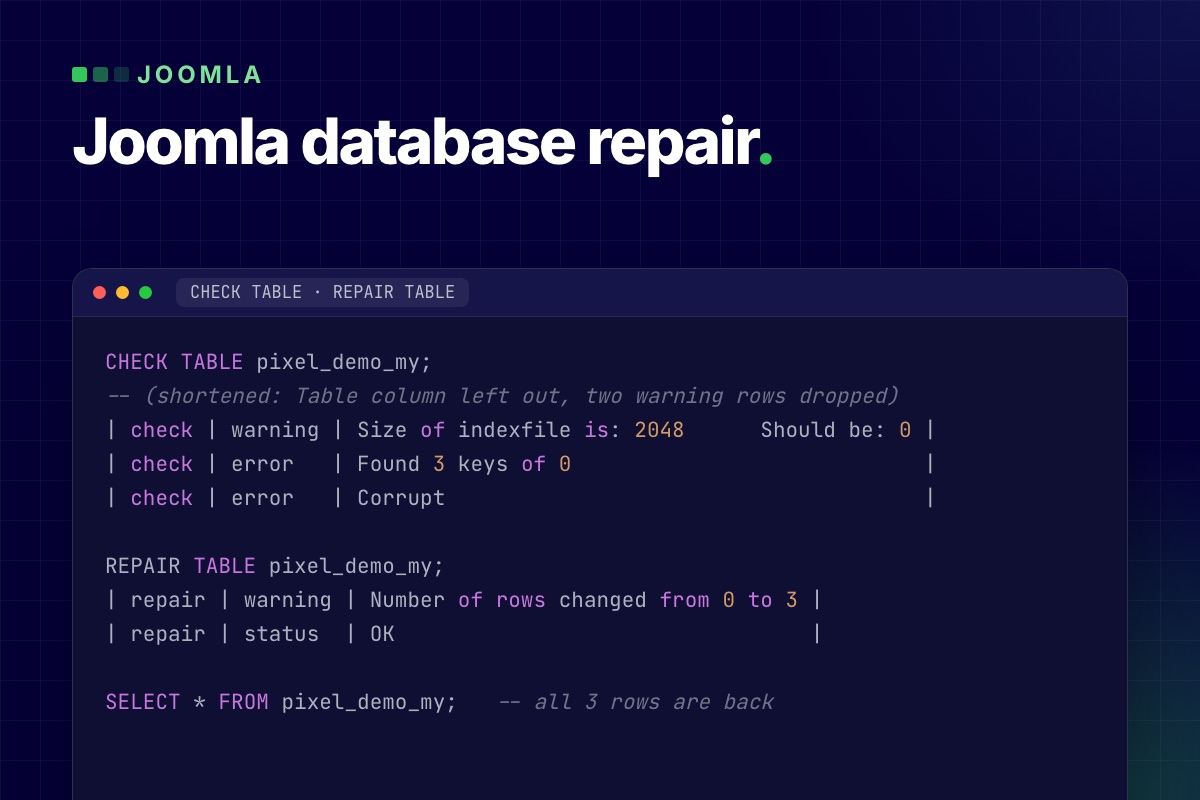
To get a damaged table to show, we overwrote 64 bytes in the header of a MyISAM index file (.MYI) on the scratch database. This is a rough imitation, not the same as a crash during a write, but it gives the same kind of messages. The first step is always CHECK TABLE, which changes nothing:
CHECK TABLE pixel_demo_my;
-- (shortened: Table column left out, two warning rows dropped)
| check | warning | Size of indexfile is: 2048      Should be: 0 |
| check | error   | Found 3 keys of 0                            |
| check | error   | Corrupt                                      |

REPAIR TABLE pixel_demo_my;
| repair | warning | Number of rows changed from 0 to 3 |
| repair | status  | OK                                 |

SELECT * FROM pixel_demo_my;   -- all 3 rows are back
Treat the result as a report to read. A repair that ends with status OK but changes the row count has dropped or recovered rows, and you should know which before the site goes back to normal. If the server stops during a repair, MySQL's documentation says to restart it and run REPAIR TABLE again straight away, before any other statement touches the table.
Run it from the admin with PX Adminer
If the Joomla administrator still opens, you do not need a hosting panel for this:
- Open Components → PX Adminer (it needs Track Session Metadata set to Yes under System → Global Configuration → System, the Joomla default) and click the database name to see the table list with sizes and engines.
- Tick the tables you want to look at. Under the list, the buttons run Analyze, Optimize, Check and Repair; Adminer shows the SQL statement behind each one as a tooltip (
CHECK TABLE,REPAIR TABLE, …). Click Check first. - Read the result. Only if it reports errors on a MyISAM table, run Repair on that table, then Check again.
- Reload the page that failed.
The same four statements can be typed in the SQL command screen. These buttons are Adminer features; PX Adminer wraps them in a Joomla component that only Super Users can open and that uses the database settings Joomla already has. For its security model see the documentation.
No admin? Use mysqlcheck over SSH
mysqlcheck ships with MySQL and MariaDB and runs the same statements on a whole database:
# check every table, change nothing
mysqlcheck -u DBUSER -p --check DBNAME

# check, and repair only the tables that report corruption
mysqlcheck -u DBUSER -p --auto-repair DBNAME
Take the backup first and run it when traffic is low. MariaDB ships its own mysqlcheck with the same options, though we only tested MySQL 8.0.40.
What Joomla's own Database screen does (and does not)
System → Maintenance → Database compares your tables with the update scripts of Joomla and your extensions, and its Update Structure button applies the changes that are missing. That can fix errors like 1146 and 1054 after an interrupted update, when the missing table or column is defined in the update scripts of Joomla or the extension; if it is not, update or reinstall the extension. It does not run REPAIR TABLE, so it will not bring back a crashed table. Run it after a repair if the site still complains about a missing column.
When the table is InnoDB and really is damaged
There is no REPAIR TABLE for it. Damage on InnoDB tends to show up as page corruption or the server failing to start, not as error 1194; if you get 1194, check the engine again with the query above. In order of preference:
- Restore the table, or the whole database, from your last good backup. This is the normal answer.
- Ask your host. Corruption is often a disk or crash problem, not a Joomla one.
- Only as an emergency, MySQL's
innodb_force_recoverycan start a server that will not start, so you can dump your data. Values 4 and above can damage the data files for good, so start at 1 and read that page before you try it. It is a job for the server owner, not something to run from a Joomla admin.
Stop it coming back: move old tables to InnoDB
InnoDB tables recover from a crash on their own in most cases, which is why a "marked as crashed" error is rare on a current Joomla site. If the engine query above showed MyISAM tables, convert them once you have a backup:
ALTER TABLE pixel_demo_my ENGINE=InnoDB;The statement rebuilds the table and blocks writes to it while it runs, which takes a while on a large table, so do it off-peak and check that the extension that owns the table has no fixed-engine requirement first. On the scratch database the table was InnoDB afterwards and kept its rows.
Limits you should know
- There is no undo. Repair and engine changes act on the live database at once. PX Adminer Pro copies a table into a snapshot before an ALTER, such as the engine change, so it can be restored in one click; a REPAIR is not covered.
- It needs a working administrator for the PX Adminer route; otherwise use SSH or your host's tools.
- MySQL and MariaDB only. PX Adminer does not support PostgreSQL.
- Your database user needs the privileges for the statements; on shared hosting the host may restrict them.
Get PX Adminer
PX Adminer is free with a free account on this site. Download it from the PX Adminer page, install it from System → Install → Extensions and open it under Components. Not comfortable running repairs on a live site? Our maintenance and recovery service does it for you.
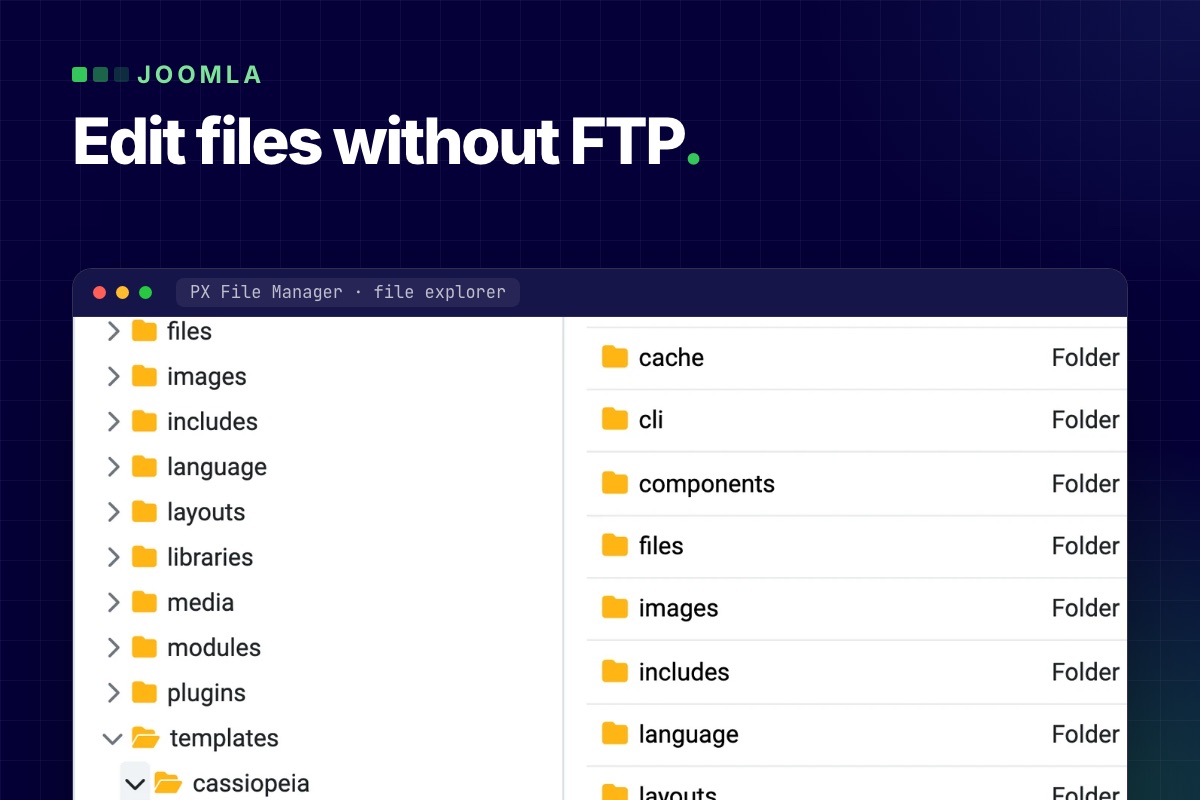
You can edit Joomla files without FTP from the administrator, as long as something in there gives you a file browser and a code editor. Joomla core only goes part of the way: it edits template files and manages media, not the rest of the site. For everything else (configuration.php, .htaccess, a plugin file you need to patch, a stray file to delete) you need a file manager component.
What Joomla core lets you edit
- Template files. System → Site Templates → your template → Customise lets you open and edit that template's files and create overrides. It does not open anything else.
- Media. Content → Media manages files in the media folders (
/imagesby default) and only accepts the file types allowed in the Media options. - Both are Super User tools by default.
Nothing in core opens configuration.php, .htaccess, a component's PHP file or a file in /plugins. That is the gap FTP, SFTP or the hosting panel's file manager normally fills.
Edit files from the Joomla administrator with PX File Manager
PX File Manager is a free component that adds a file explorer and a code editor to Components → PX File Manager. It is built on the Monaco editor, the same editor engine as VS Code. It works on any file under the Joomla root and nowhere outside it.
The common jobs:
- Open and edit a file. Click a file in the tree; text files open in a tab with syntax highlighting. Save writes the file directly to disk. Closing a tab with unsaved changes asks first.
- Find a file. The search box at the top of the sidebar (Cmd/Ctrl+K) matches file and folder names (not file contents), so
template defaultfindstemplates/…/default.php. The shortcut does not fire while the cursor is inside the editor. It skips/.git,/cache,/logs,/administrator/cacheand/administrator/logsby default; change the list in the component Options. - Upload. Drop files onto the list or use Upload. Files go up one at a time into the open folder.
- Zip and unzip. Select items and Compress, or Extract a zip. If you type a destination folder name that already exists, Extract refuses; with no name it unpacks into the current folder and asks what to do with clashing files.
- Copy, cut, paste, rename, delete. A folder cannot be pasted into itself. Delete is permanent (there is no trash), and force-deleting a folder removes everything in it.
- Change permissions. Properties shows the details; the Permissions dialog sets the mode as 3 or 4 octal digits such as
644or0755. Never use777.
Binary files are not opened as text, and the editor will not save content with NUL bytes. Images, audio, video and PDFs open in a preview instead.
Is it safe to put a file editor in the admin?
A file editor in the browser is a risk if it is badly built. From the component source:
- Every request needs a valid Joomla session token (CSRF), and every action is checked against four permissions you can set per user group: manage (browse, read, search), create (upload, zip, copy), edit (rename, save, chmod) and delete (delete, move). "Manage" still lets a user open and download any file under the root,
configuration.phpincluded, so it is not a read-only-safe role. Anyone with create or edit can write PHP into the site, which is full control: give those only to people you would trust with FTP. - Paths are resolved against the Joomla root. A path with
..or one that resolves outside the root is rejected. - It runs as the PHP user, so it can only touch what the web server can already write. A file that is read-only for PHP stays read-only: the save fails with "File is not writable."
Keep the component updated through the Joomla updater. As with any admin tool, the real protection is a strong super-user login with two-factor authentication, and only the groups that need it getting the permissions above. When clients or editors need their own folder and must never reach configuration.php, PX File Pro adds a root folder and rules per user group, protected core files and an activity log. Our Joomla hardening guide covers the login side.
Edit live files without breaking the site
The editor saves straight to the live file. It does not keep a version history, so the safety net is yours:
- Copy before you edit. Select the file, Copy, Paste in the same folder, choose to keep both (never Override) and rename the copy, for example to
configuration.bak.php. Keep the.phpending: a copy namedconfiguration.php.bakis served as plain text and would publish your database password. Delete the copy when the change is confirmed. - Change one thing at a time and reload the front end and the admin in another tab before the next change.
- Have a way back in before you start. A PHP syntax error in a plugin or template file can break the front end and the administrator, and then the editor cannot save either. Know where your host's file manager or SFTP login is, so you can restore the copy.
- Do not edit core files. Joomla updates overwrite them. Put changes in a template override, a plugin or a child template.
- Take a full backup first before touching
configuration.php,.htaccessor anything in a plugin.
If the admin itself is down, a browser-based tool cannot help and FTP, SSH or the host panel is the way in. See Joomla broken after a PHP upgrade for recovering in that case.
Two common edits, step by step
Change a rule in .htaccess
- Open
/.htaccess(Apache and LiteSpeed hosts; nginx ignores it). Copy it first and rename the copy, as above. - Add your rule, save, and load the front page and
/administrator. A bad rule returns a 500 error right away. - A bad rule usually returns a 500 on the administrator too, so restore the copy from your host's panel or SFTP.
Turn on debug in configuration.php
// configuration.php
public $debug = true;
public $error_reporting = 'maximum';
Both properties exist in Joomla's configuration class; set them back to their previous values when you are done, and never leave debug on a public site. When the admin works, Global Configuration (System and Server tabs) changes these without touching the file, which is the better route. It also sets configuration.php to read-only (0444), so a save in the editor fails with "File is not writable." To edit by hand, set it to 644 in the Permissions dialog, save, then set it back to 444.
When another tool is the better choice
For a bulk deploy, a Git workflow or a whole-site move, use SFTP, rsync or SSH. A browser file manager is for the small, urgent edits and the "I just need to look at that file" moments. For the database there is PX Adminer.
Get PX File Manager
PX File Manager is free for Joomla 4.4, 5 and 6 with a free account on this site. Download it from the PX File Manager page, install it from System → Install → Extensions, and open it under Components. For production sites where you would rather not do this yourself, our maintenance and security service covers updates, backups and recovery.
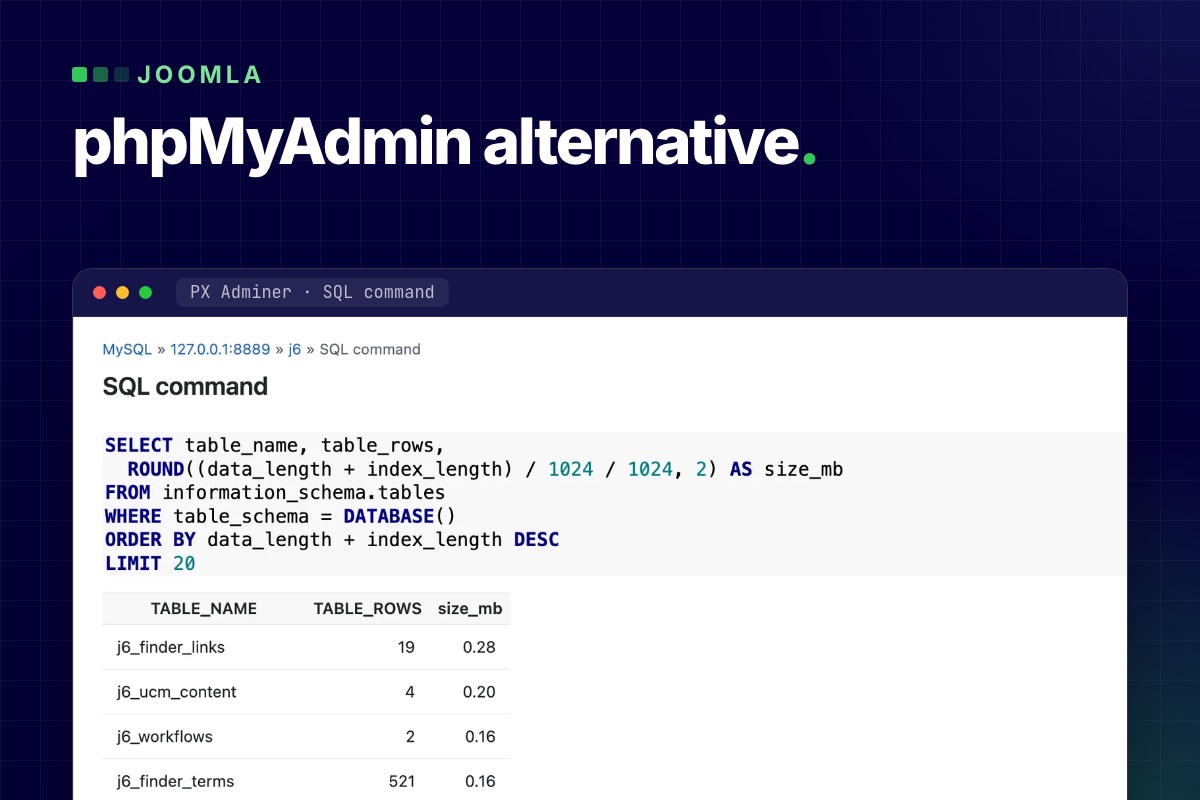
A phpMyAdmin alternative for Joomla can live inside the administrator itself. PX Adminer is a free component that opens your site's database under Components → PX Adminer: browse and edit tables, run SQL, export and import, and nothing to log in to, because it uses the database settings Joomla already has. It needs Joomla 5 or 6 and a MySQL or MariaDB database.
Why look for a phpMyAdmin alternative at all
Most Joomla problems that end in the database are small: an article that will not open because it is stuck as checked out, a module with a broken params value, a user you need to look up. Fixing them means getting to a database tool first, and that is where the time goes:
- phpMyAdmin is a separate application with its own login. If it lives behind the hosting panel, you need the panel login too, and that is not always at hand.
- A database tool is a high-value target. Any tool you add to a live site, this one included, needs to be locked down; see the security section below.
- Joomla's tables are named with a site-specific prefix, so copied queries need editing before they run.
If your host gives you phpMyAdmin and you are happy with it, nothing here forces a switch.
What PX Adminer does
PX Adminer is built on Adminer by Jakub Vrana, an open-source database manager written in PHP. Adminer alone also runs without a hosting panel, but you would upload it yourself and protect its login yourself. PX Adminer wraps it in a Joomla component and adds the Joomla parts:
- Tables and data. Filter the table list by name, then browse, search, sort and filter rows.
- Edit rows. Change, add, clone or delete rows in a form. Fields that hold JSON, such as a module's
paramsor an article'simages, get a Format button and a "Valid JSON" check, so you can read the value indented and see right away if your edit broke it. - SQL command. Run any SQL, or insert one of the ready-made Joomla queries. Choosing a query fills in your site's real table prefix; nothing runs until you click Execute.
- Export and import. Download tables or the whole database as SQL, CSV or TSV (optionally gzipped) with the size of every table shown first, and import an
.sqlor.sql.gzfile. - Structure. See and change columns, indexes and foreign keys.
Four common jobs
These use the queries from the SQL command's "Joomla queries" list. Open Components → PX Adminer, click SQL command, pick the query, read it, then Execute. In the examples #__ stands for your table prefix; PX Adminer writes the real one for you.
1. Release items that are stuck as checked out
An article, category, module or menu item that stays locked after a crashed session can be listed first:
-- Show checked-out items
SELECT 'content' AS source, id, title, checked_out, checked_out_time FROM `#__content` WHERE checked_out > 0
UNION ALL SELECT 'categories', id, title, checked_out, checked_out_time FROM `#__categories` WHERE checked_out > 0
UNION ALL SELECT 'modules', id, title, checked_out, checked_out_time FROM `#__modules` WHERE checked_out > 0
UNION ALL SELECT 'menu', id, title, checked_out, checked_out_time FROM `#__menu` WHERE checked_out > 0;
The "Check in all articles, categories, modules and menu items" query then clears them with UPDATE … SET checked_out = NULL, checked_out_time = NULL. It does the same kind of fix as System → Global Check-in, but only for those four tables; Global Check-in covers every table that has a checked-out column. Use Global Check-in when the admin works. The query changes data: read it before you click Execute.
2. List the members of the Super Users group
-- Super Users
SELECT u.id, u.name, u.username, u.email, u.block, u.lastvisitDate
FROM `#__users` u
JOIN `#__user_usergroup_map` m ON m.user_id = u.id
WHERE m.group_id = 8
ORDER BY u.id;
Group 8 is Joomla's default Super Users group. This lists its direct members only, blocked accounts included (check the block column), and it does not show a custom group that has been given Super User rights. An account nobody on the team recognises is a reason to act the same day.
3. Fix a broken JSON value
- Open the table (for example the modules table), click edit on the row and find the
paramsfield, which carries the JSON label. - Click Format to read it indented, make the change, and once you have changed the text, check that PX Adminer says Valid JSON.
- Compact folds it back. If you only formatted it to read it, the original text is saved unchanged. If you edited it, it is saved compact, as Joomla writes it.
- Save, then reload the page that uses the module.
4. Find the biggest tables, then export first
-- Largest tables
SELECT table_name, table_rows,
  ROUND((data_length + index_length) / 1024 / 1024, 2) AS size_mb
FROM information_schema.tables
WHERE table_schema = DATABASE()
ORDER BY data_length + index_length DESC
LIMIT 20;
table_rows is an estimate for InnoDB tables, but the order is what matters. On our own site the biggest were the action log and a Smart Search index table. Before you clean anything, or before a Joomla update, use Export: choose gzip and SQL, tick all tables with their data, and keep the file somewhere other than the web root. Import takes .sql and .sql.gz files up to your PHP upload limit; for bigger ones PX Adminer can run an adminer.sql file you put in its folder on the server.
Is it safe to open the database from the admin?
Full database access is enough to take over a site, so this is the part to check. From the PX Adminer source and its documentation:
- Super Users only. The component checks the global
core.adminpermission. Other groups, Administrator included, get a 403 even if you give them access in the component Options. - No password of its own. When you open the component, Joomla issues a one-time key that is valid for 60 seconds and works once, only in the browser that asked for it. Only a hash of it is stored.
- Tied to your Joomla login. Every request checks that your administrator session is still active and that the user is not blocked and is still a Super User. Log out of Joomla and PX Adminer closes. A session lasts two hours at most.
- Your site's database only. It connects with the host, user and database from
configuration.phpand has no login form for another server. - A log. When Joomla's logs folder exists and is writable, sign-ins and rejected keys that belong to a user are written to
pxadminer.phpthere with time, IP address and user ID.
It works with the privileges of your Joomla database user: if that user can see other databases on the same server, so can a SQL command here. The real protection is still a strong Super User login with two-factor authentication. Our Joomla hardening guide covers that side.
Limits you should know
- There is no undo. Changes go to the live database at once. Export first, and stay out of Joomla's own tables (users, assets, extensions) unless you know the effect. PX Adminer Pro adds the undo: a snapshot of the rows or tables before each change, restored in one click.
- MySQL and MariaDB only. PostgreSQL is not supported, even though Adminer itself can talk to other databases.
- It needs a working administrator. If the admin is down, for example after a PHP upgrade, use your host's tools or SSH. See Joomla broken after a PHP upgrade.
- Session setting. In System → Global Configuration → System, Track Session Metadata must be Yes (the Joomla default).
- Requirements: PHP 8.1 or later with mysqli (Joomla 6 itself needs a newer PHP than that).
Get PX Adminer
PX Adminer is free with a free account on this site. Download it from the PX Adminer page, install it from System → Install → Extensions and open it under Components; the documentation walks through every screen.
Related: its sister tool PX File Manager does the same for files, and before a Joomla 5 or 6 upgrade a database export belongs in step one of our migration runbook. For production sites where you would rather not do it yourself, our maintenance and security service covers updates, backups and recovery.
Page 1 of 7