
PX Atlas draws interactive maps in the Joomla administrator: layers of points, lines and shapes on OpenStreetMap, Google Maps or your own picture, shown on the site with a module. Set it up in Components → PX Atlas.
Overview
PX Atlas draws interactive maps in the Joomla administrator and shows them on your site. A map has layers, and layers hold points, lines, polygons, circles and rectangles, each with its own style and content. The map can sit on OpenStreetMap, on Google Maps, or on your own picture such as a floor plan or a park map. Use it for store locators, city guides, delivery zones, hiking trails, venue and campus maps. PX Atlas is free.
- Visual editor: layers and objects on the left, the map on the right; draw, drag, reshape or type exact positions.
- Five object types: points, polylines, polygons, circles and rectangles; up to 200 layers and 5,000 objects per map.
- Markers: pin, point, square, letter badge, Font Awesome icon or your own picture, in any colour and size.
- Content: a heading, formatted text, an image and a button, shown as a tooltip, popup or side panel, on click or hover.
- Layers for visitors: a layer control, layers hidden at load, and zoom ranges that show detail only when zoomed in.
- Image maps: your own JPG, PNG or WebP picture from the Media Manager, with positions in pixels.
- The Joomla way: a module for any position,
{loadmoduleid}in articles, Joomla permissions, languages, keyboard access.
Installation
System requirement
- Joomla 5.4 or Joomla 6
- PHP 8.1 or later
- A MySQL or MariaDB database
Install the package
- Download
pkg_pxatlas-1.0.0.zipfrom the PX Atlas page (a free thepixel.dev account is enough). - In your Joomla administrator go to System → Install → Extensions and upload the file.
- Open Components → PX Atlas.
The package installs the component (the editor), the PX Atlas module (the map on the site) and the plugin Console - PX Atlas (command line). New versions show up in System → Update → Extensions; installing a newer package over the old one keeps your maps.
Maps
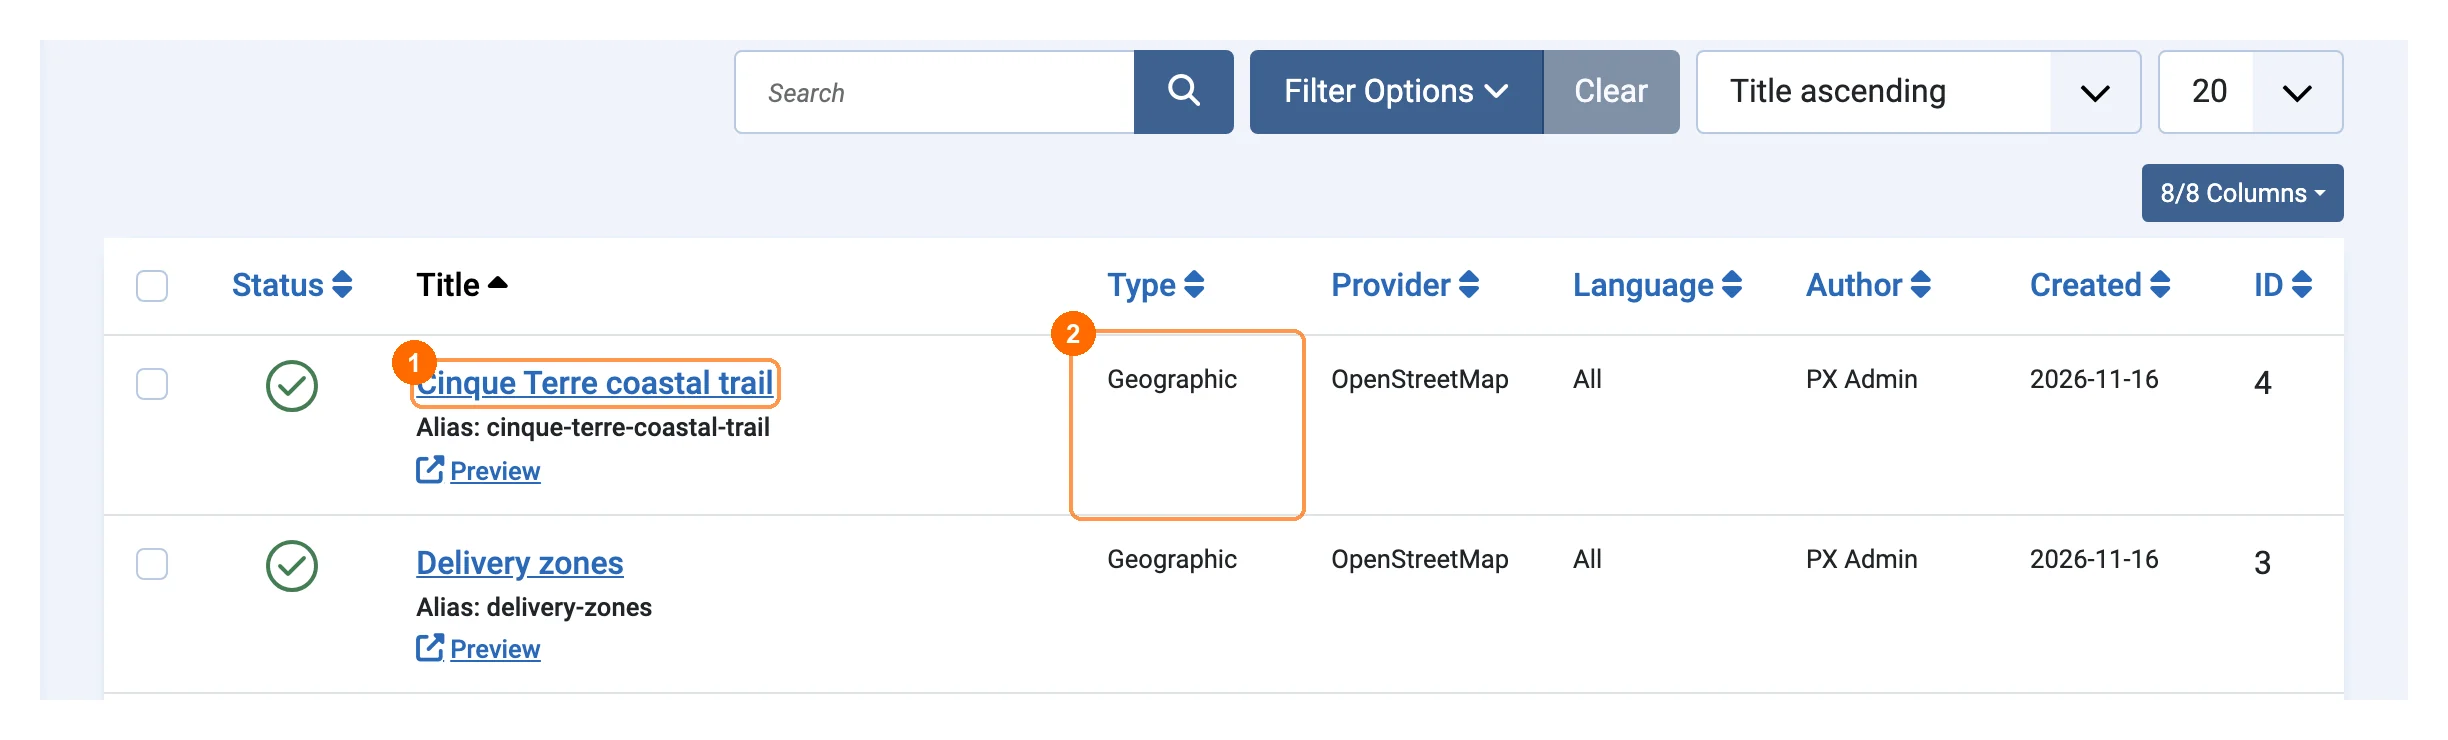
Components → PX Atlas lists your maps with their 1title and a Preview link, and their 2type and provider. Search, filter by status or type, publish, unpublish and trash maps the usual Joomla way. Deleting a map from the trash also deletes its layers and objects.
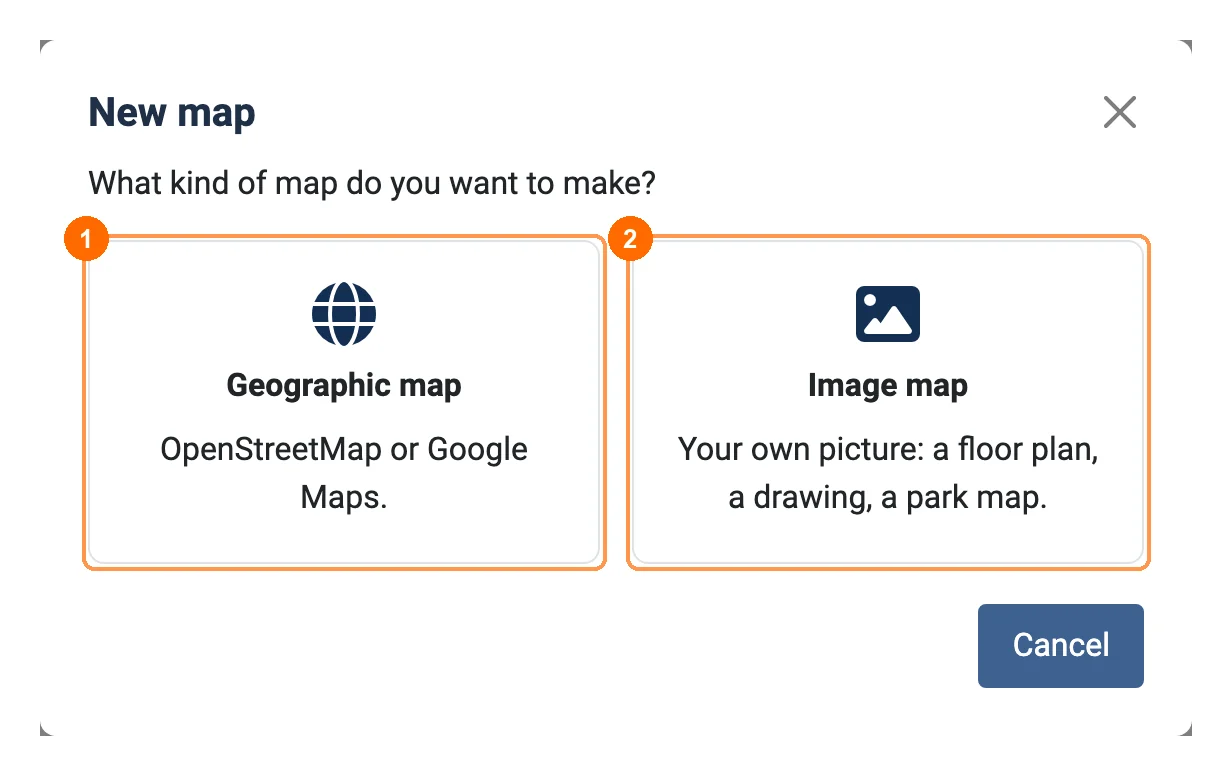
New asks what kind of map you want: 1Geographic map (OpenStreetMap or Google Maps) or 2Image map (your own picture). The type cannot change once the map has objects.
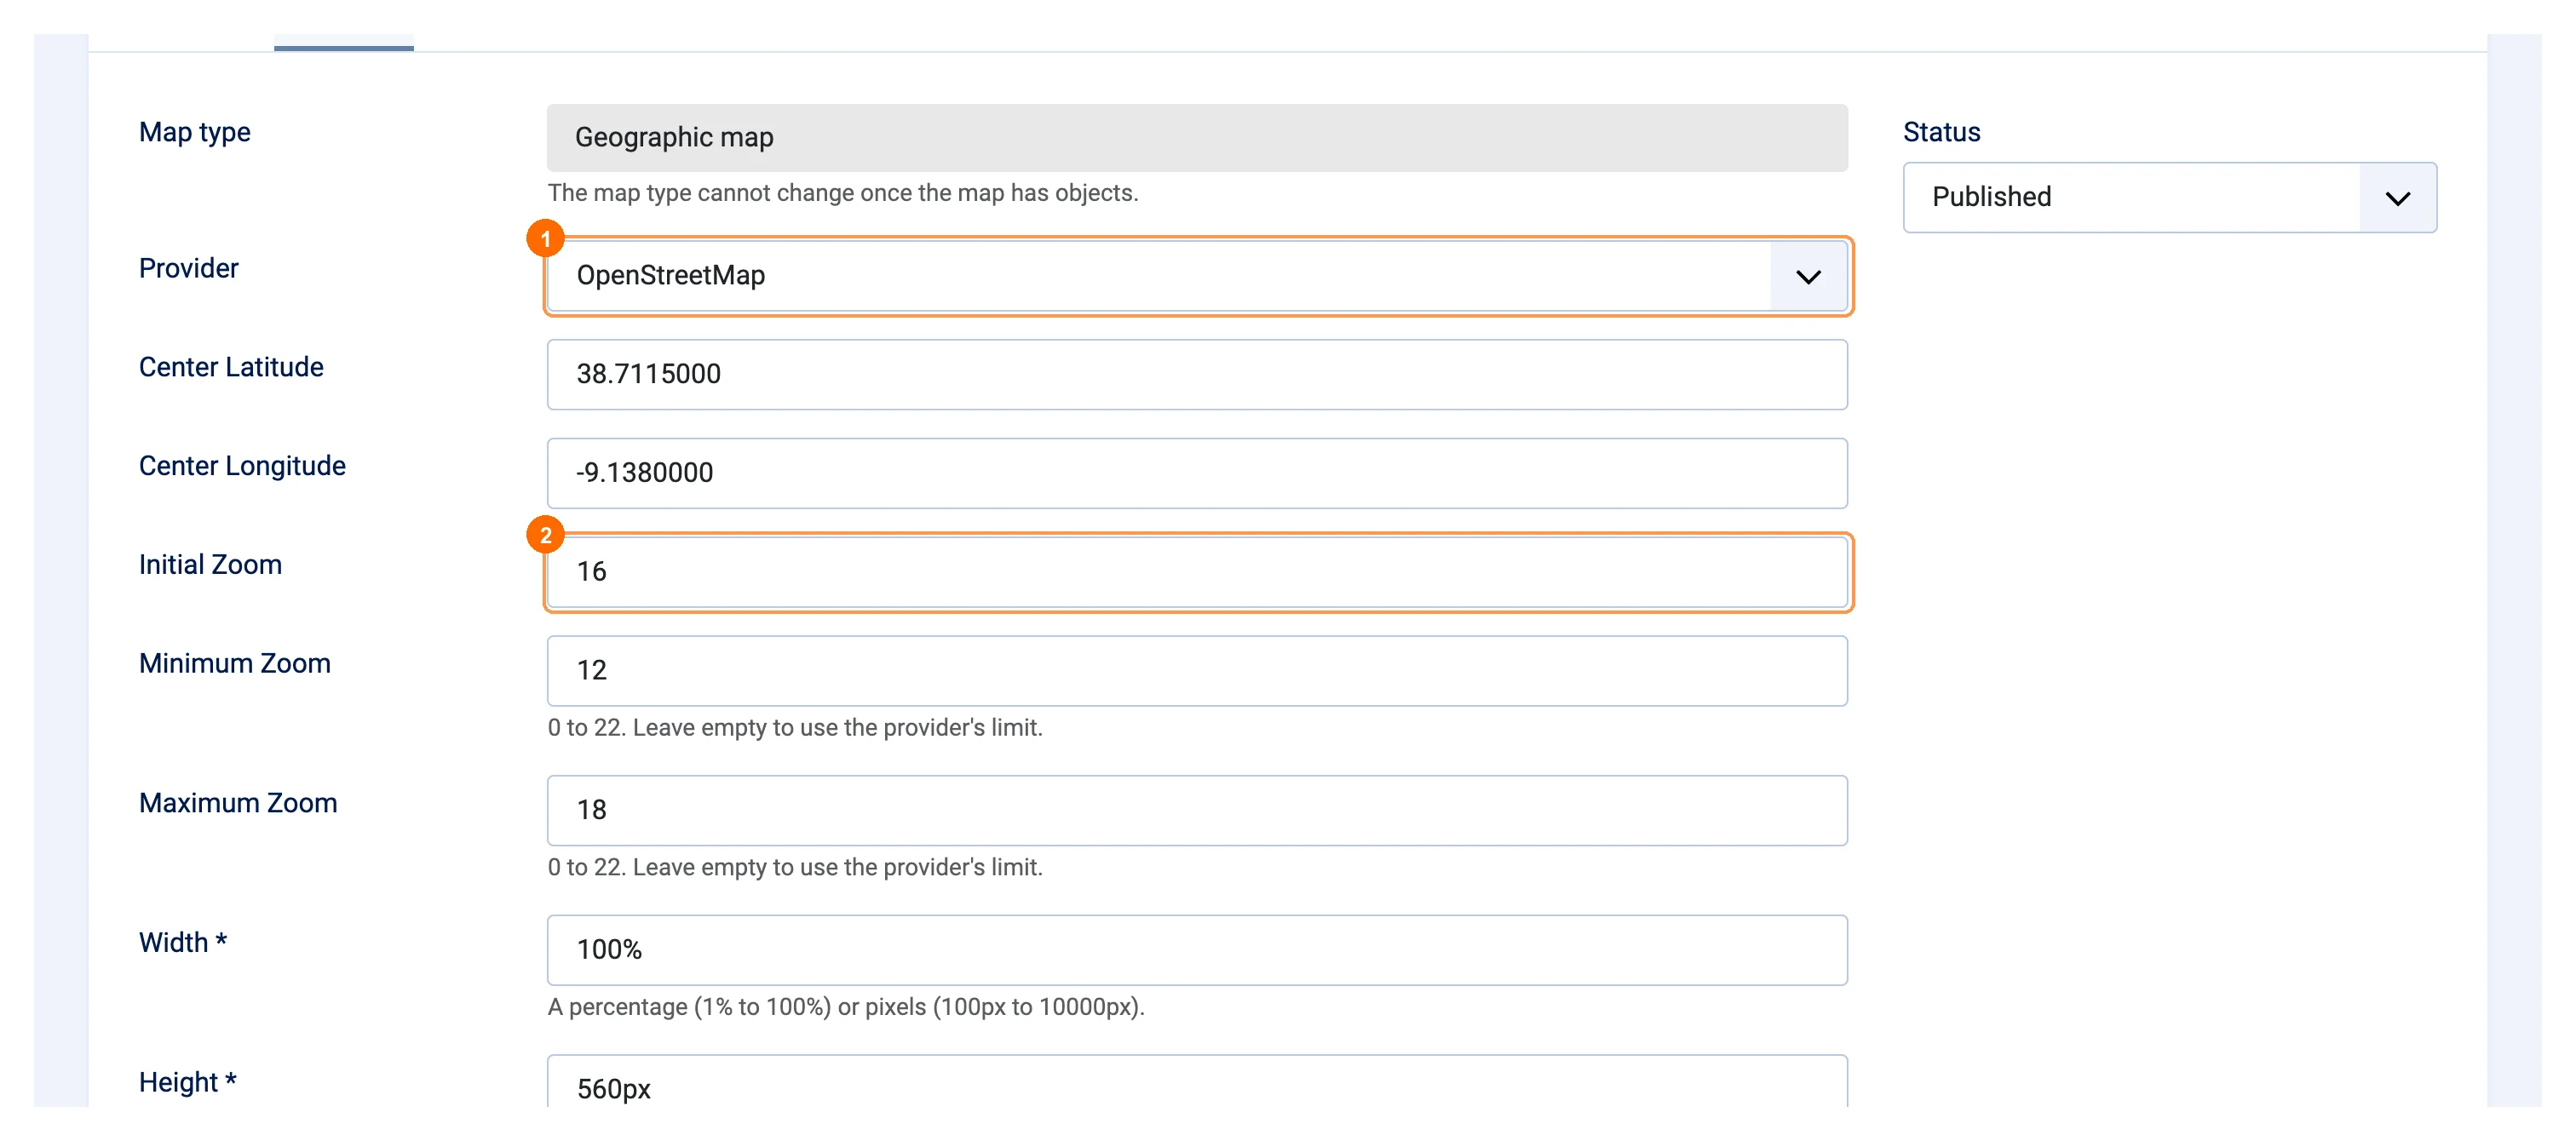
Details
Give the map a Title, then open the Details tab:
- 1Provider: OpenStreetMap or Google Maps (see Map providers).
- Center Latitude / Longitude and 2Initial Zoom (0 = the whole world, 22 = a building). You can also set the start view in the editor.
- Minimum / Maximum Zoom: how far visitors can zoom out and in; empty uses the provider's limits.
- Width (1%–100% or 100px–10000px) and Height (100px–5000px or 10vh–100vh).
- Layer control and its position: a button with the list of layers for visitors (shown when the map has two or more published layers).
- Status, Language and a Description for your own notes.
The editor
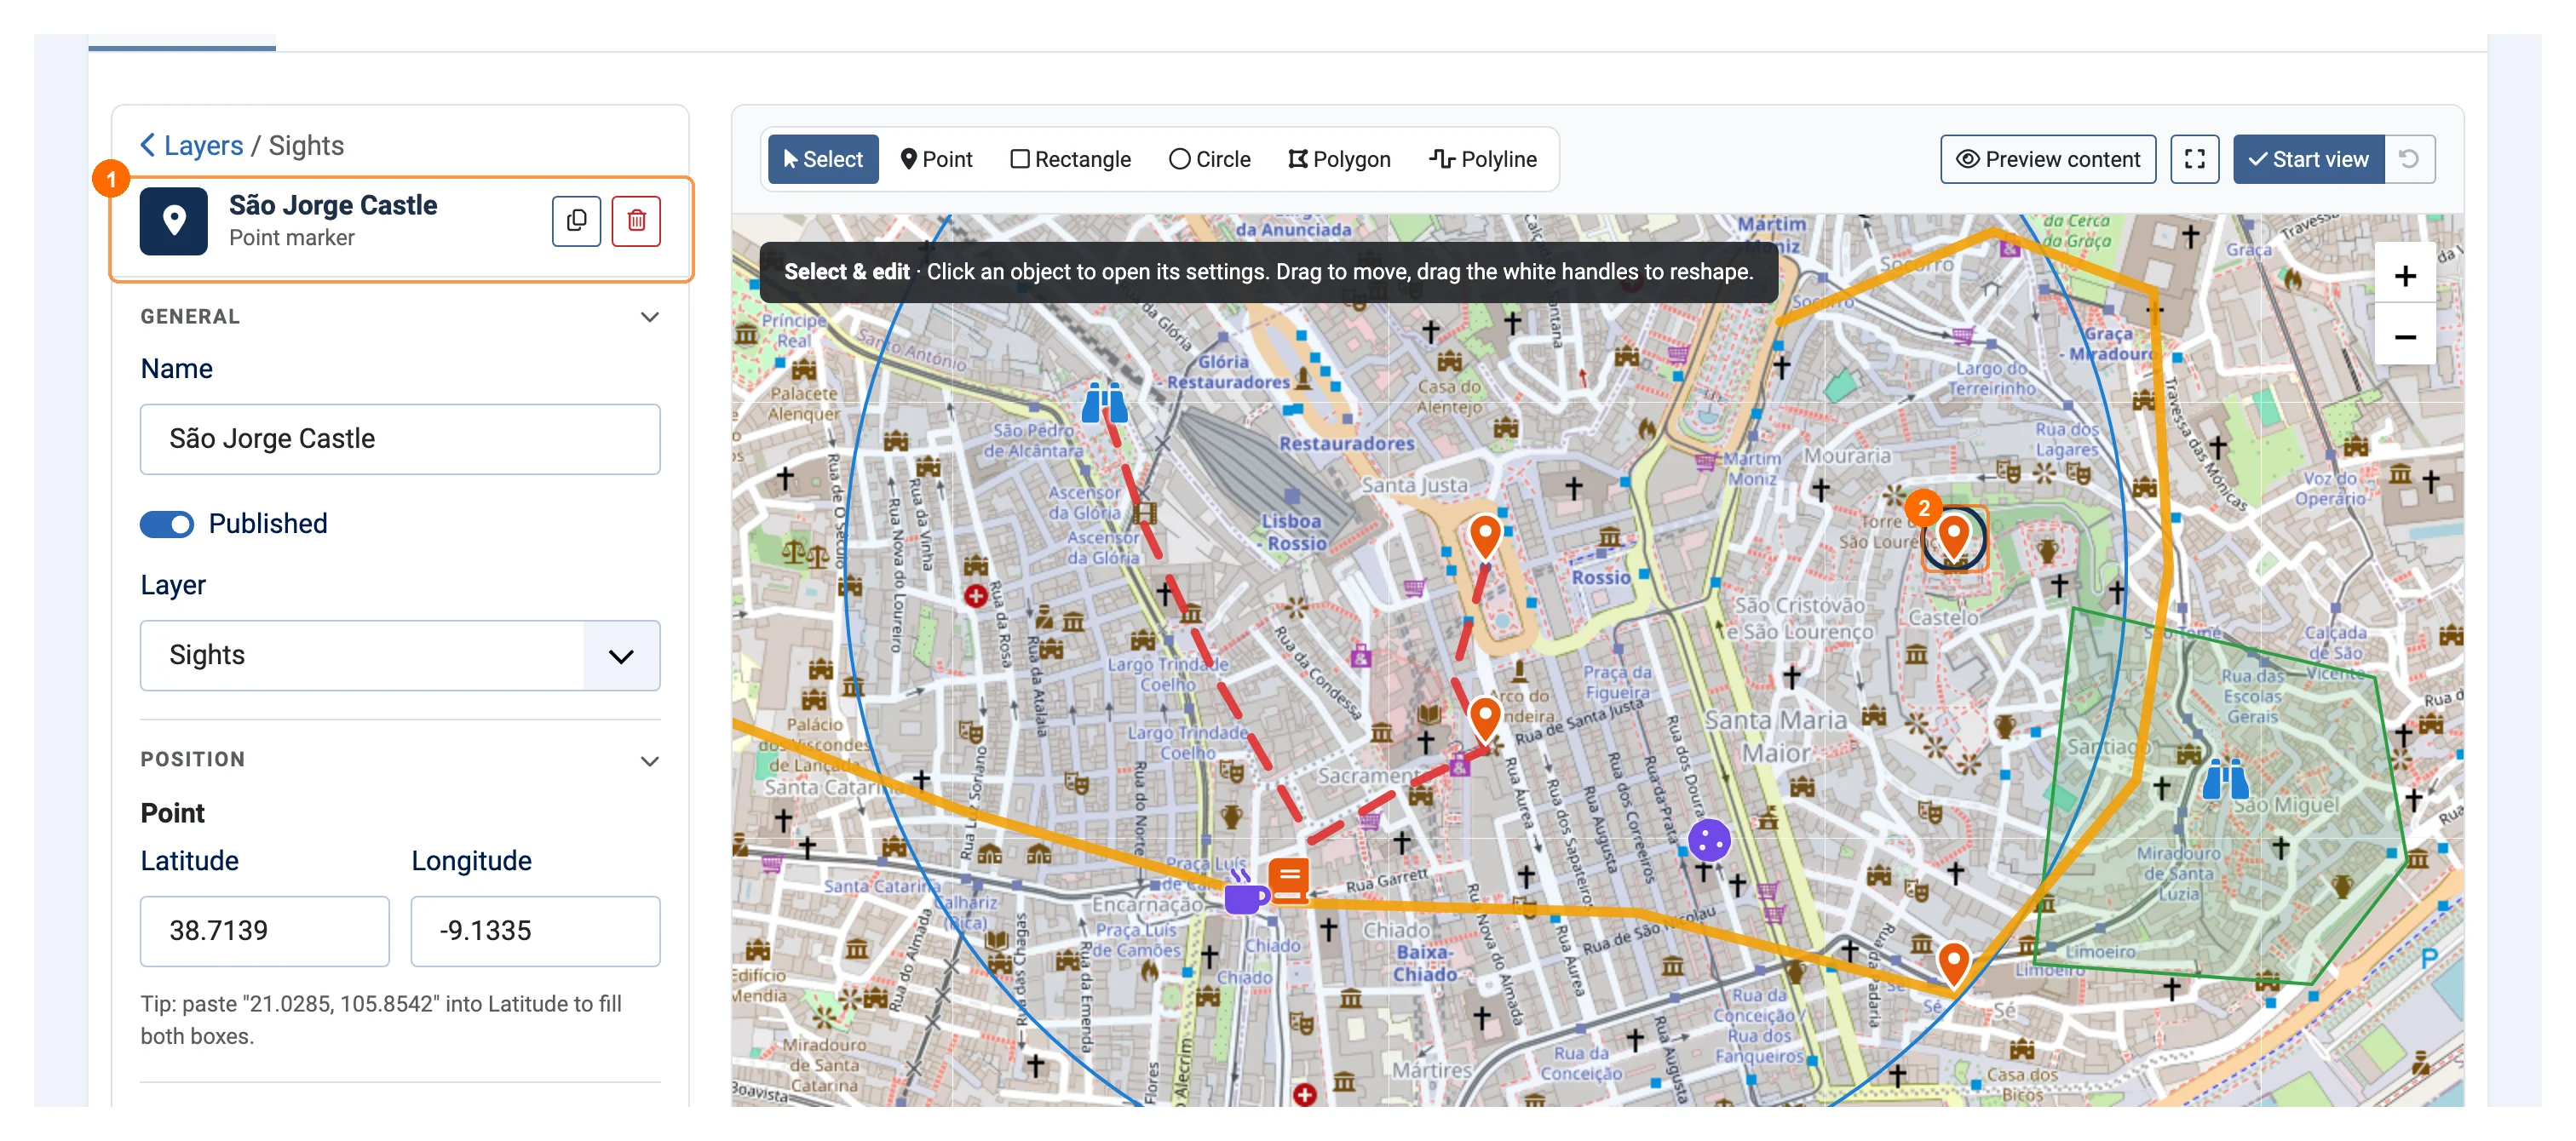
The Map Editor tab is where you draw. 1Layers and their objects are on the left, the map on the right. Above the map are 2the tools Select, Point, Rectangle, Circle, Polygon and Polyline, and on the right Preview content, Full screen and 3Set start view: pan and zoom, click it, and that is the view visitors get when the map loads.
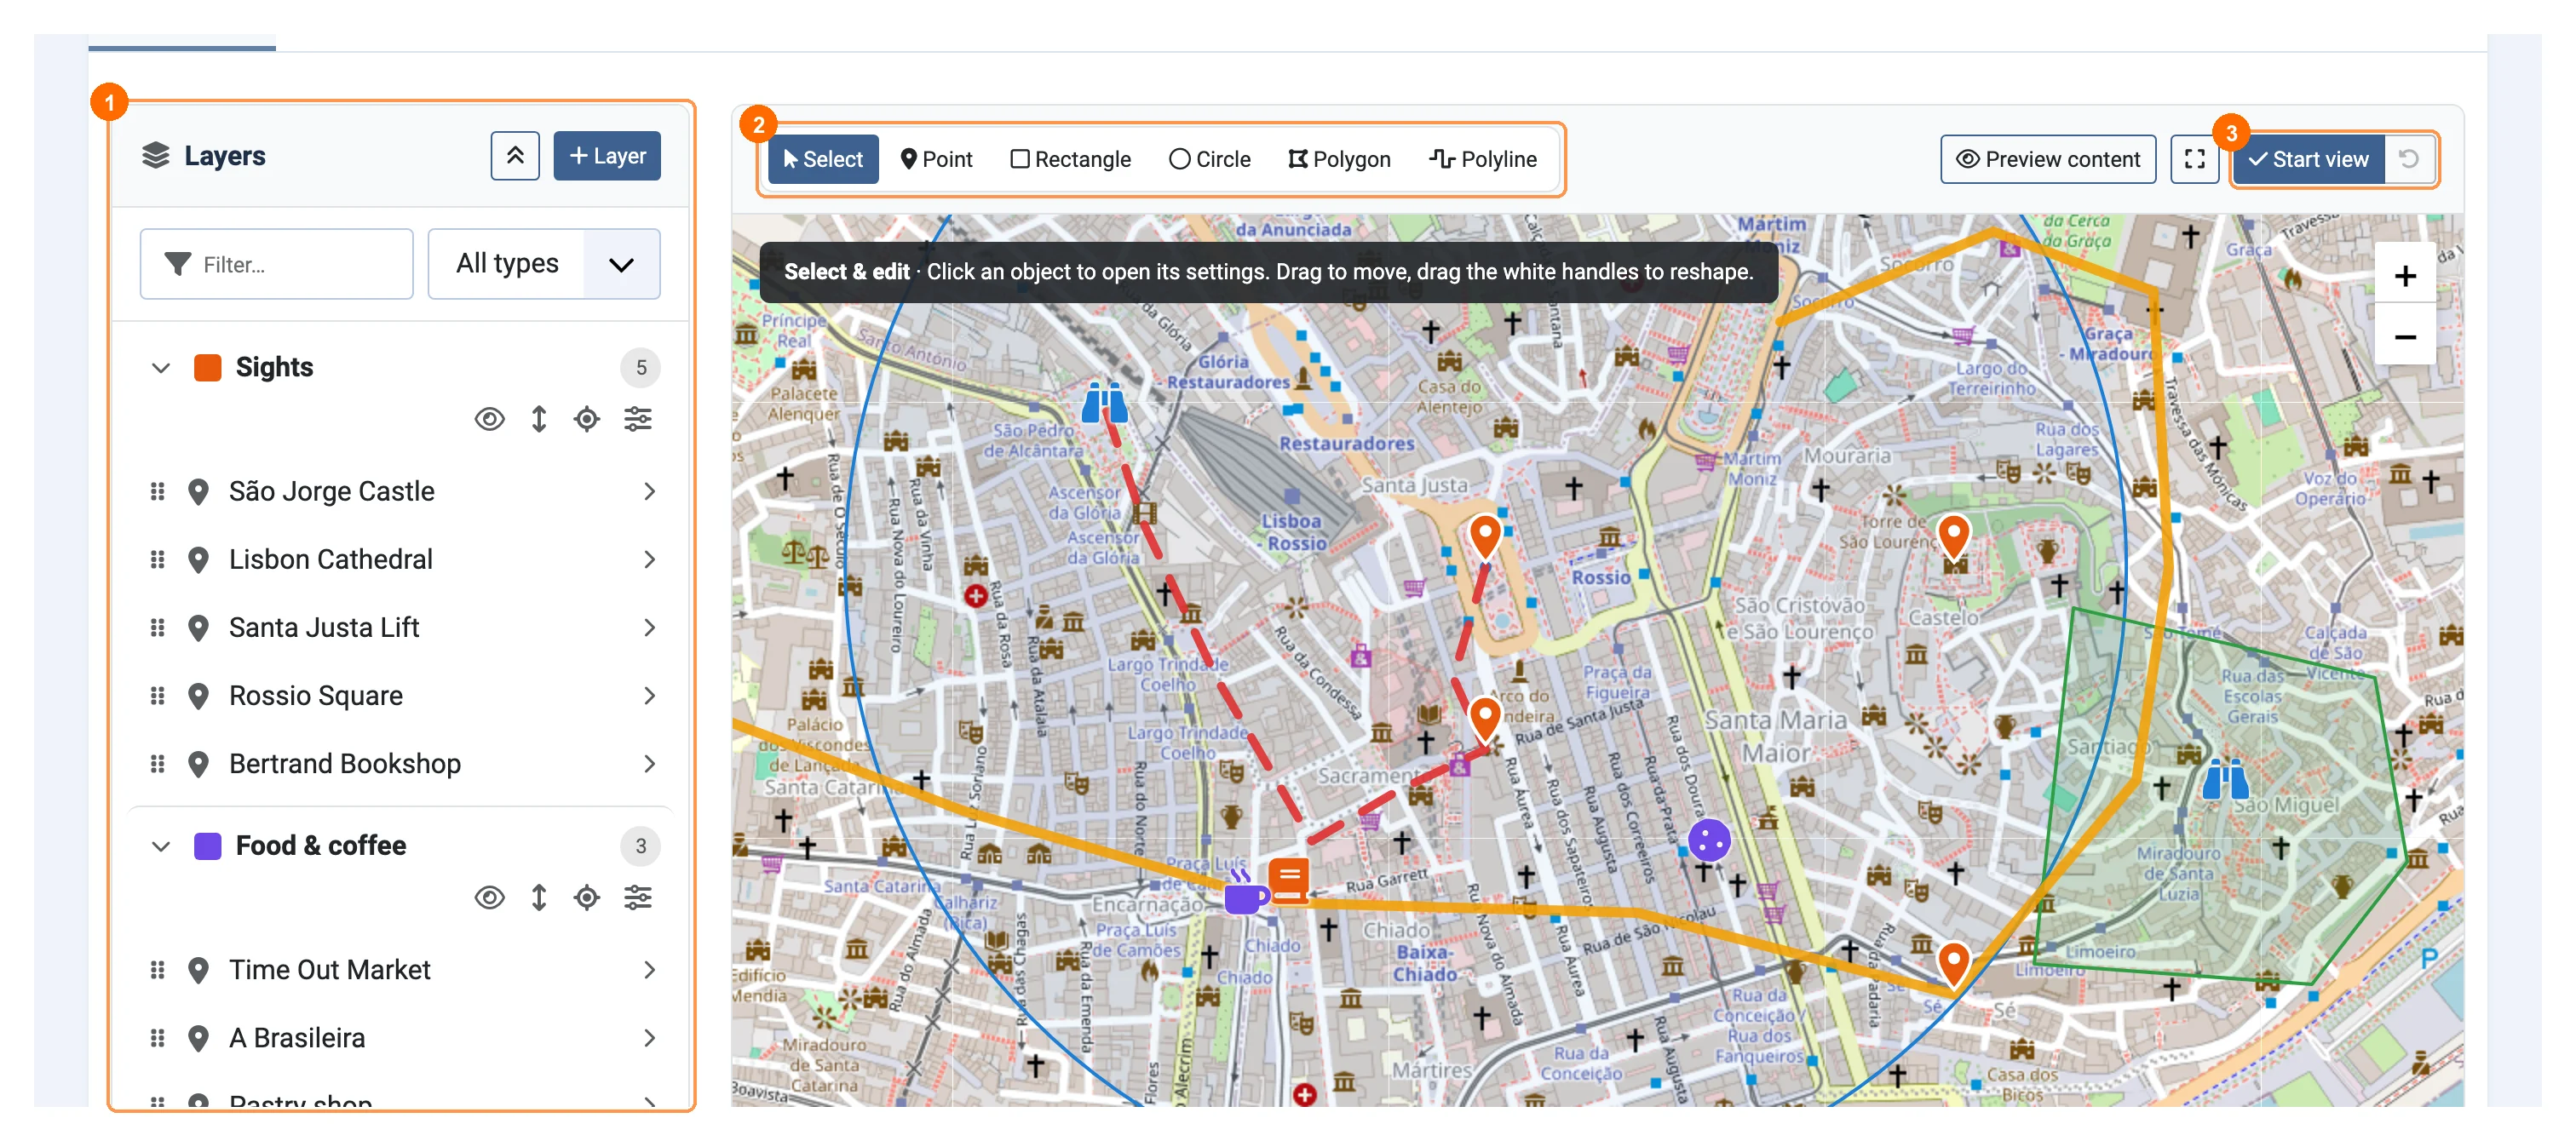
Hold Ctrl (⌘ on a Mac) and scroll to zoom the map; a plain scroll moves the page. A dark bar on the map explains the active tool, and a status line under it shows the cursor position, the zoom and how many layers and objects are visible. Changes are stored with Save or Save & Close; Close with unsaved changes asks "Leave without saving?".
Layers
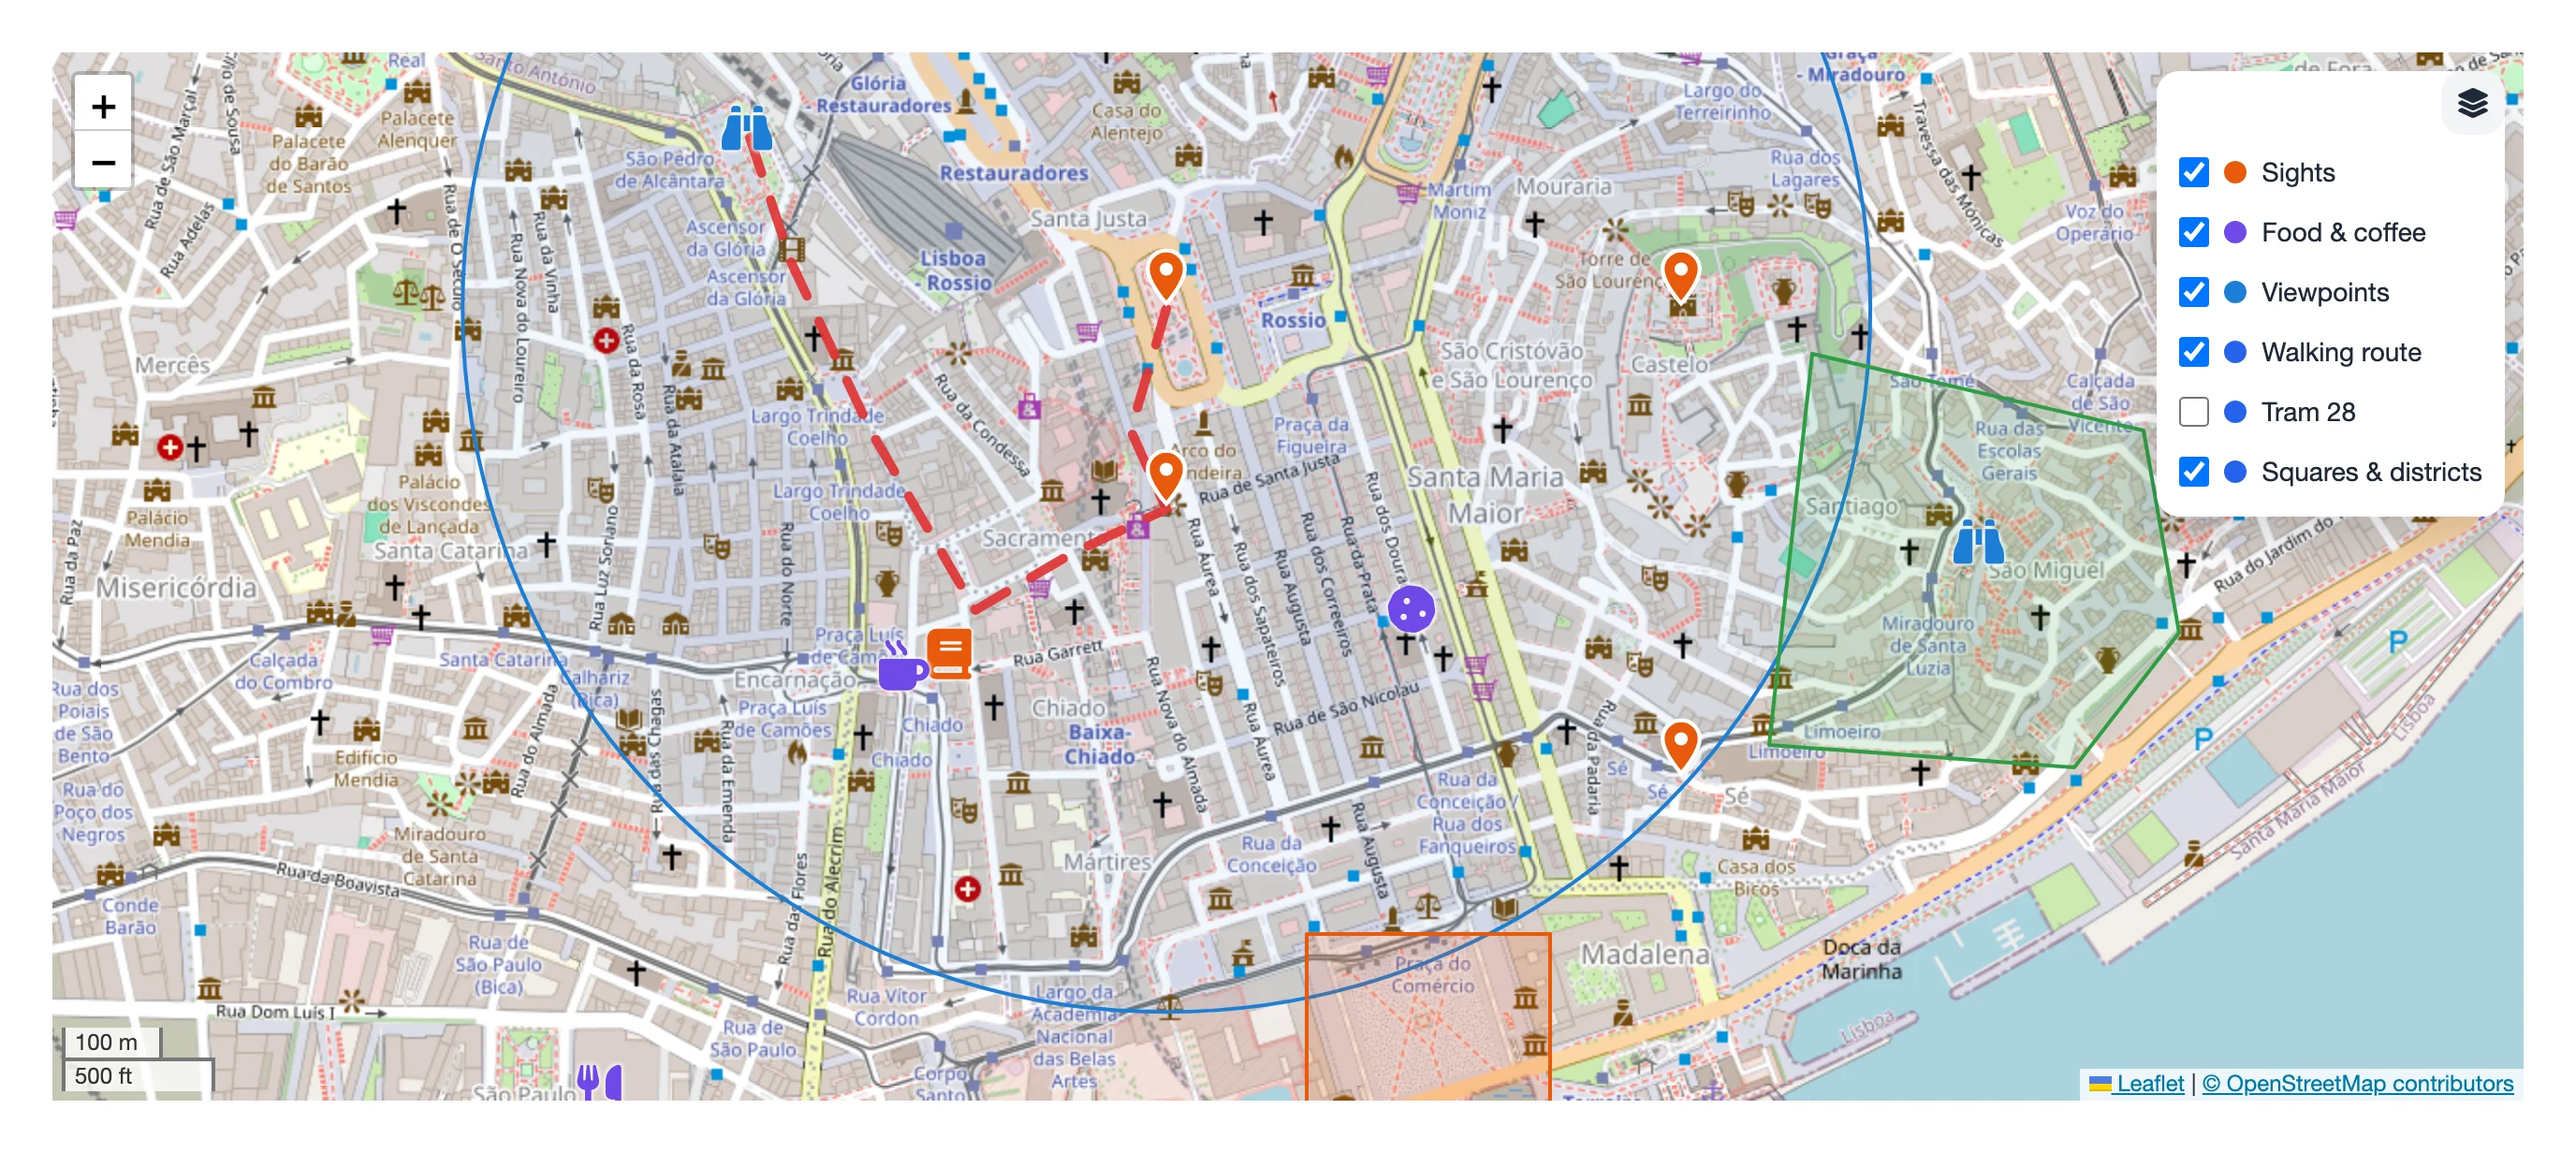
Layers group objects, for example Sights, Food & coffee or a walking route. A map needs a layer before you can draw.
- + Layer adds one. Each layer row has buttons to hide it in the editor (the eye, only for you), Order layers, Go to … (fits the map to its objects) and Settings of ….
- In the layer settings: Layer name, Published, Colour (objects use it unless they have their own), Visible when the map loads and a zoom range.
- Order layers by dragging, or with the move buttons and Alt + arrow keys.
- Delete layer asks whether to delete its objects or move them to another layer.
- The Filter… box and the All types list narrow the list.
Drawing objects
| Tool | How to draw |
|---|---|
| Point | Click the map. |
| Polyline | Click to add points; double-click, press Enter or click Finish to end. Undo point removes the last one. |
| Polygon | Click to add corners; click the first corner, double-click or press Enter to close it. |
| Rectangle | Drag, or click two opposite corners. Hold Shift for a square. |
| Circle | Drag from the centre, or click the centre and then the edge. |
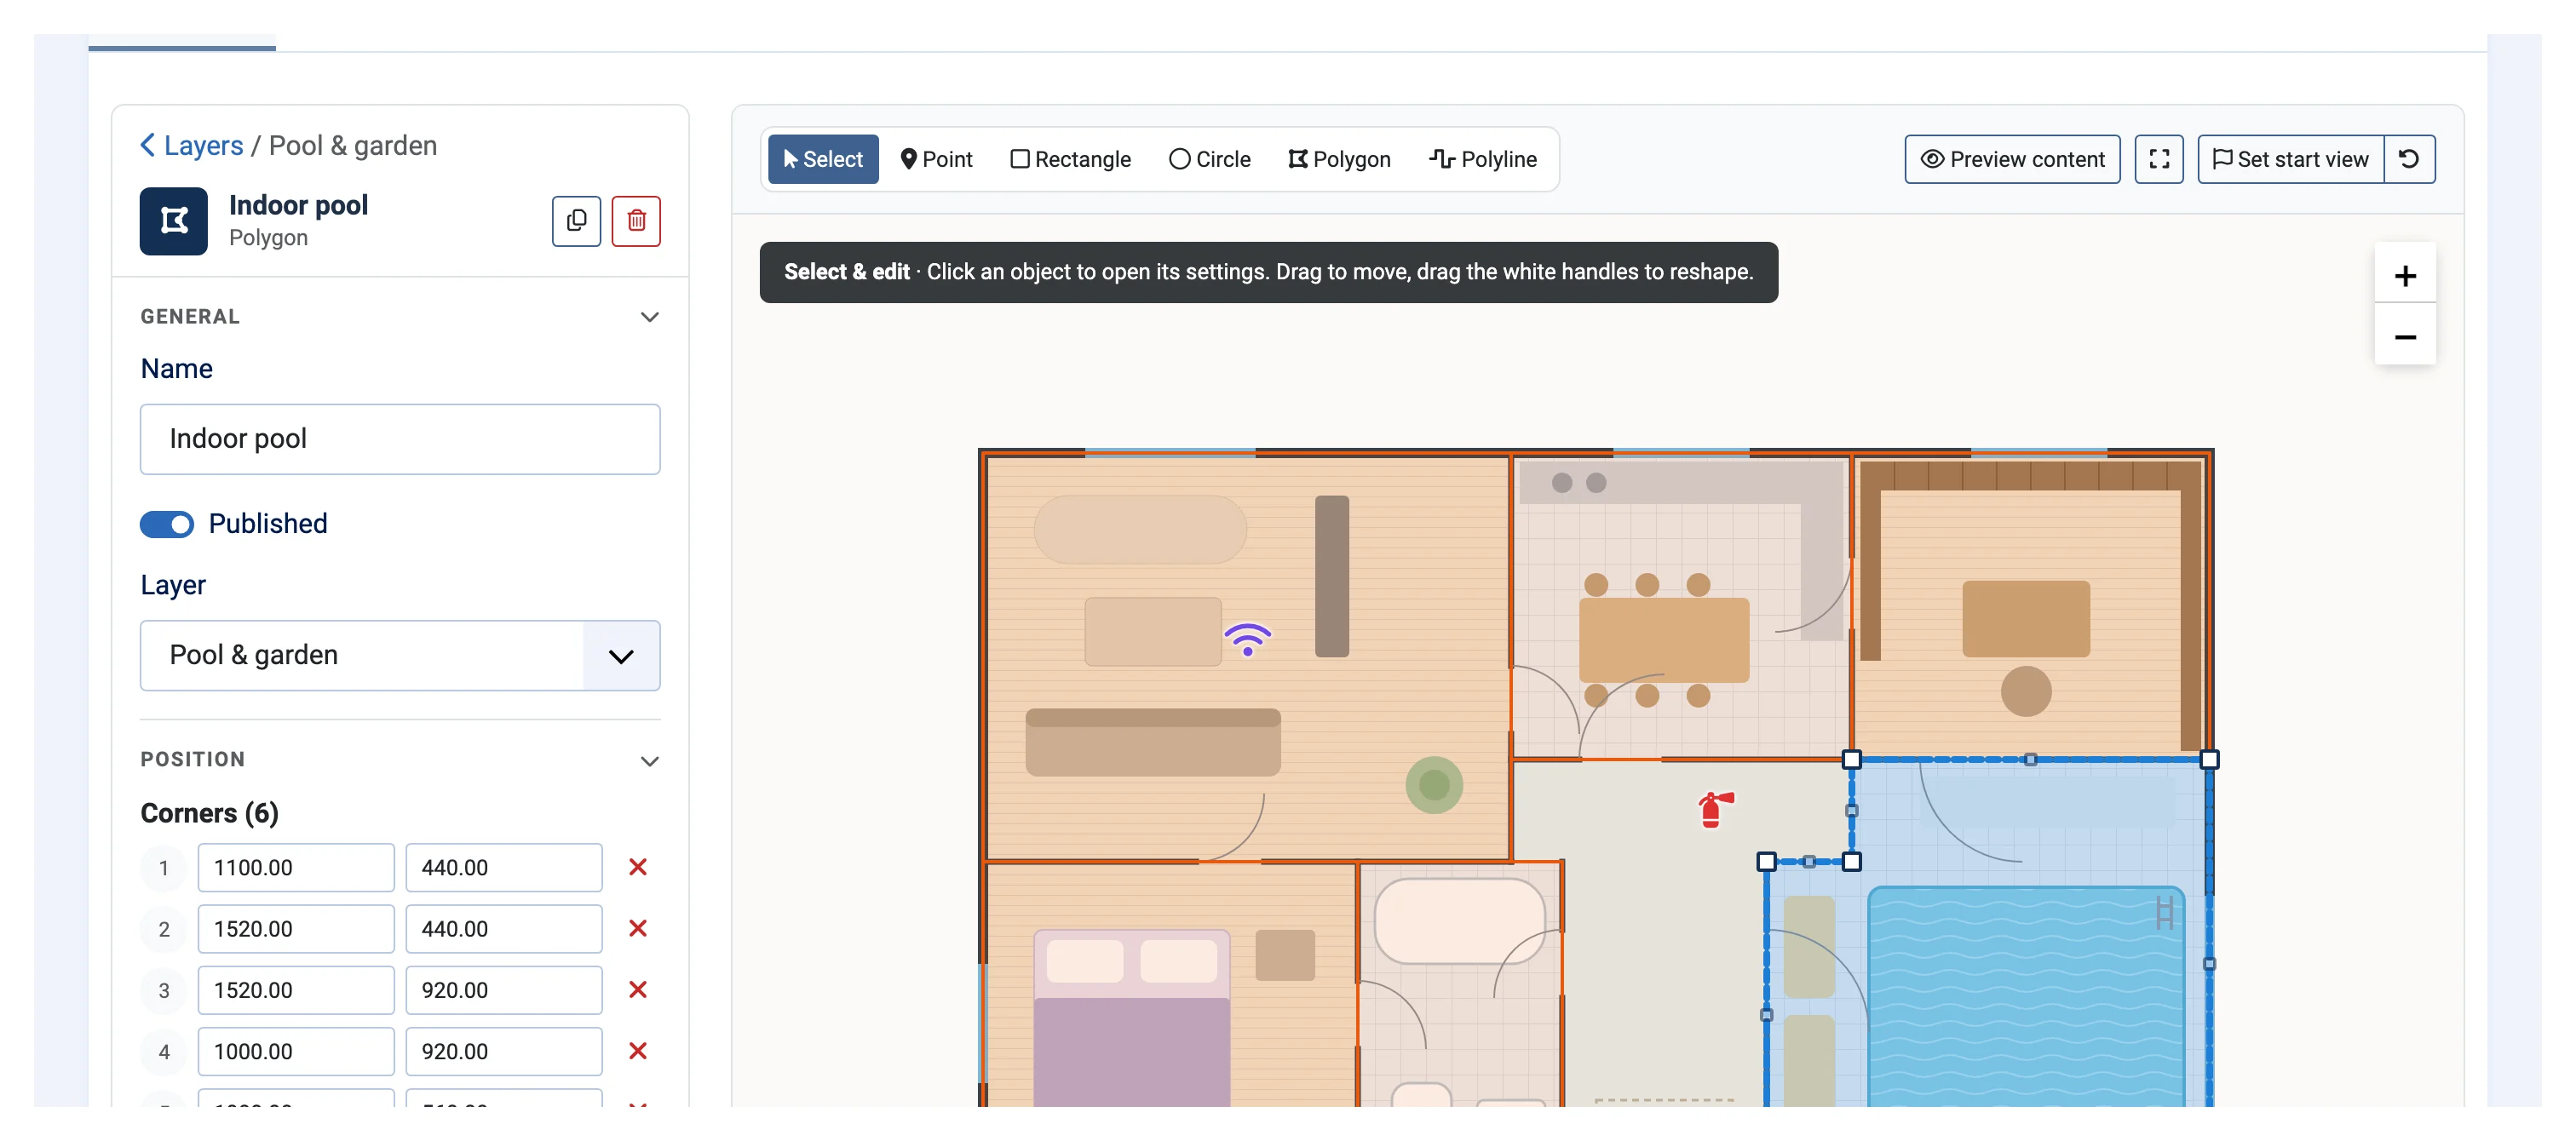
After drawing you pick the layer, and 1the object's settings open on the left while 2the object is selected on the map. With Select you drag an object to move it and its white handles to reshape it, or type exact values in Position (paste "38.7139, -9.1335" into Latitude to fill both boxes). You can also duplicate, delete (Delete key), reorder objects inside a layer and move them to another layer.
Style, content and interaction
Style
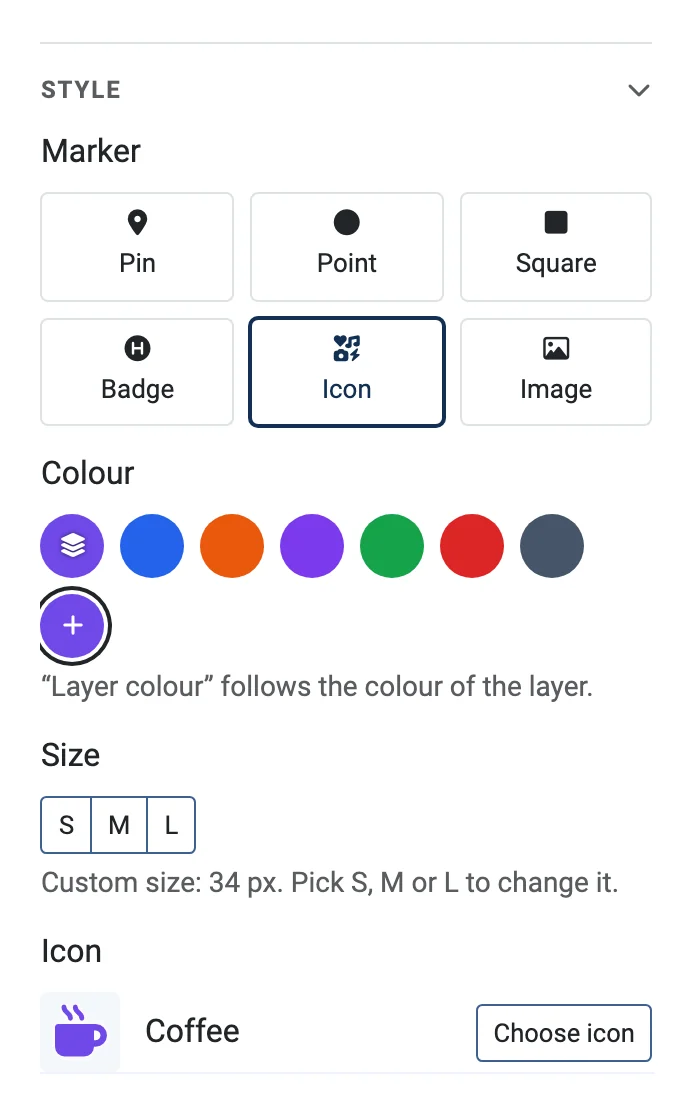
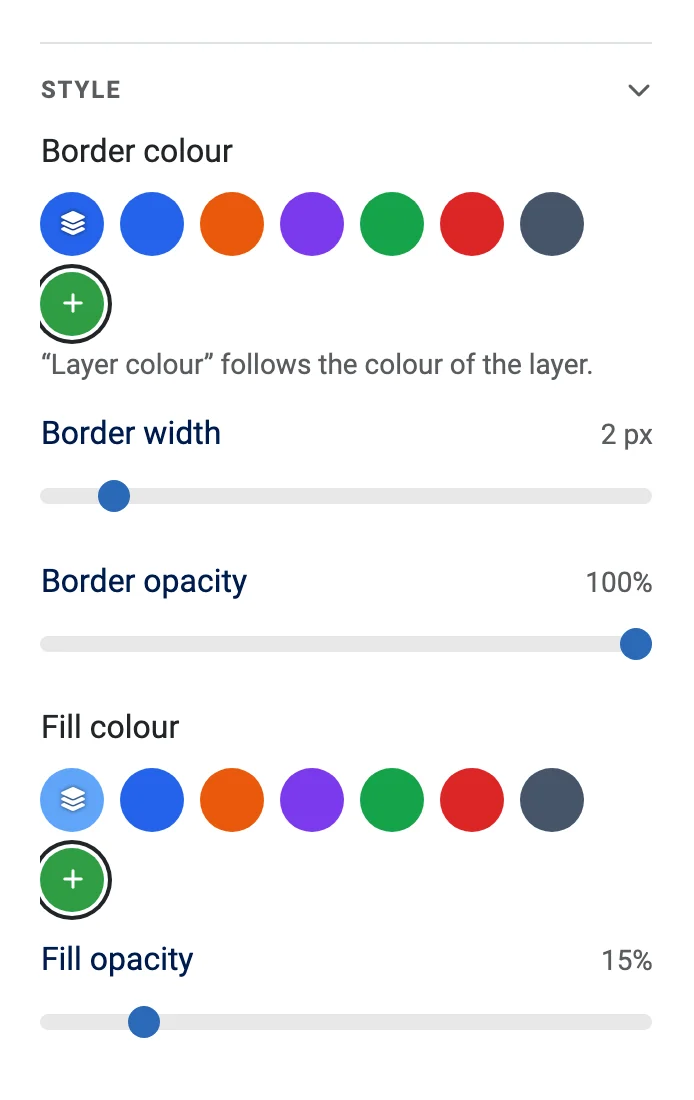
A point is a Pin, Point, Square, Badge (1 or 2 letters or digits), Icon (search the Font Awesome icons of your site, for example coffee, bus or parking) or Image (a picture from the Media Manager). Set its Colour ("Layer colour" follows the layer) and Size (S, M, L or a custom size). Lines have width, opacity and a solid, dashed or dotted line style; polygons, circles and rectangles also have a fill colour and fill opacity.
Content
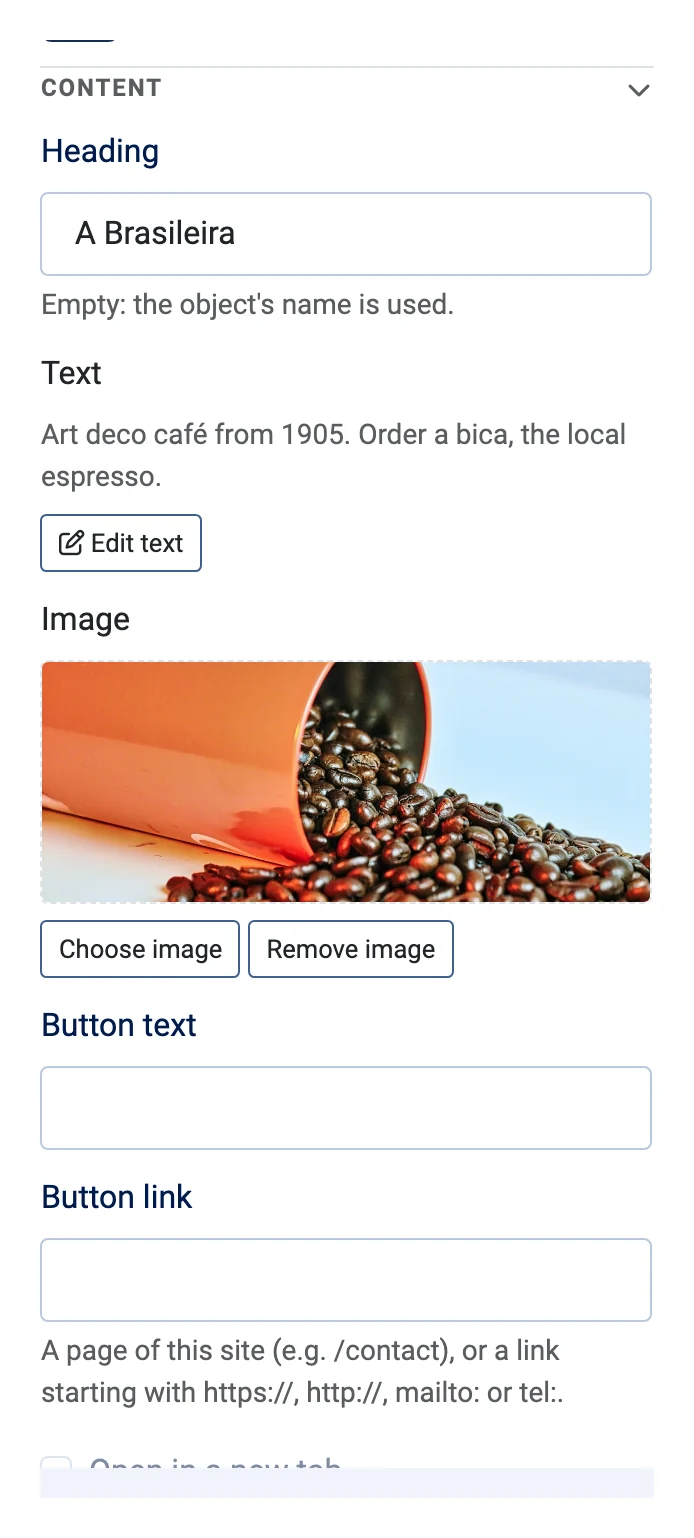
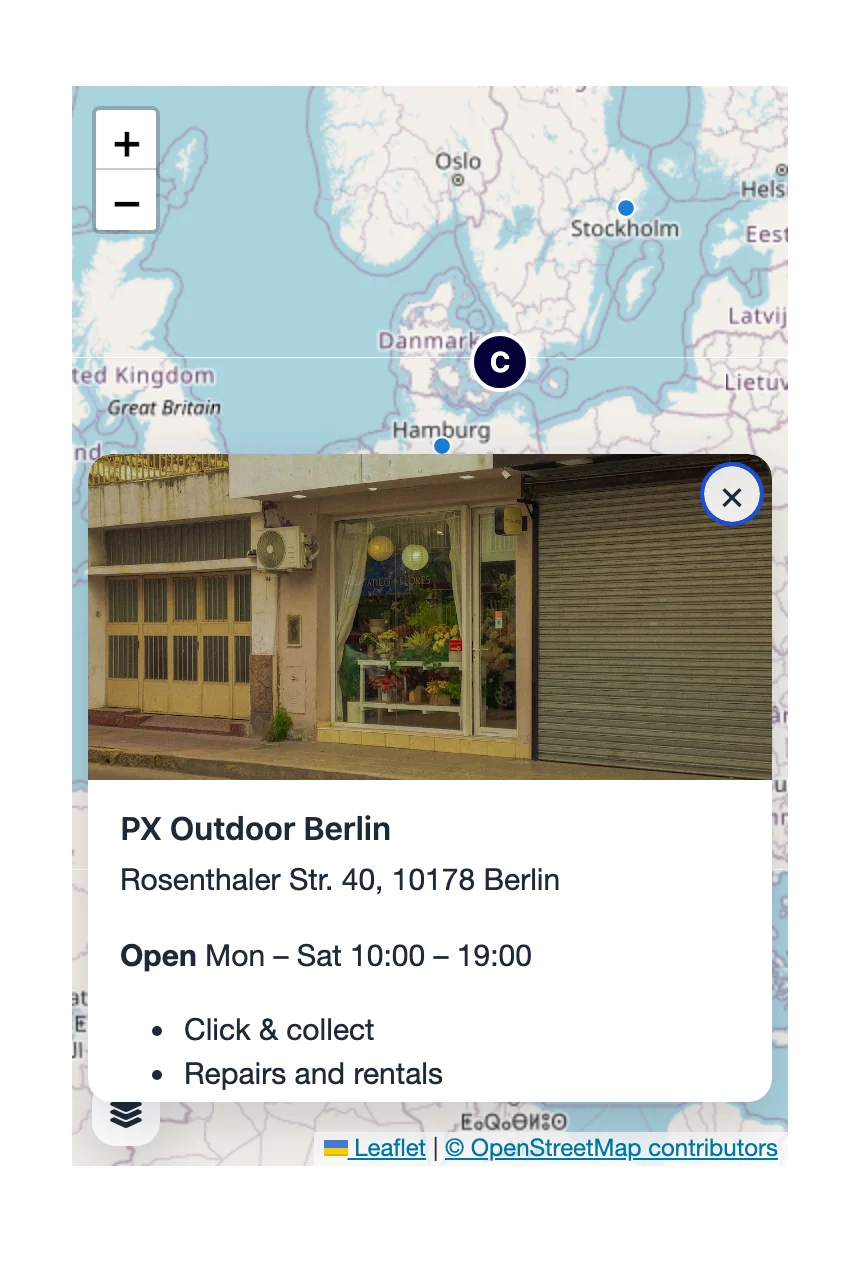
What visitors see when they open an object: a Heading (empty uses the object's name), Text written in Joomla's editor (Edit text), an Image from the Media Manager and a Button with its link (a page of your site, or https://, mailto: or tel:). An object without content is shown but cannot be opened.
Interaction
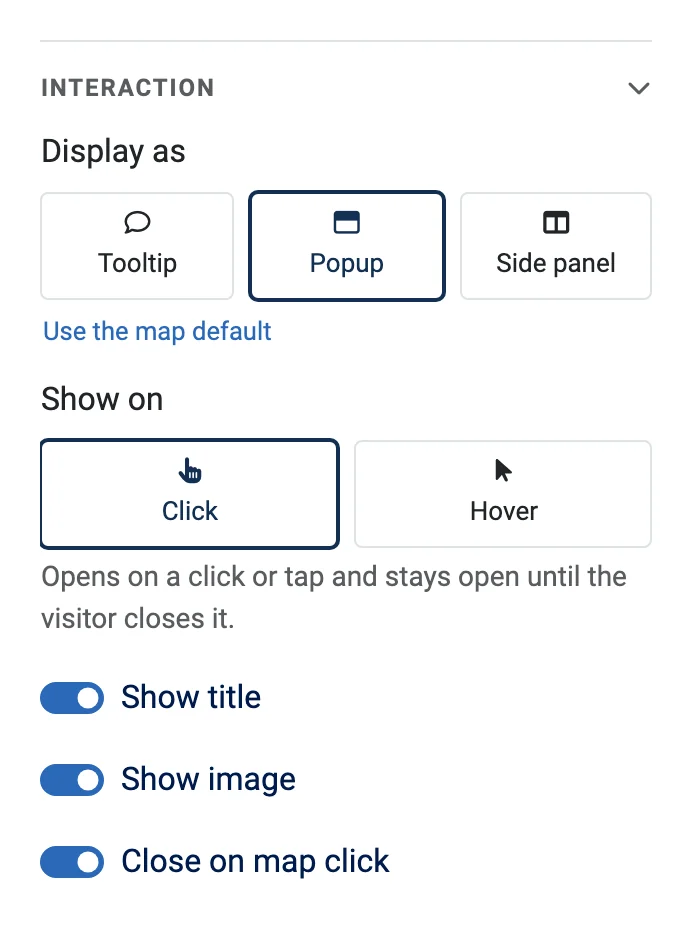
Display as chooses a Tooltip (a small label), a Popup (a card next to the object) or a Side panel (a card at the side of the map). Show on is Click or Hover (a tap on touch screens). Switch the title and the image on or off, and choose whether a click on the map closes the box. On small maps, popups and side panels open as a sheet at the bottom. Preview content in the toolbar shows the selected object's box as visitors see it.
Zoom ranges
A layer or an object can show only between two zoom levels, so details such as water taps or bus stops appear once the visitor has zoomed in. Fill From zoom and To zoom in the Zoom range section of the layer or object settings. In the editor the layer gets 1a badge such as Zoom 14–17, and the layer control on the site lists it dimmed with "Visible at zoom 14–17" until the visitor zooms in.
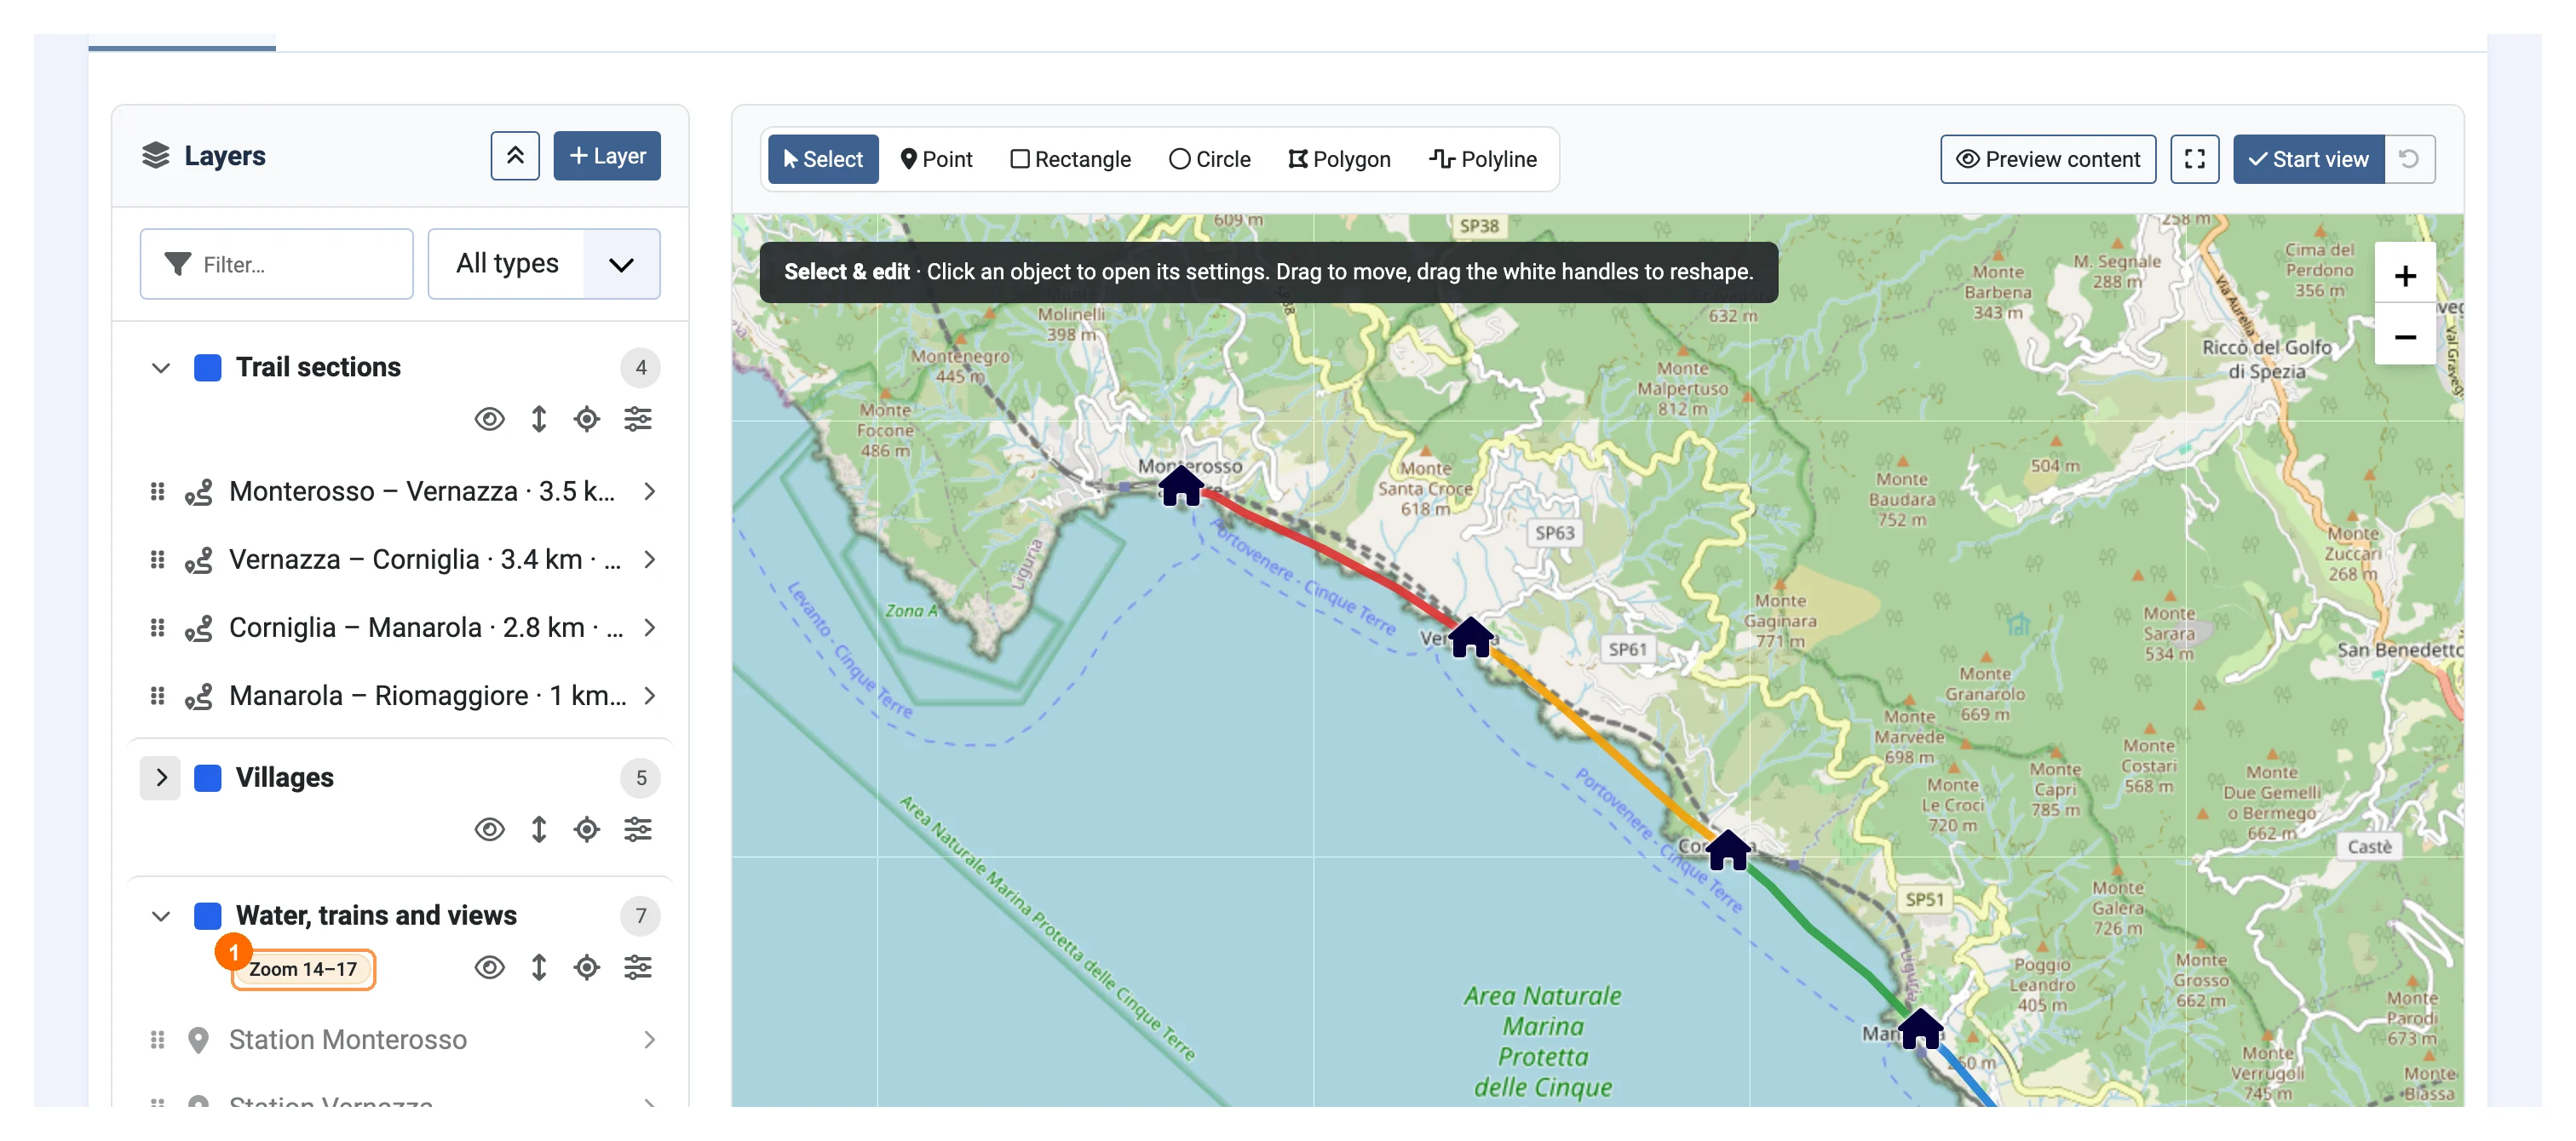
Image maps
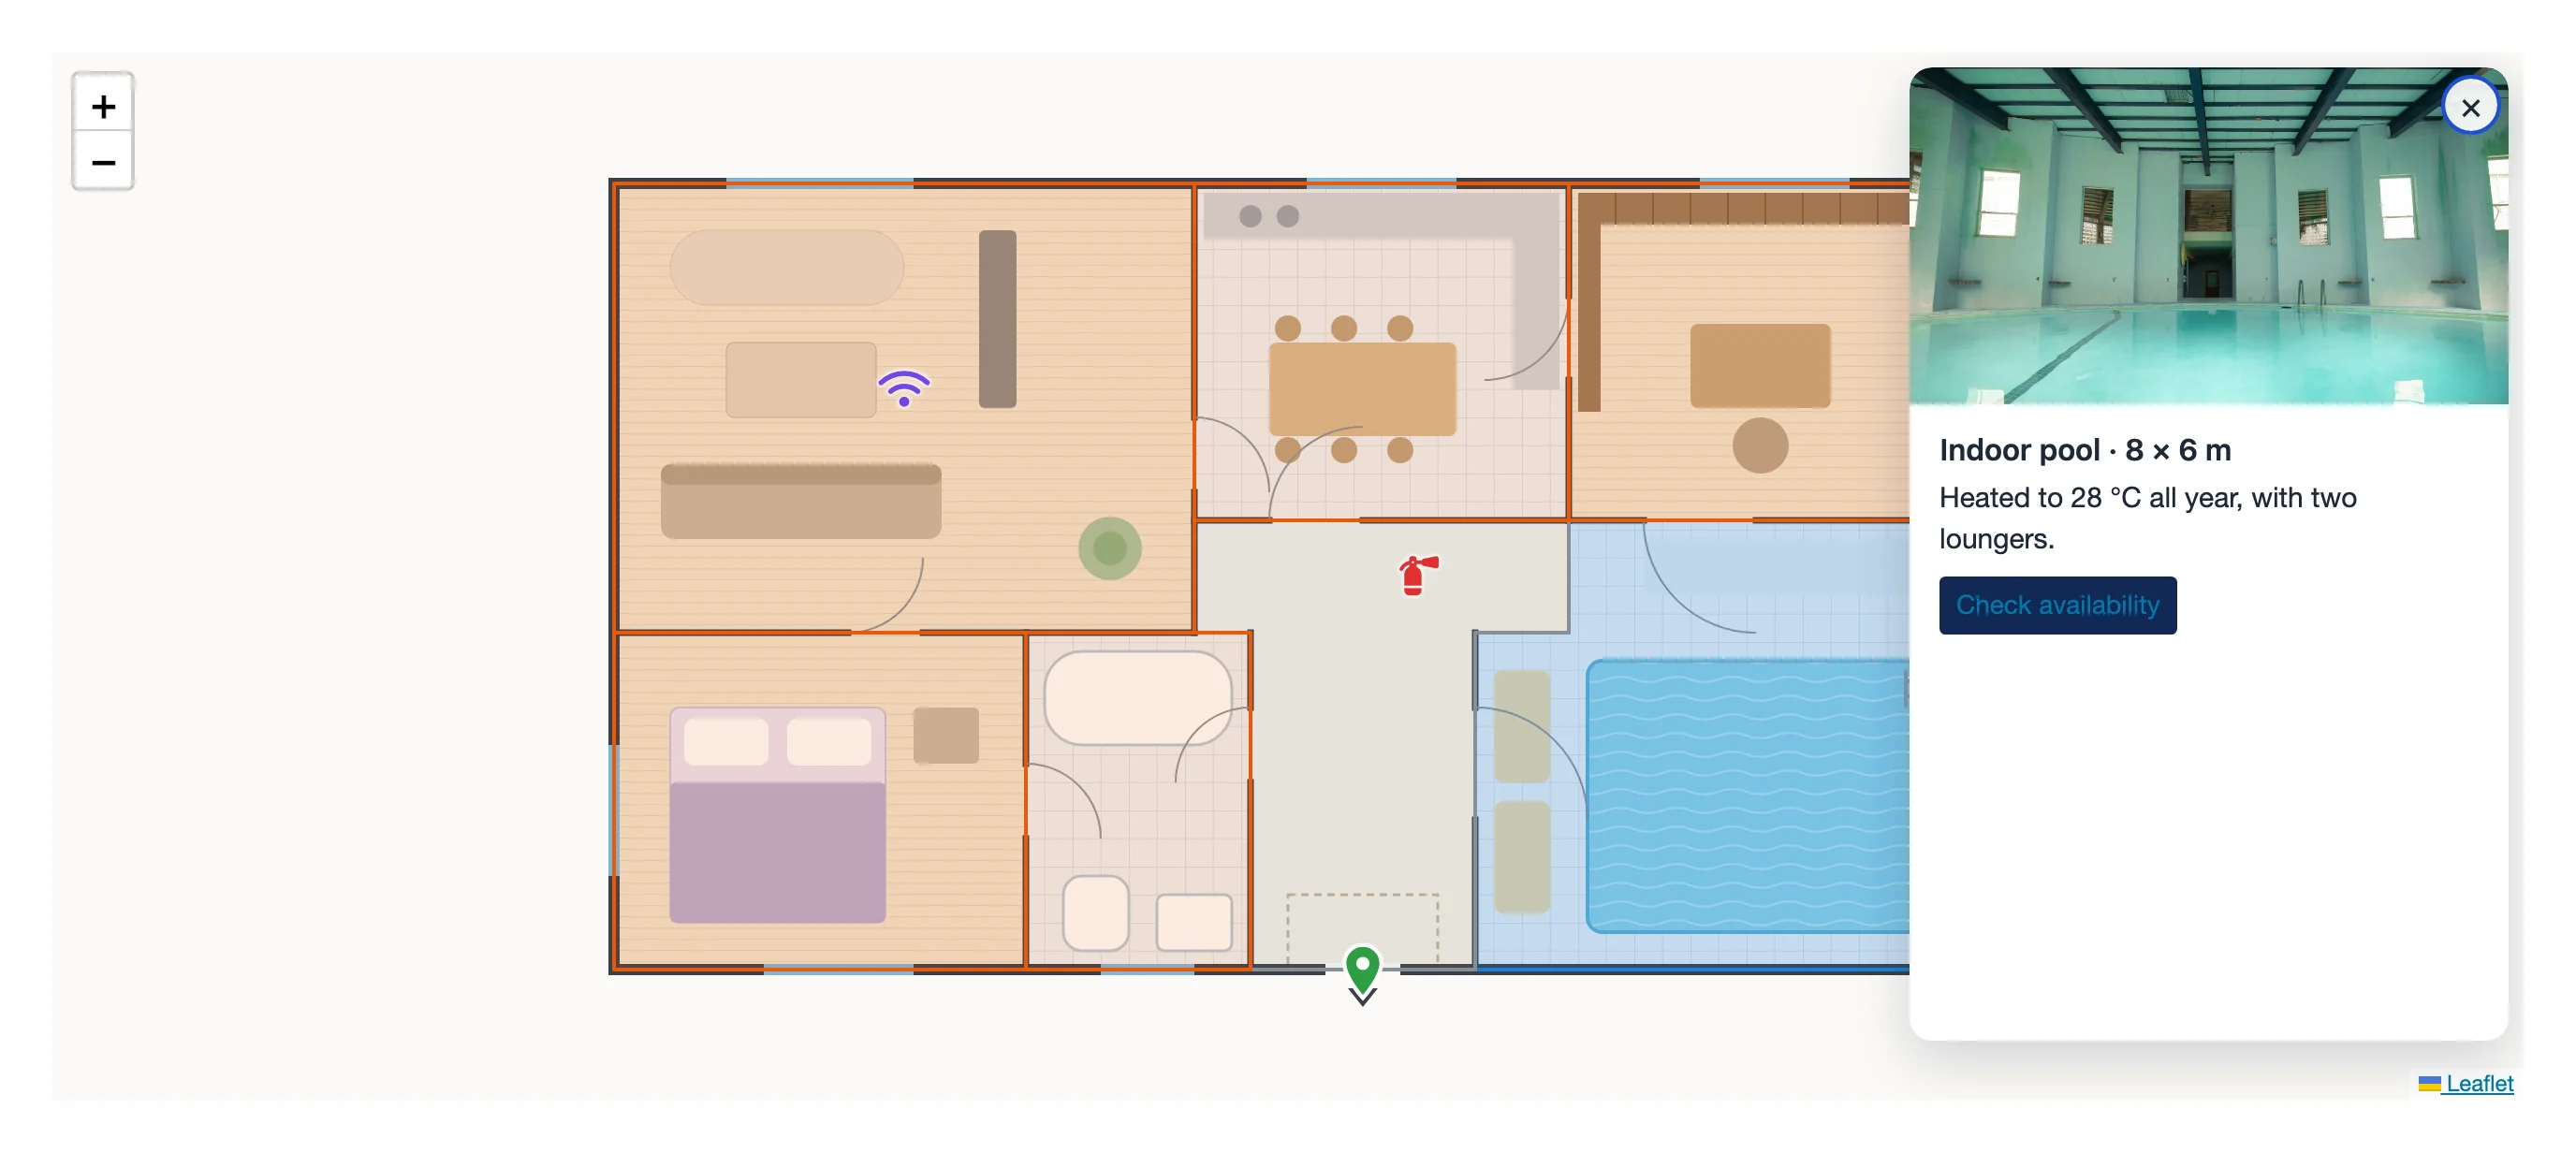
An image map shows your own picture instead of a street map: a floor plan, a drawing, a campus or festival map. Choose Image map in the New map window, type a title and pick the Base image on the Details tab (a JPG, PNG or WebP file in the images folder). After saving, the form shows its size, for example "1600 × 1000 px · PNG · 100 % at zoom 3". A new image map can only be published once it has a base image.
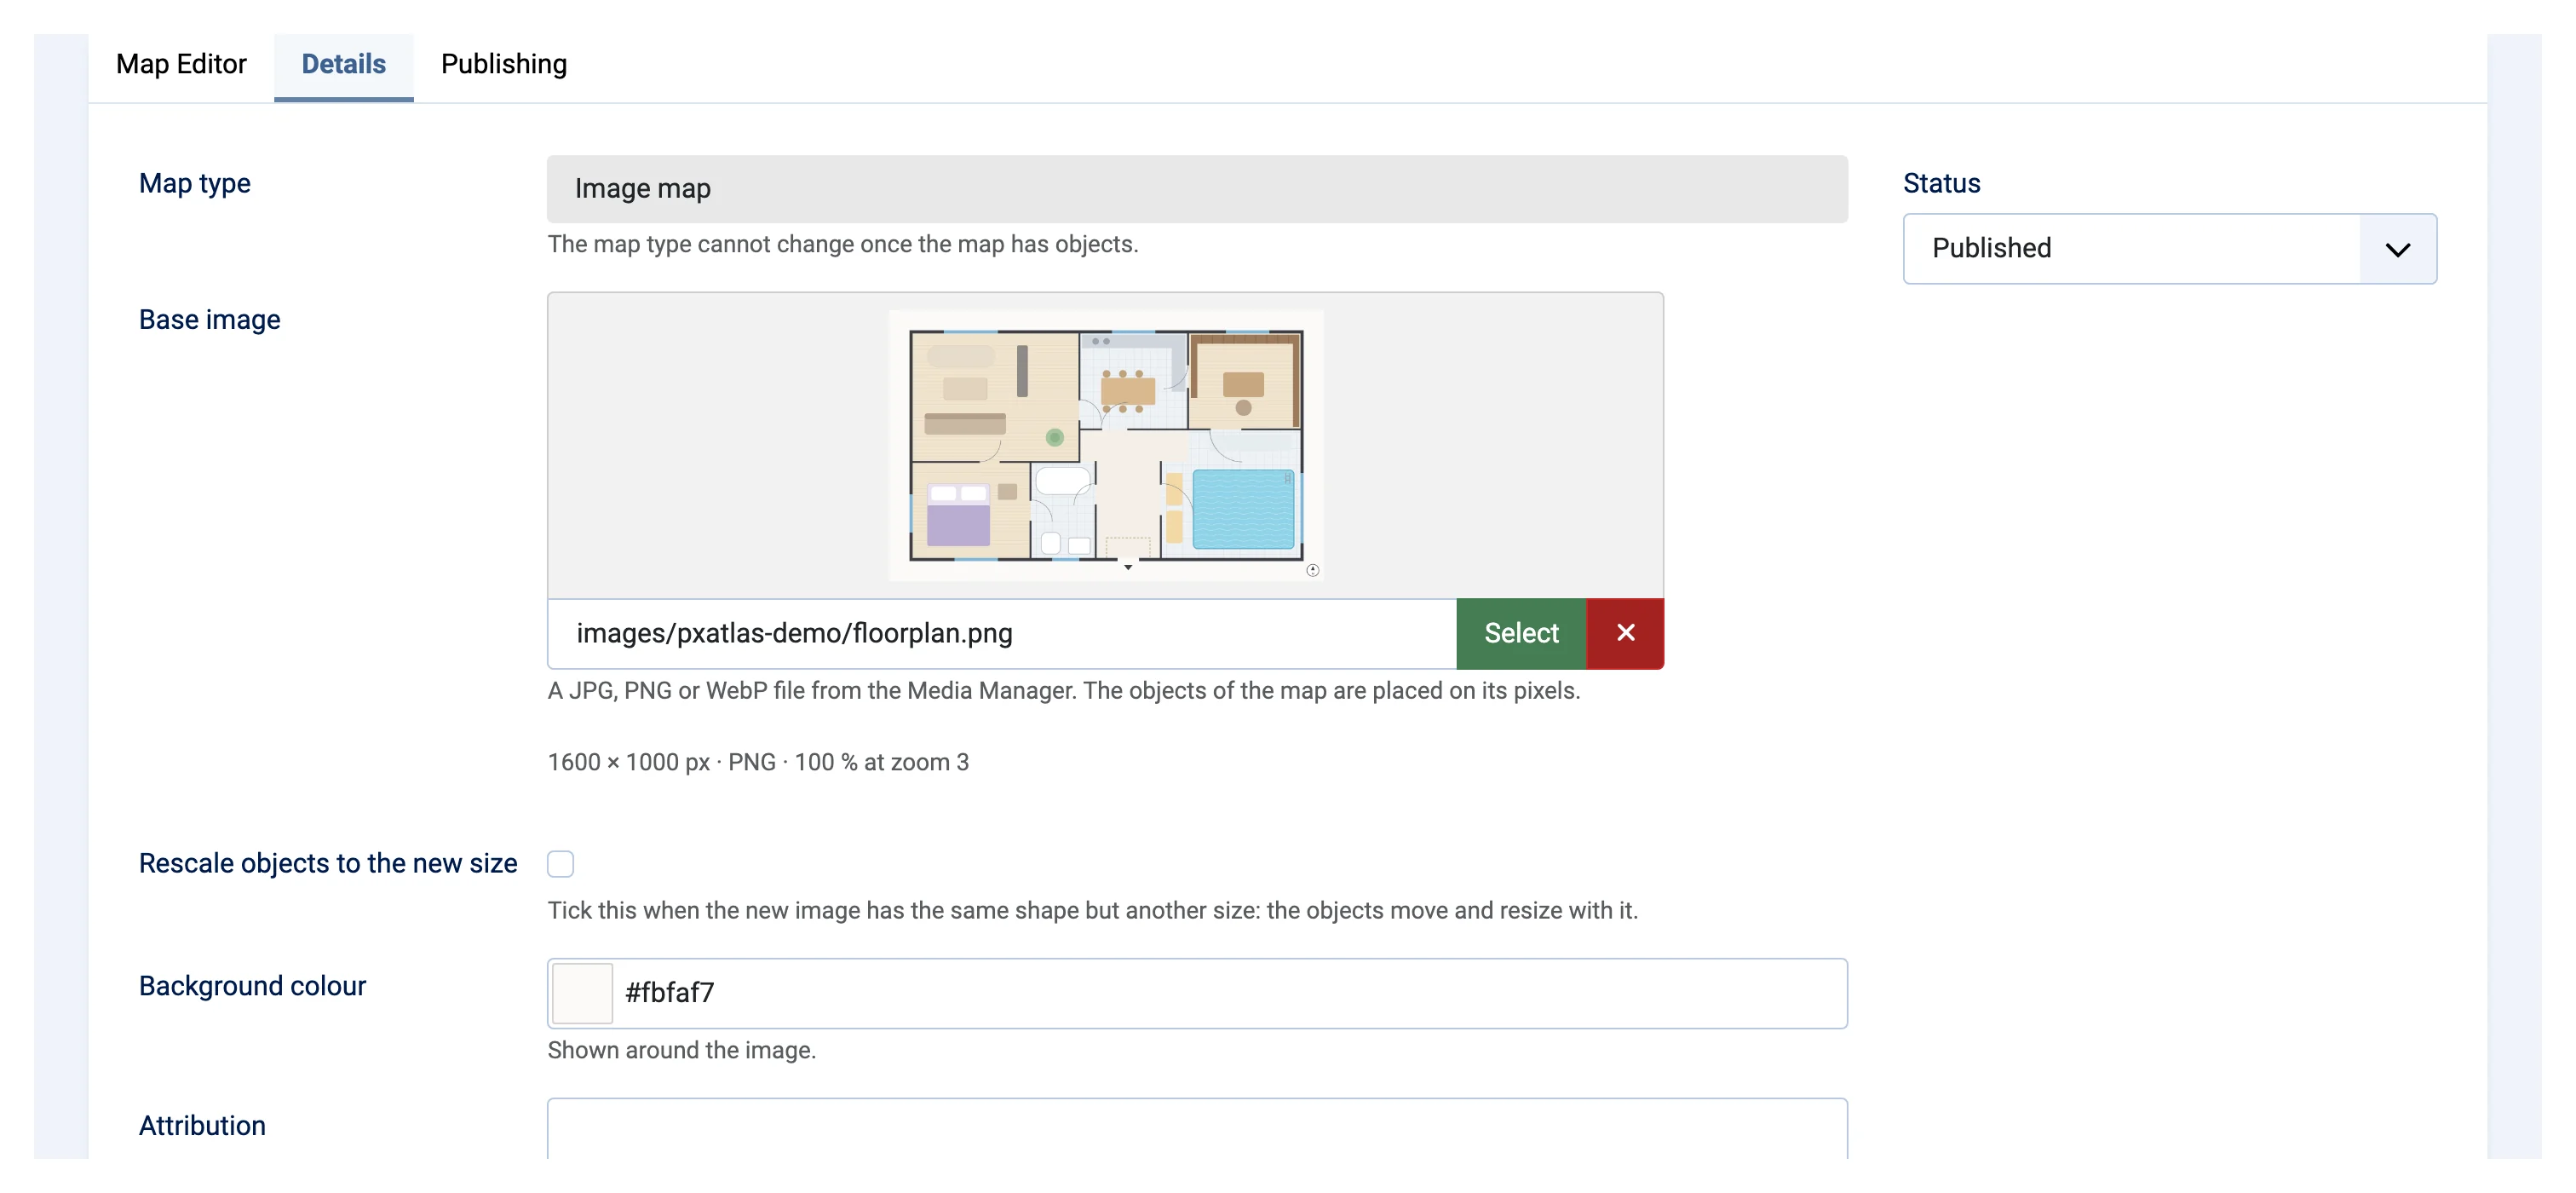
You draw exactly as on a geographic map, but positions are pixels counted from the top-left corner of the picture (X, Y, Radius (px)…), and objects stay inside the picture. The image map has its own zoom scale; set the Initial view, start, minimum and maximum zoom on the Details tab or with Set start view. Background colour fills the space around the picture and Attribution adds a credit in the corner.
To change the picture, select another one and save. A picture of the same size keeps everything in place; one of the same shape but another size can rescale the objects (tick Rescale objects to the new size); a picture of another shape needs a new map. Keep pictures reasonably small: very large images are loaded whole by the visitor's browser, and their hidden photo data (such as GPS) stays in the public file.
Map providers
The provider settings are in Components → PX Atlas → Options.
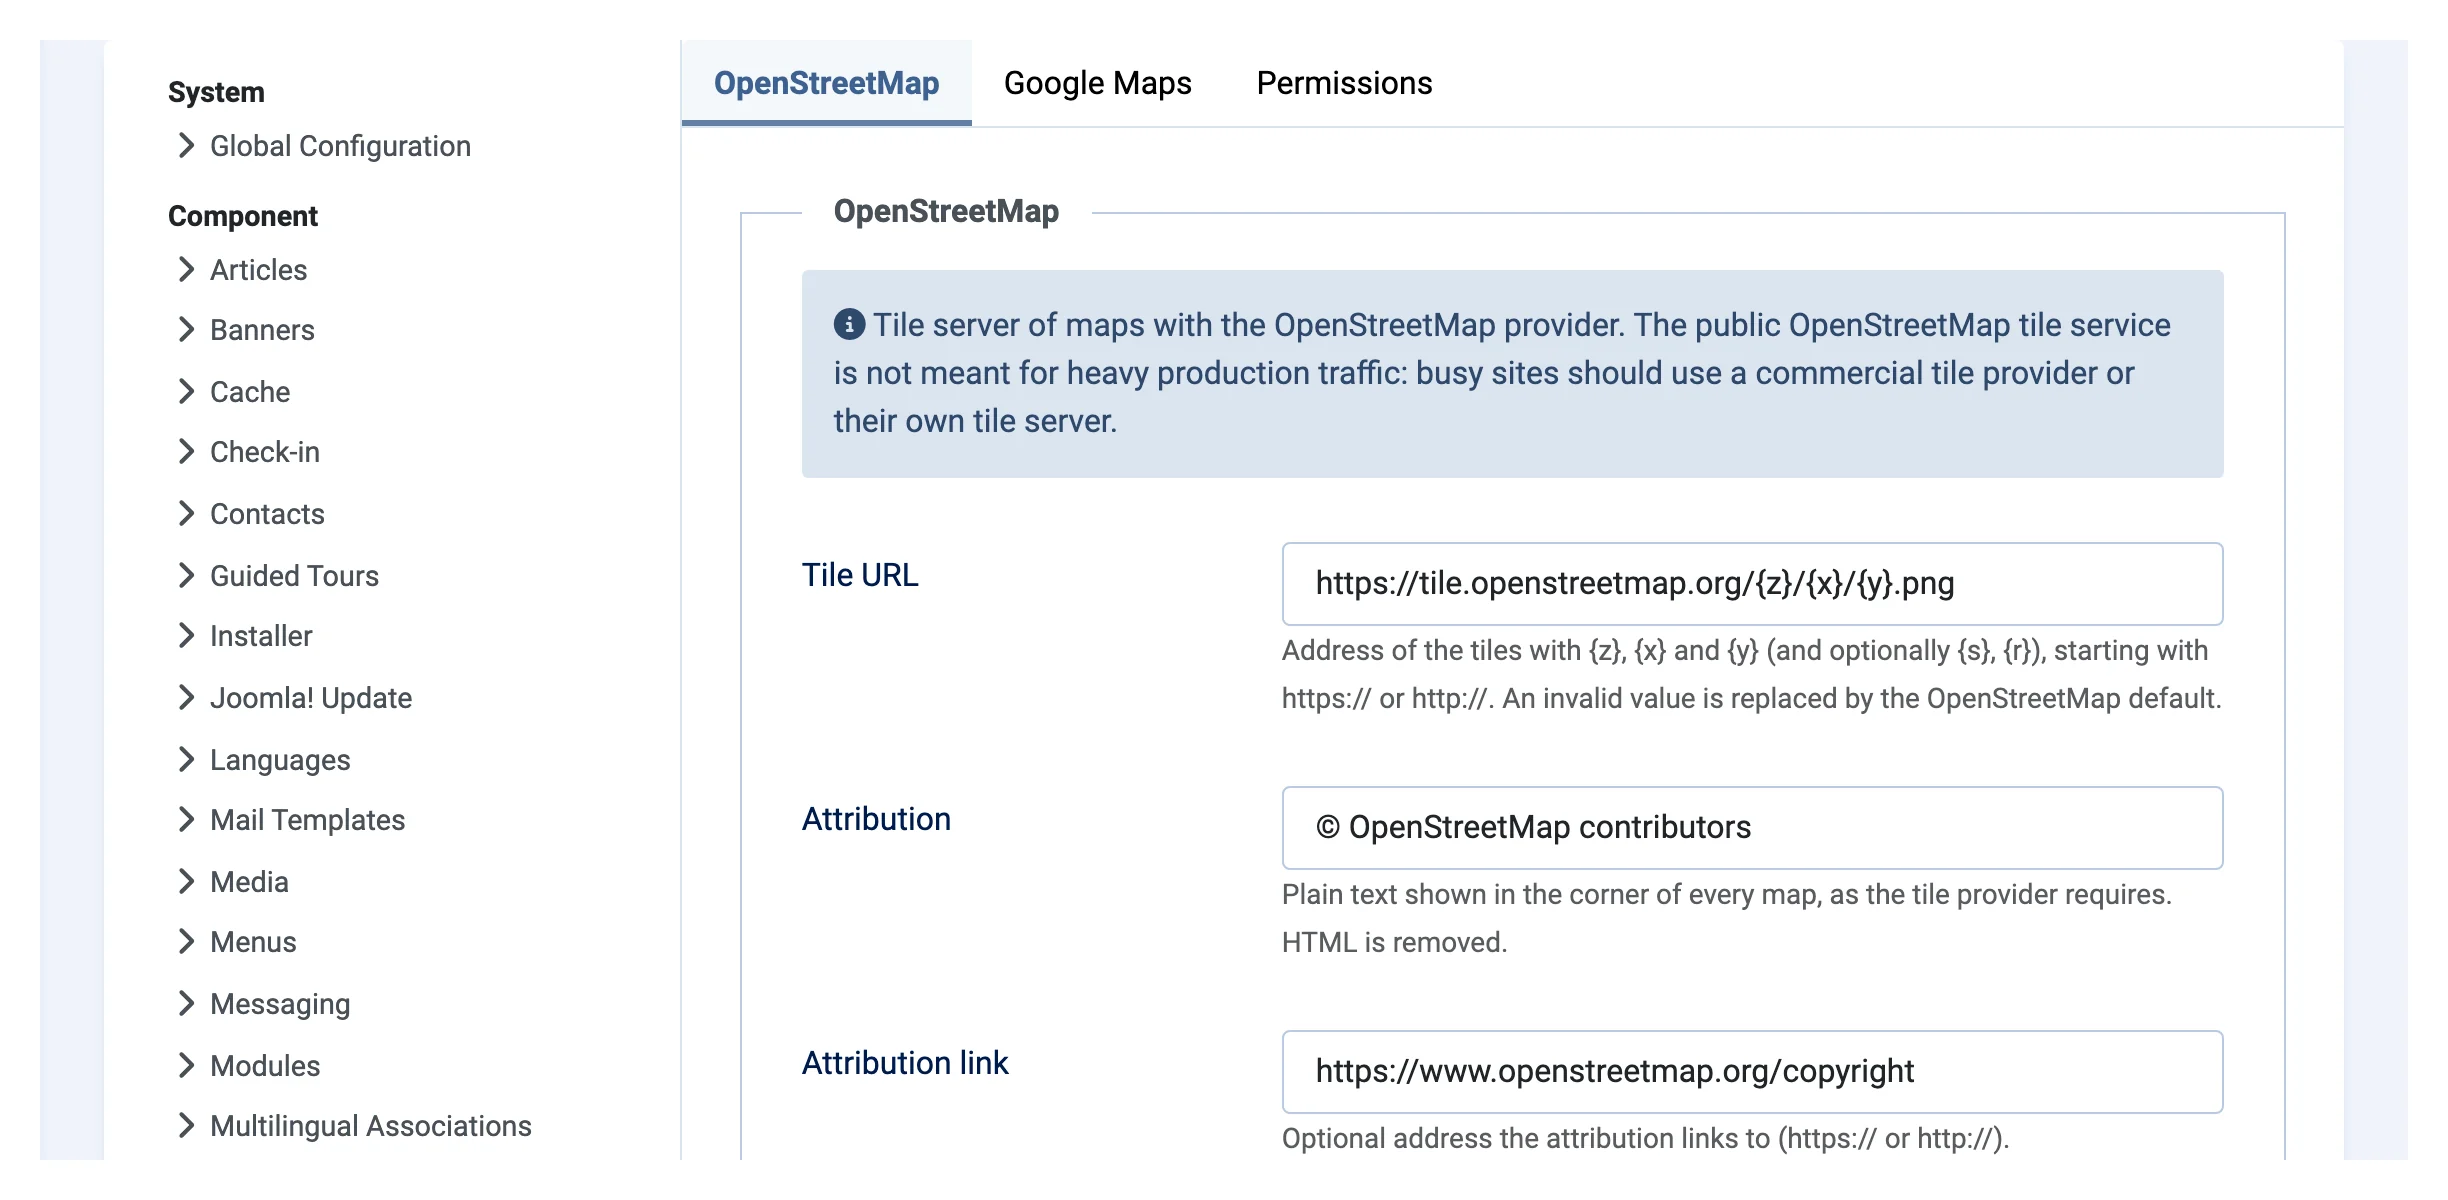
OpenStreetMap
Works without any setup. The public OpenStreetMap tile service is meant for light use (see its tile usage policy); for a busy site, enter the Tile URL, Attribution, Attribution link and Maximum tile zoom of a commercial tile provider or your own tile server on the OpenStreetMap tab. A value that is not valid falls back to the OpenStreetMap default, and the attribution is always shown.
Google Maps
- In the Google Cloud console, create or choose a project and enable the Maps JavaScript API.
- Create an API key and restrict it to HTTP referrers (your site's address) and to the Maps JavaScript API. The key is public, so these restrictions protect it.
- Paste it into Browser API Key on the Google Maps tab of the Options and save.
Without a key, Google shows its maps in development mode. If Google refuses the key or does not answer, the map says "The map could not be loaded." and the editor points to the key. Google bills your own account; PX Atlas only passes the key on.
Showing a map on the site
- Go to Content → Site Modules → New and choose PX Atlas.
- Pick the 1Map. 2Width, Height and Layer control can override the map's own settings for this module.
- Choose a Position, the Access level (it decides who sees the map) and the pages in Menu Assignment, then save.
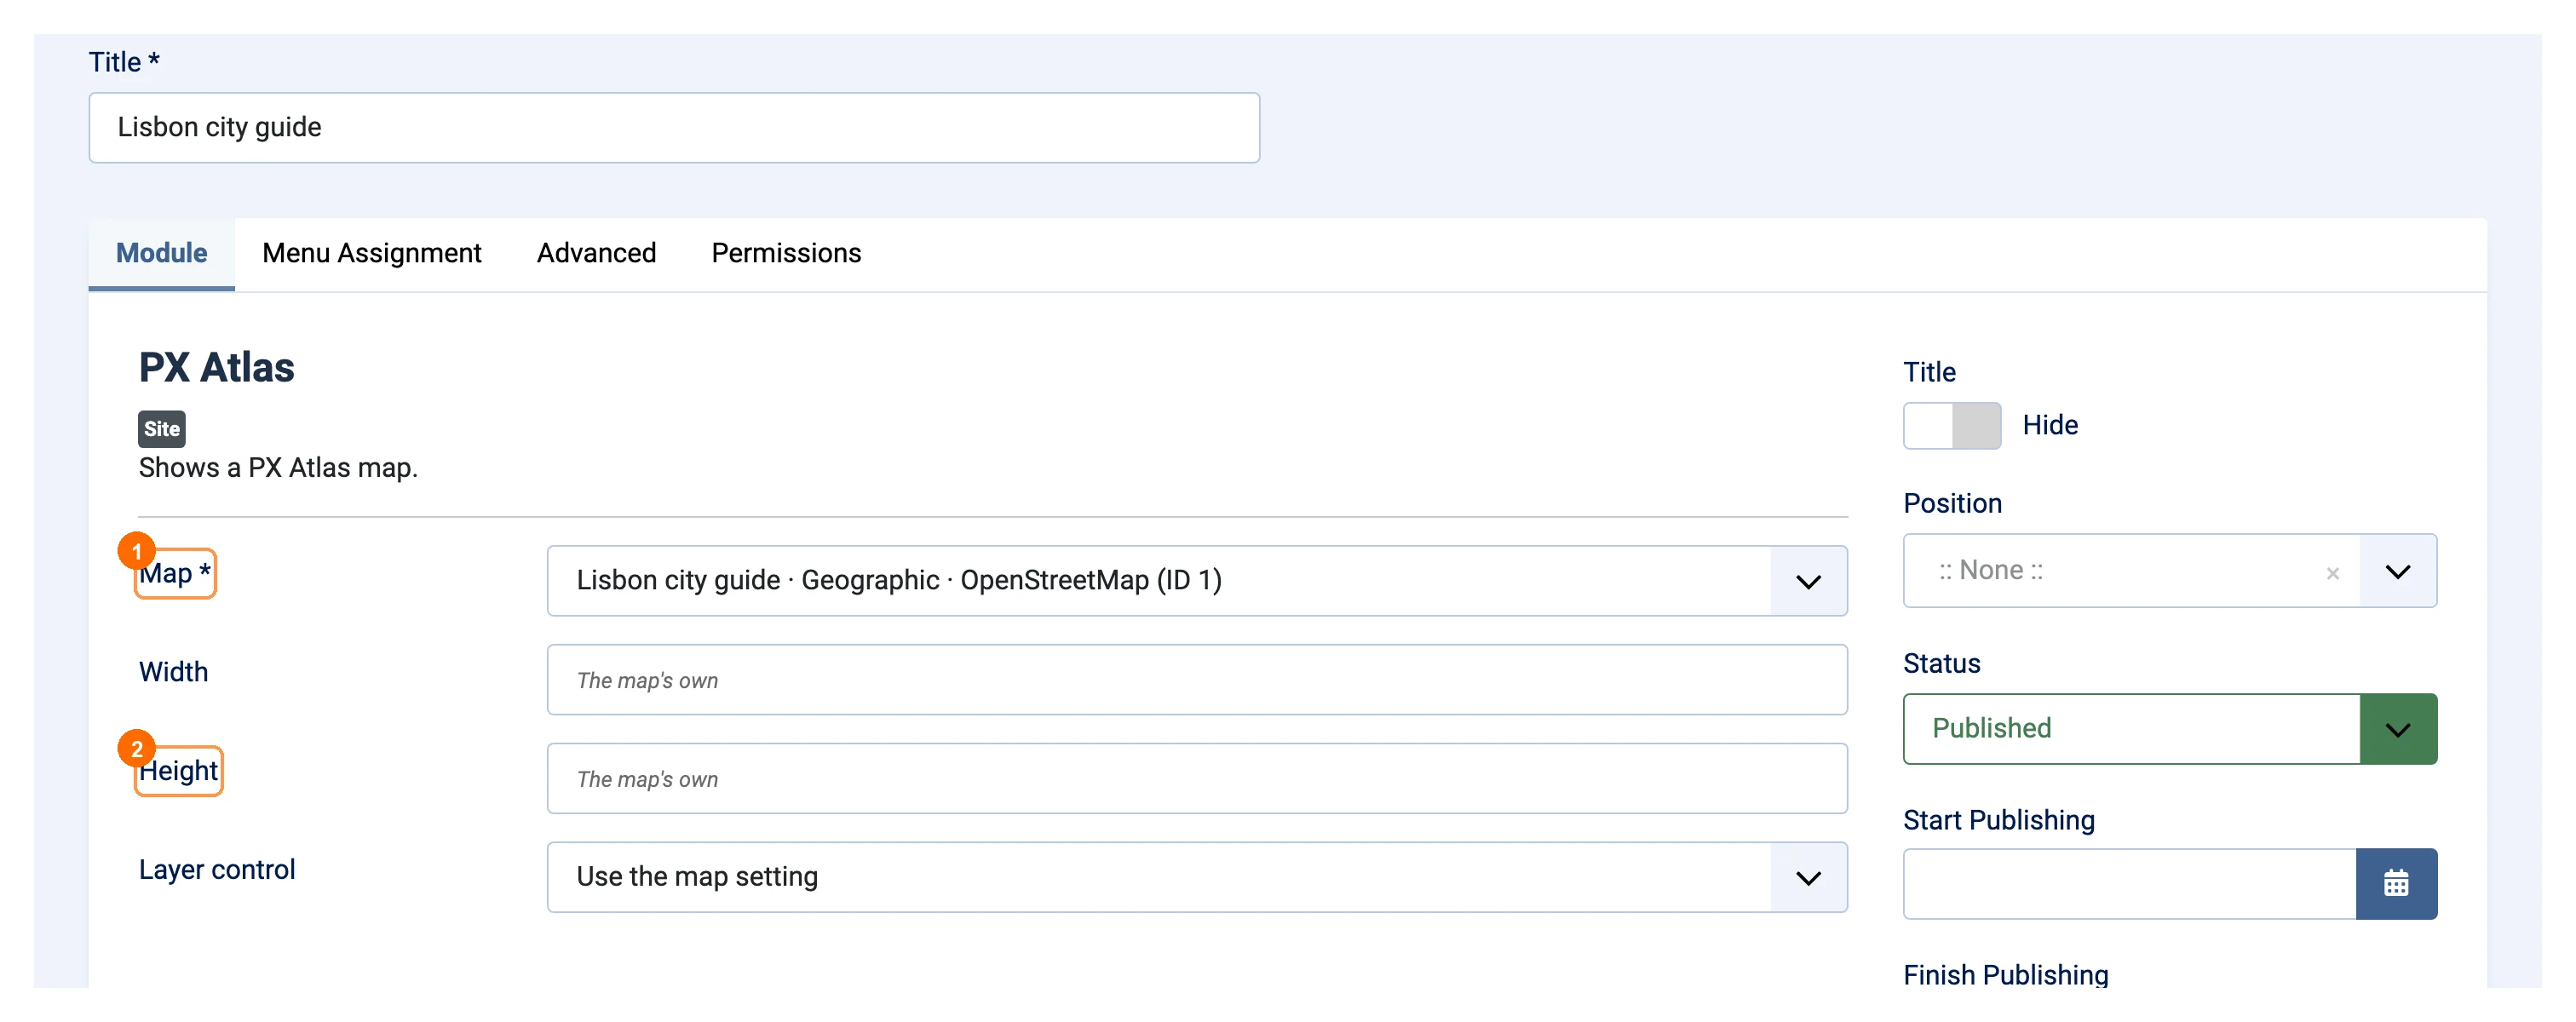
To put a map inside an article, create the module without a position and type {loadmoduleid N} in the article, where N is the module ID. Several maps can share one page, and one map can be used by several modules. A map that is missing, unpublished or trashed shows nothing at all.
What visitors can do
- Zoom with the buttons, a double-click, or Ctrl + scroll; on touch screens, move and zoom the map with two fingers (one finger scrolls the page).
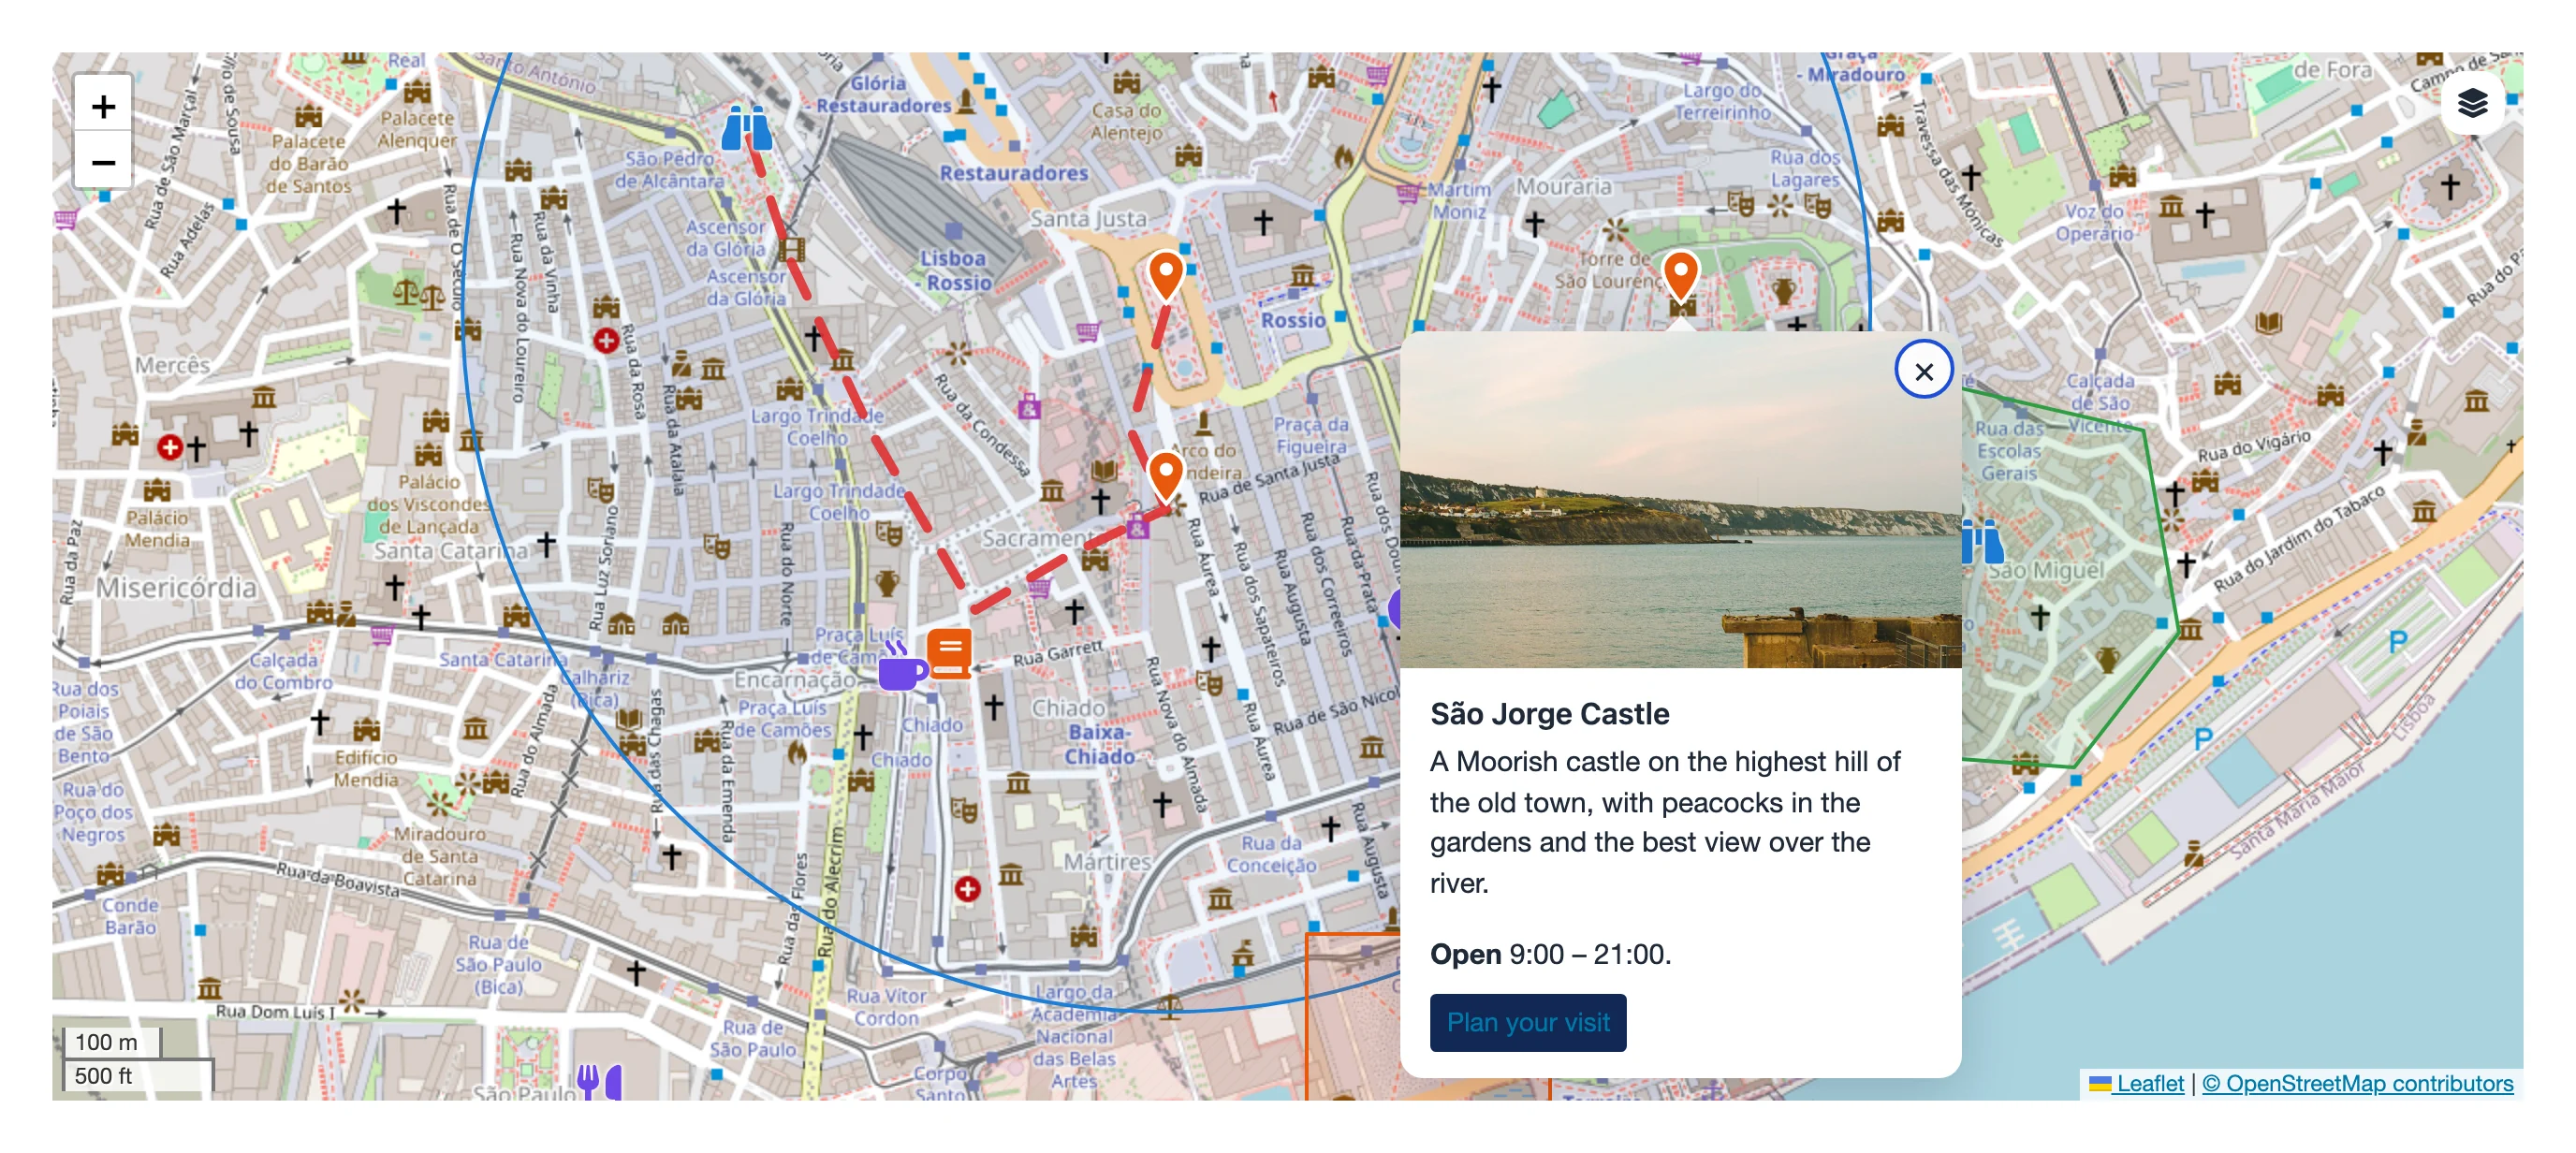
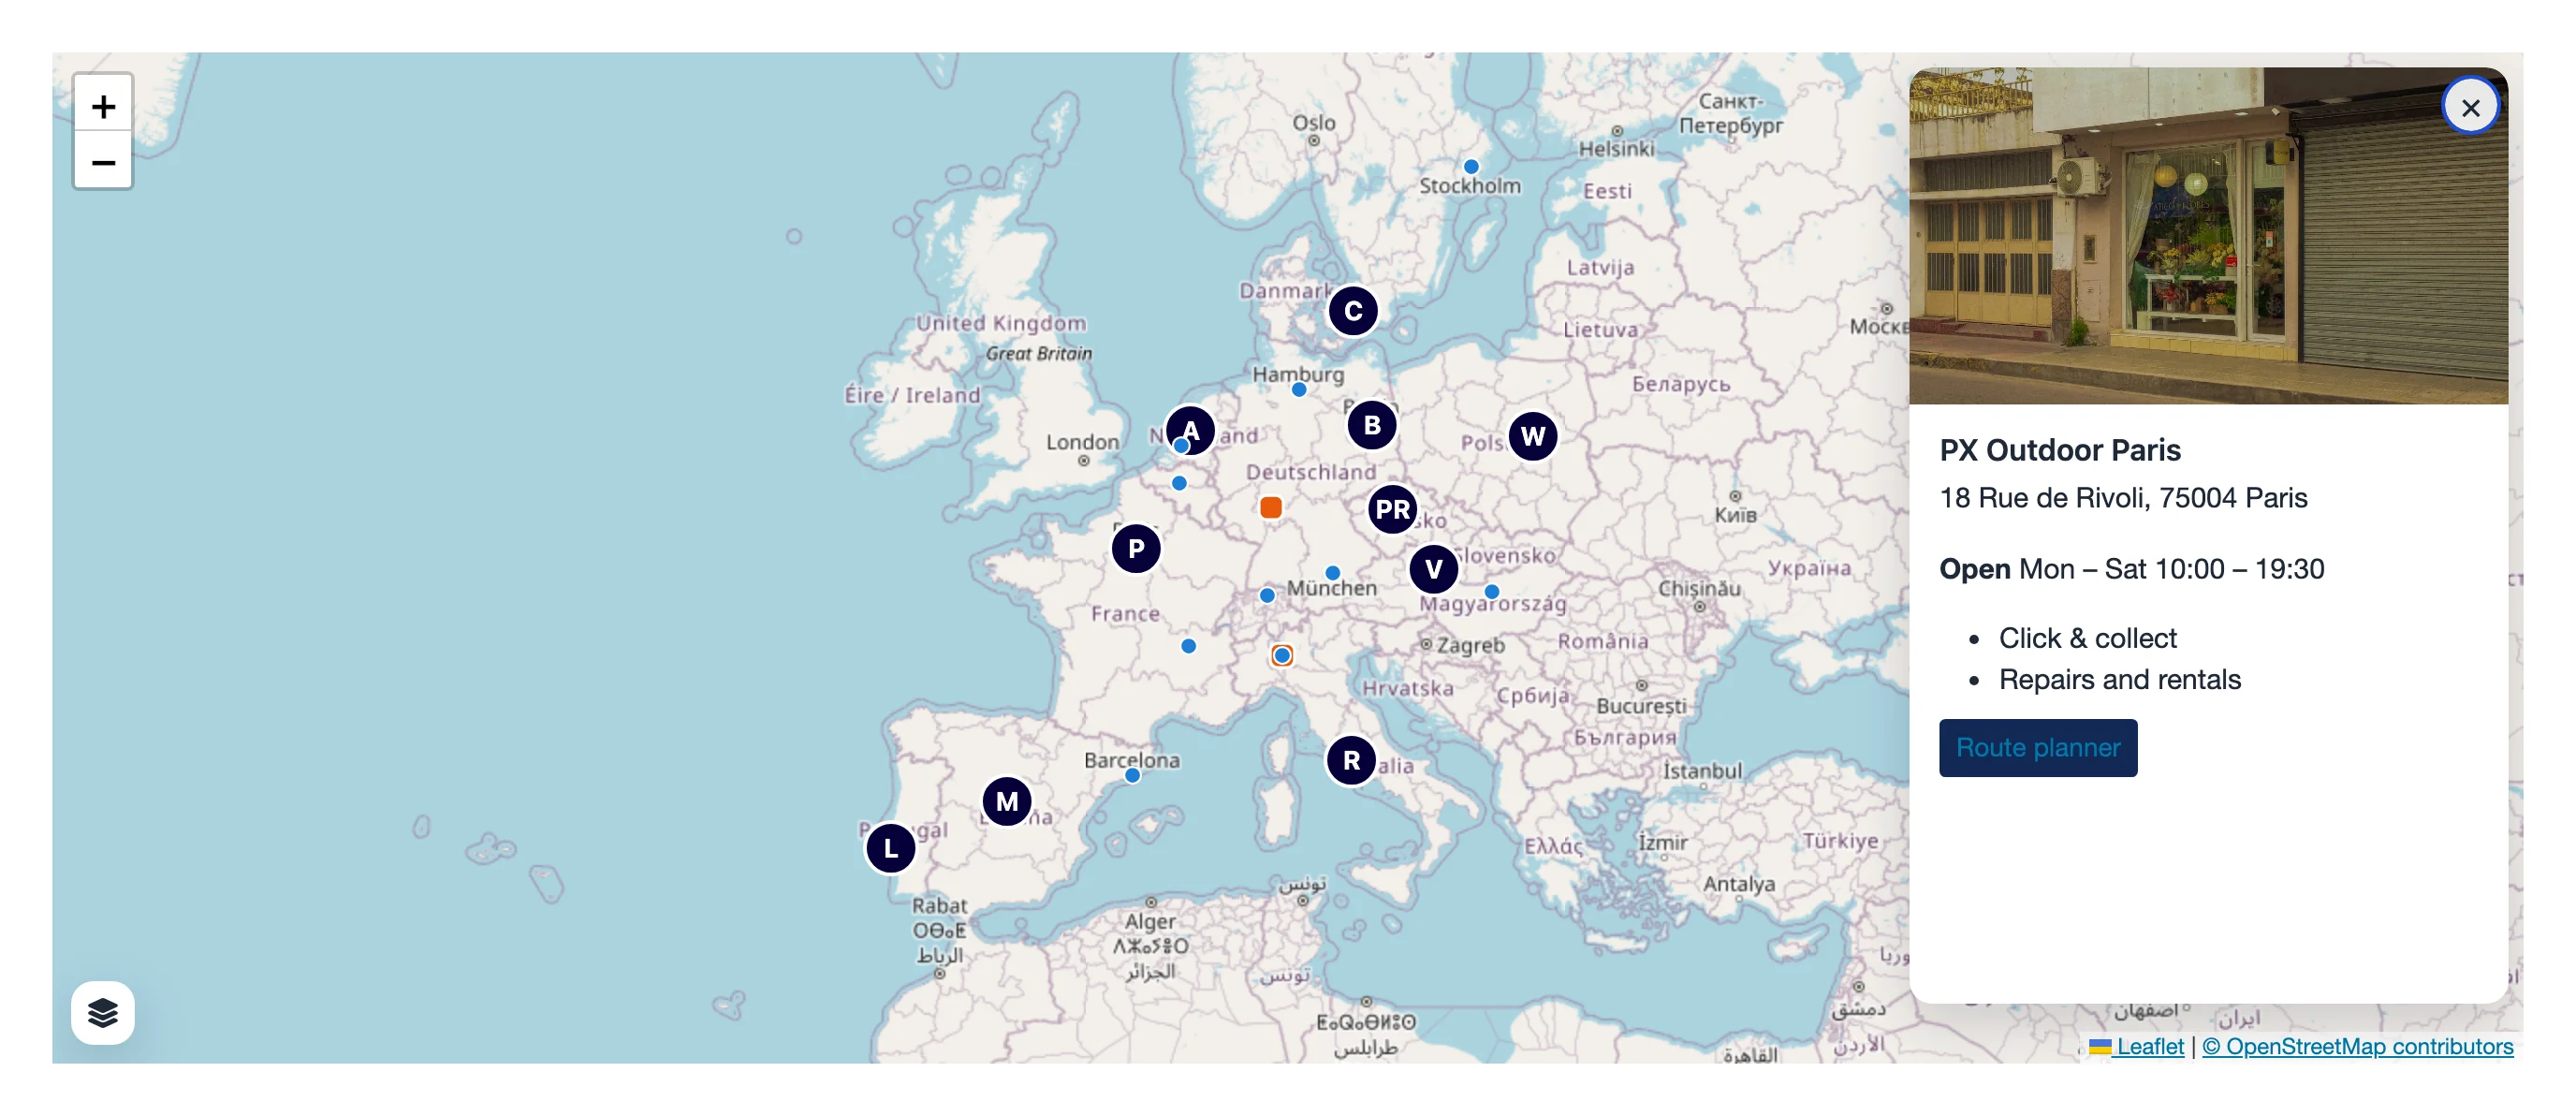
- Click, tap or hover on objects to open their tooltip, popup or side panel, or reach them with Tab and open them with Enter.
- Switch layers on and off with the layer control.
Permissions
PX Atlas uses Joomla's permissions (Options → Permissions) for the whole component: Access Administration Interface, Create, Edit, Edit Own (maps you created), Edit State, Delete and Configure Options. The editor needs Edit, or Edit Own on your own map. Every save is checked on the server with Joomla's form token. Maps have no access level of their own: the module's Access decides who sees them.
Command line and AI agents
The plugin Console - PX Atlas adds three commands to Joomla's command line:
php cli/joomla.php pxatlas:map:export <id> [--output=map.json]writes a map as one JSON file.php cli/joomla.php pxatlas:map:import map.json --user=<username> [--map=<id>] [--dry-run]creates a map from such a file, or replaces the layers and objects of an existing map.php cli/joomla.php pxatlas:module:create --map=<id> --user=<username>makes a module for a map and prints the{loadmoduleid N}text.
Add --json for one JSON answer. The commands run with the rights of --user and the same checks as the editor. The file format, every value and complete examples are in administrator/components/com_pxatlas/AI.md, written for AI agents and scripts. The PX Atlas demo is built this way.
Good to know
- Limits: 200 layers and 5,000 objects per map, 2,000 points per line or polygon, 4 MB per save.
- Not a GIS: no address search, routing or live tracking. The editor has no undo.
- The map type is fixed once a map has objects; make a new map for the other type.
- Nothing shows? Check that the map, its layers and objects and the module are published, the module is assigned to the page and its Access includes the visitor, and Content - Load Modules is enabled when you use
{loadmoduleid}. - A Google map in development mode needs an API key (see Google Maps).