
PX Image Optimizer compresses and resizes images when you upload them, creates WebP copies and serves them with picture tags, optimizes existing folders in bulk and keeps every original for restore. Set it up in Components → PX Image Optimizer.
Overview
PX Image Optimizer makes the images of your Joomla site smaller without changing how you work. Images you upload in the Media Manager are resized, cleaned and recompressed on the way in, a WebP copy is saved next to each one, and your pages serve the WebP copy to browsers that support it. Existing images can be optimized in bulk, and every original is kept so you can restore it. PX Image Optimizer is free.
- Optimize on upload: resize oversized images, strip EXIF/GPS data, fix the orientation and recompress JPEG and PNG.
- WebP: a
.webpcopy next to each JPEG and PNG (photo.jpg→photo.webp). - Served automatically: local
<img>tags get a<picture>wrapper with the WebP source; older browsers keep the original. - Bulk optimize the images that are already on your site, folder by folder.
- Restore any image to its original with one click.
- Savings dashboard and a system check for Imagick, GD and WebP support.
Installation
System requirement
- Joomla 6.x
- PHP 8.3 or later with Imagick (preferred) or GD with WebP support
- A MySQL or MariaDB database
- Images on the local Media Manager adapter (files in
images/and other local folders). Remote adapters such as S3 are skipped.
Install the package
- Download
pkg_pxio-1.0.0.zipfrom the PX Image Optimizer page (a free thepixel.dev account is enough). - In the Joomla administrator, go to System → Install → Extensions and upload the zip.
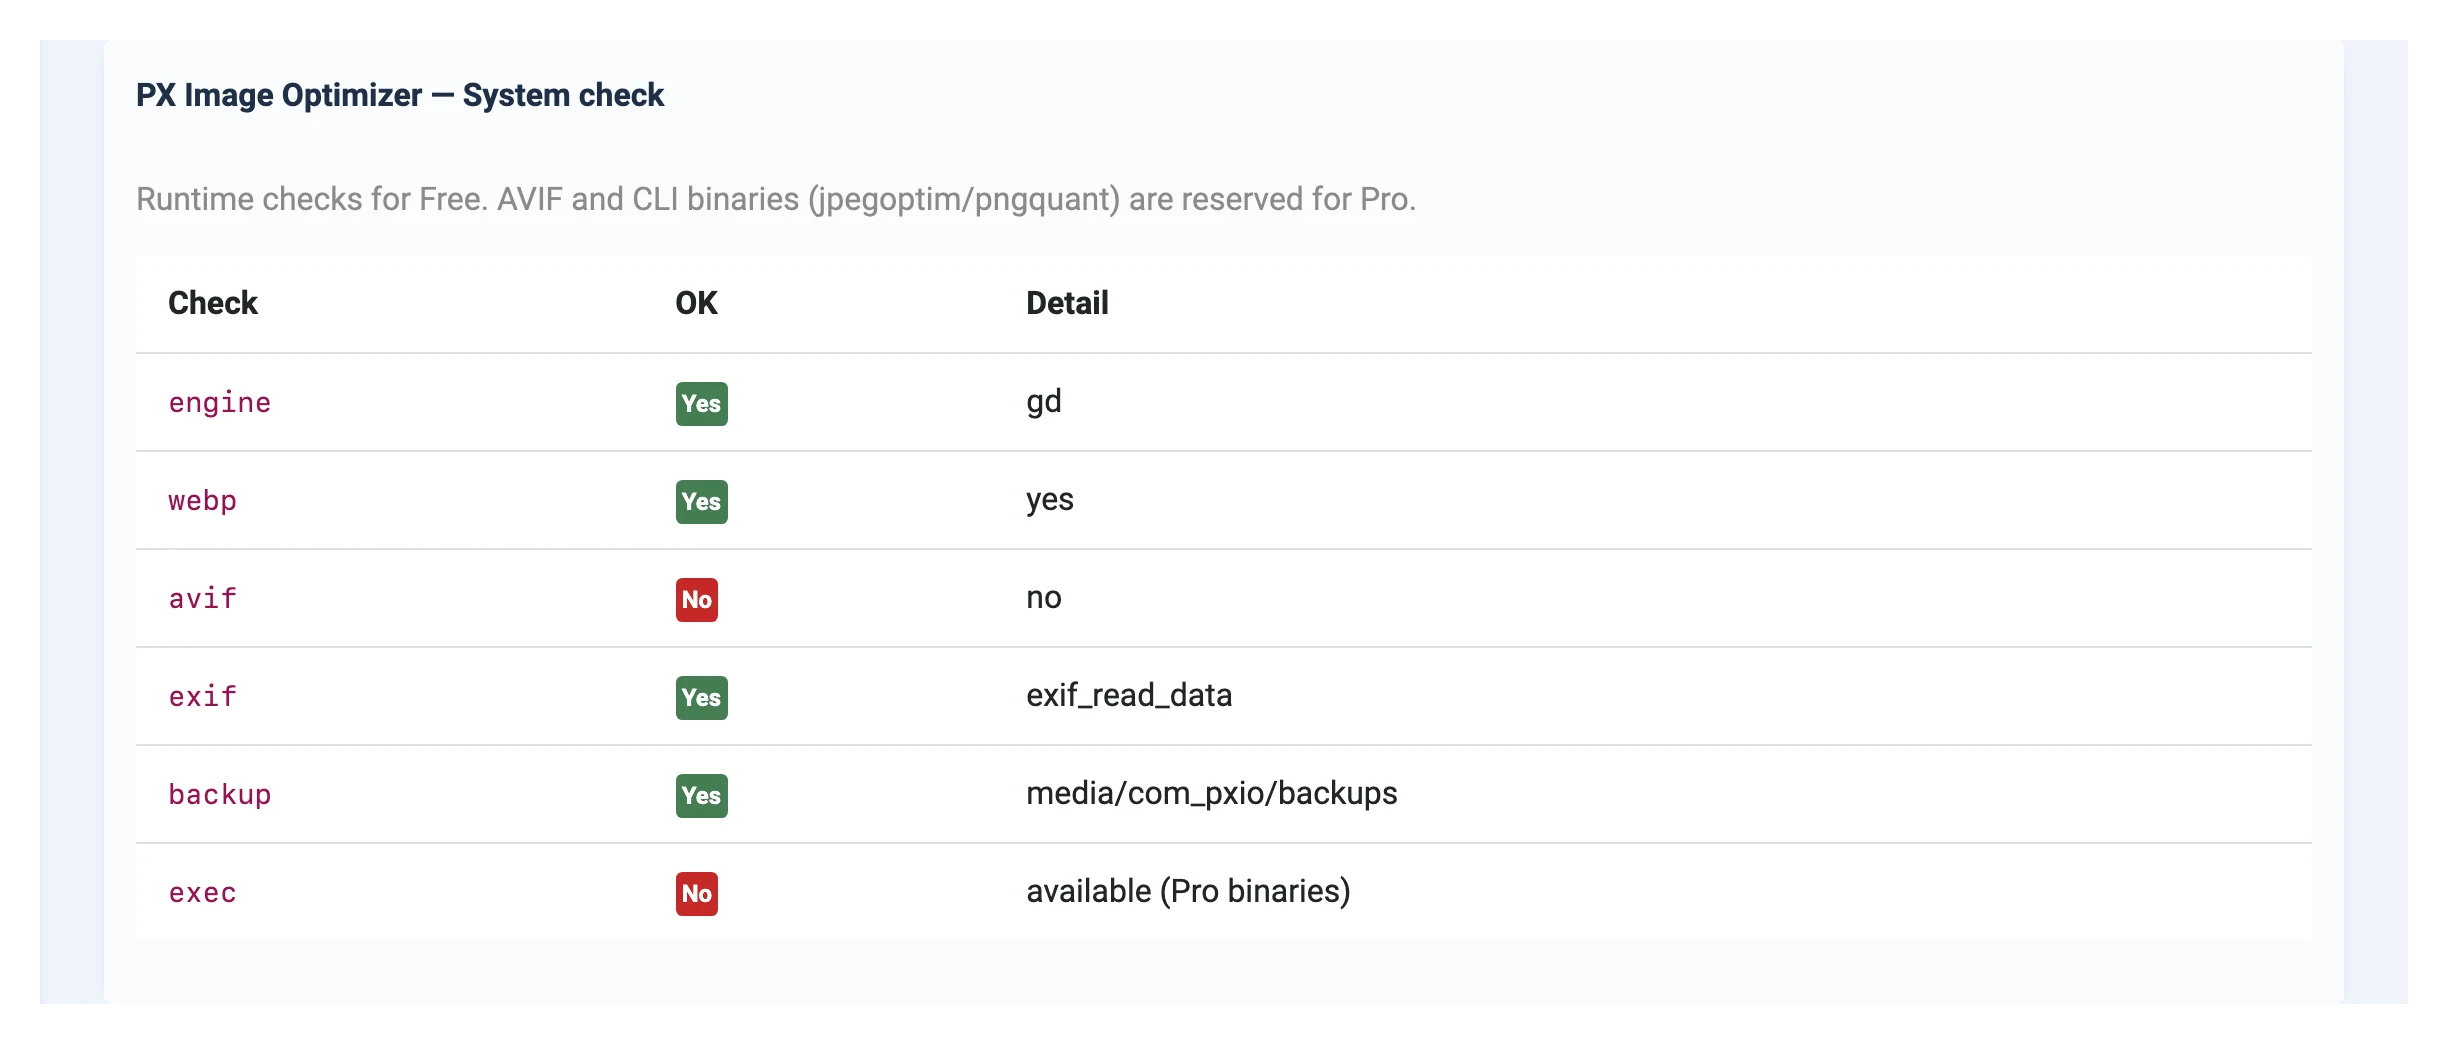
- Open Components → PX Image Optimizer → System check and make sure the engine and WebP show Yes.
The package installs the component and the plugin System - PX Image Optimizer and enables the plugin. From then on, new uploads are optimized with the default settings below.
Settings
Components → PX Image Optimizer → Settings:
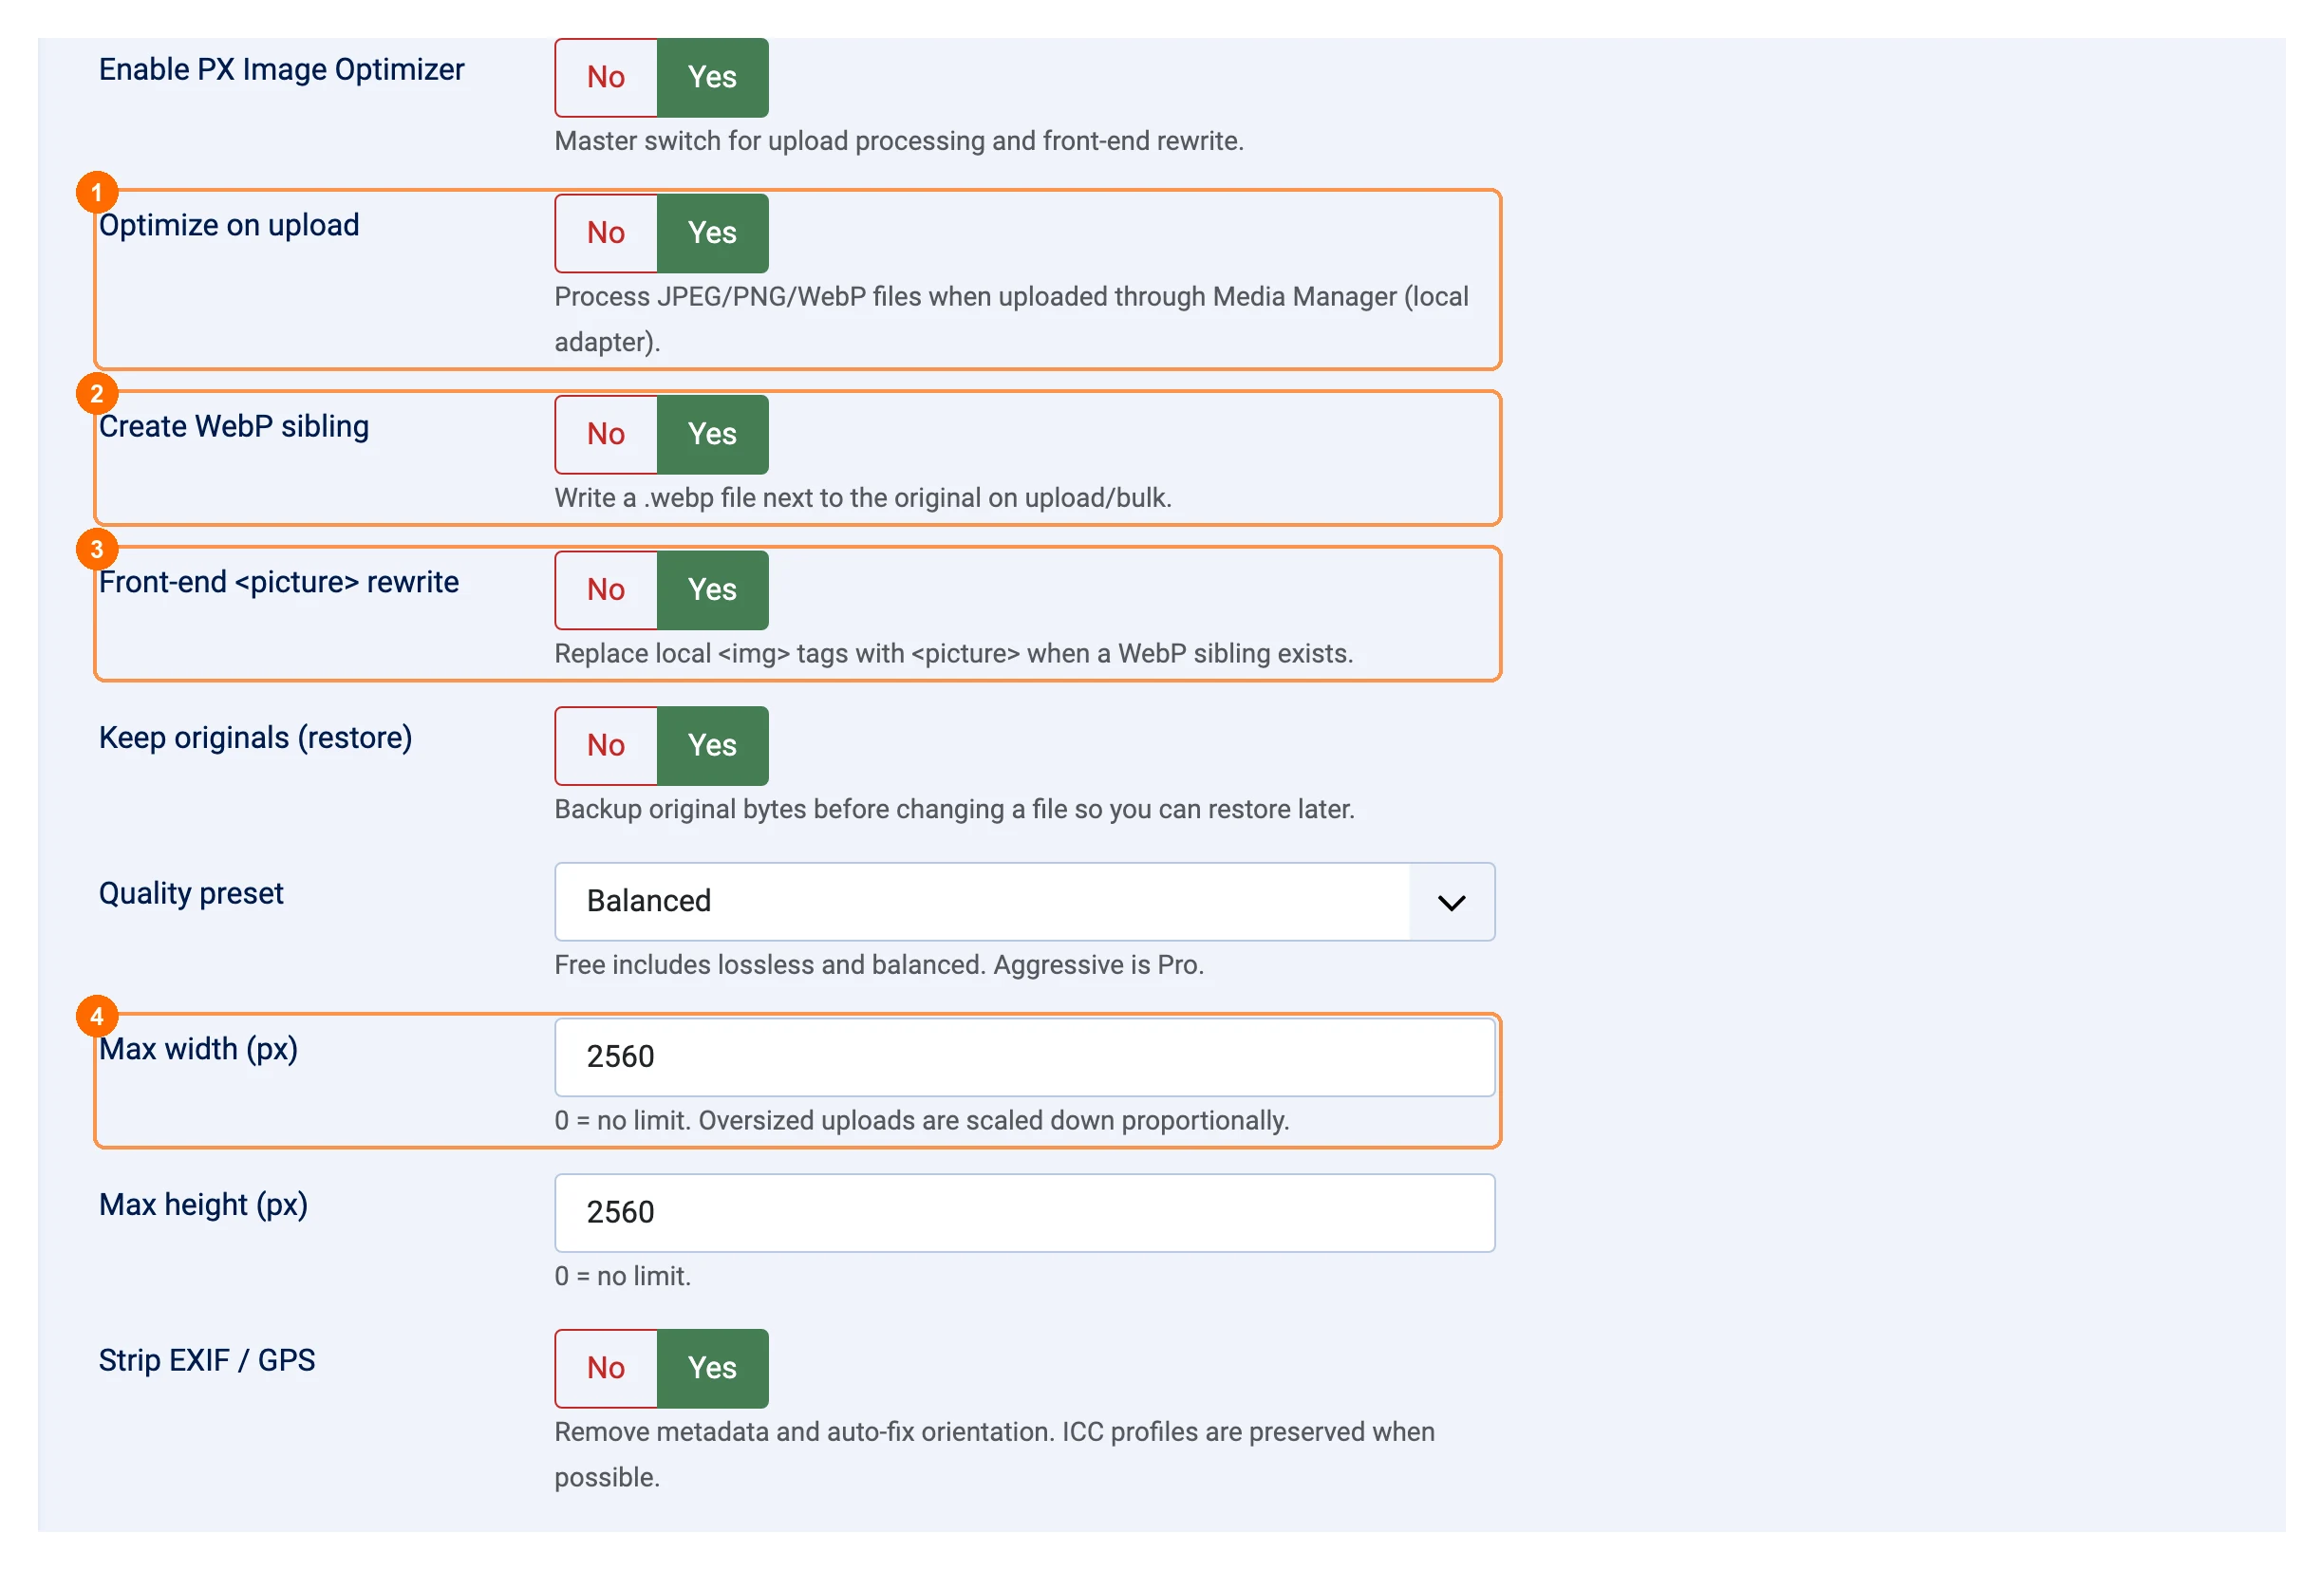
| Setting | What it does |
|---|---|
| Enable PX Image Optimizer | Master switch for upload processing and the front-end rewrite. |
| 1Optimize on upload | Process JPEG, PNG and WebP files uploaded in the Media Manager. |
| 2Create WebP sibling | Write a .webp file next to the original. |
| 3Front-end <picture> rewrite | Serve the WebP copy on your pages (see WebP on your pages). |
| Keep originals | Save the original file before it is changed, so you can restore it. |
| Quality preset | Balanced (smaller files, no visible change) or Lossless. PNG files stay lossless in both. |
| 4Max width / Max height | Larger images are scaled down to fit (default 2560 px; 0 = no limit). |
| Strip EXIF / GPS | Remove camera and location data and fix the orientation. |
When an optimized file would be larger than the original, the original is kept. GIF and SVG files are not touched.
Bulk optimize existing images
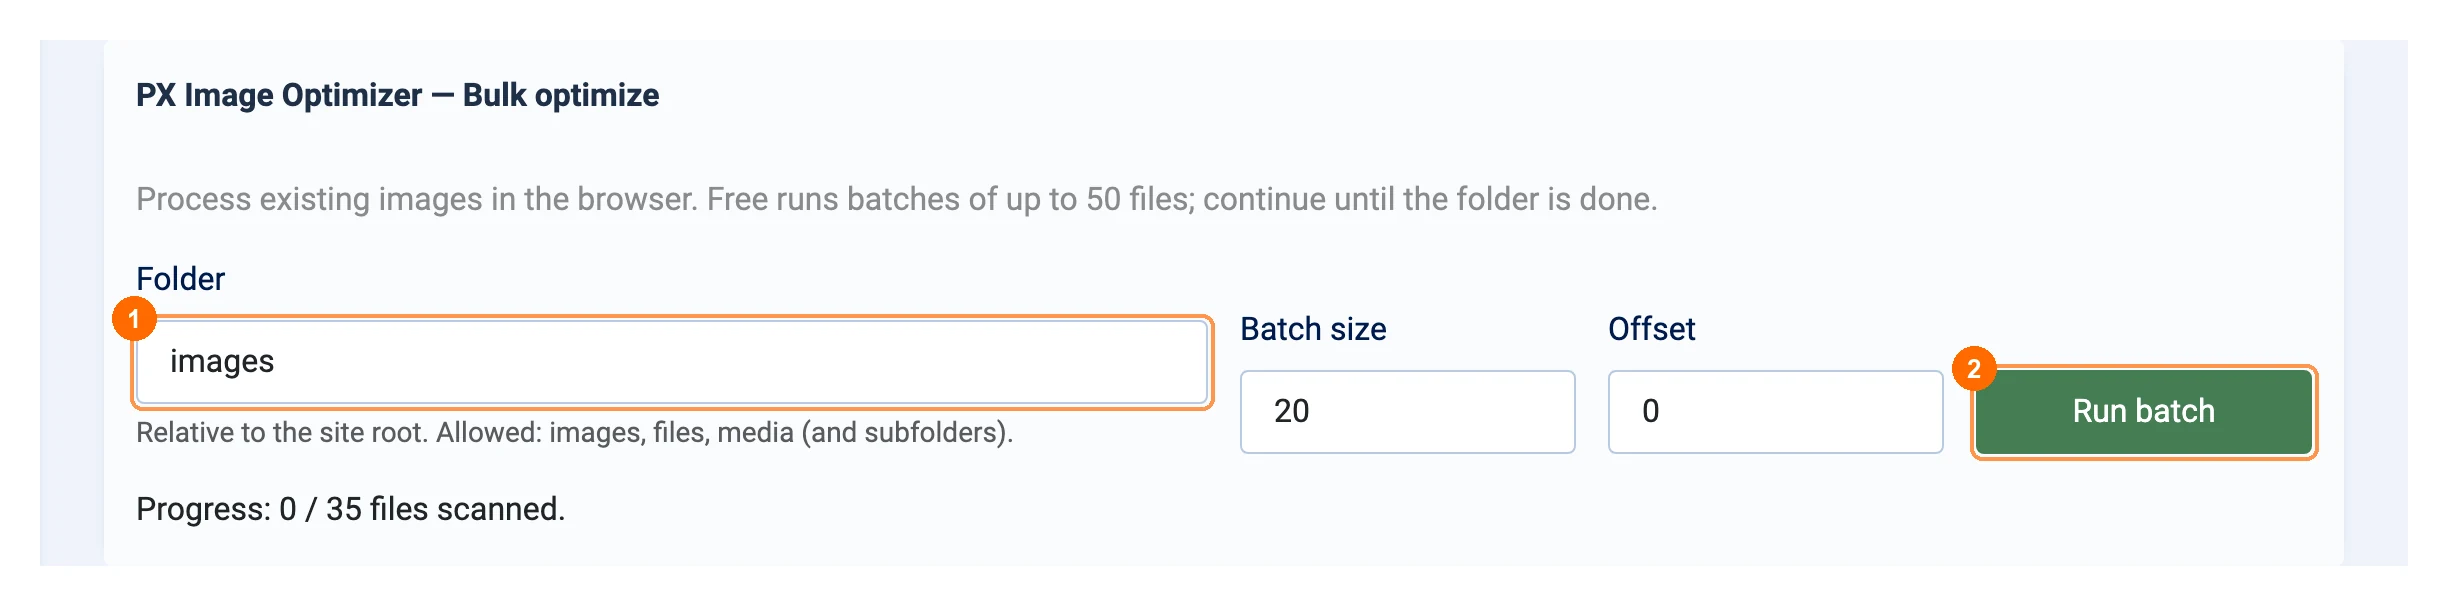
Components → PX Image Optimizer → Bulk optimize processes the images that were on your site before you installed PX Image Optimizer.
- 1Folder: a folder under
images,filesormedia, for exampleimagesorimages/blog. Subfolders are included. - Batch size: how many files one request handles (up to 50). Lower it if your host has a short time limit.
- 2Click Run batch. The page runs the next batch by itself until the folder is done, and shows how many images were optimized, skipped or failed.
Images and restore
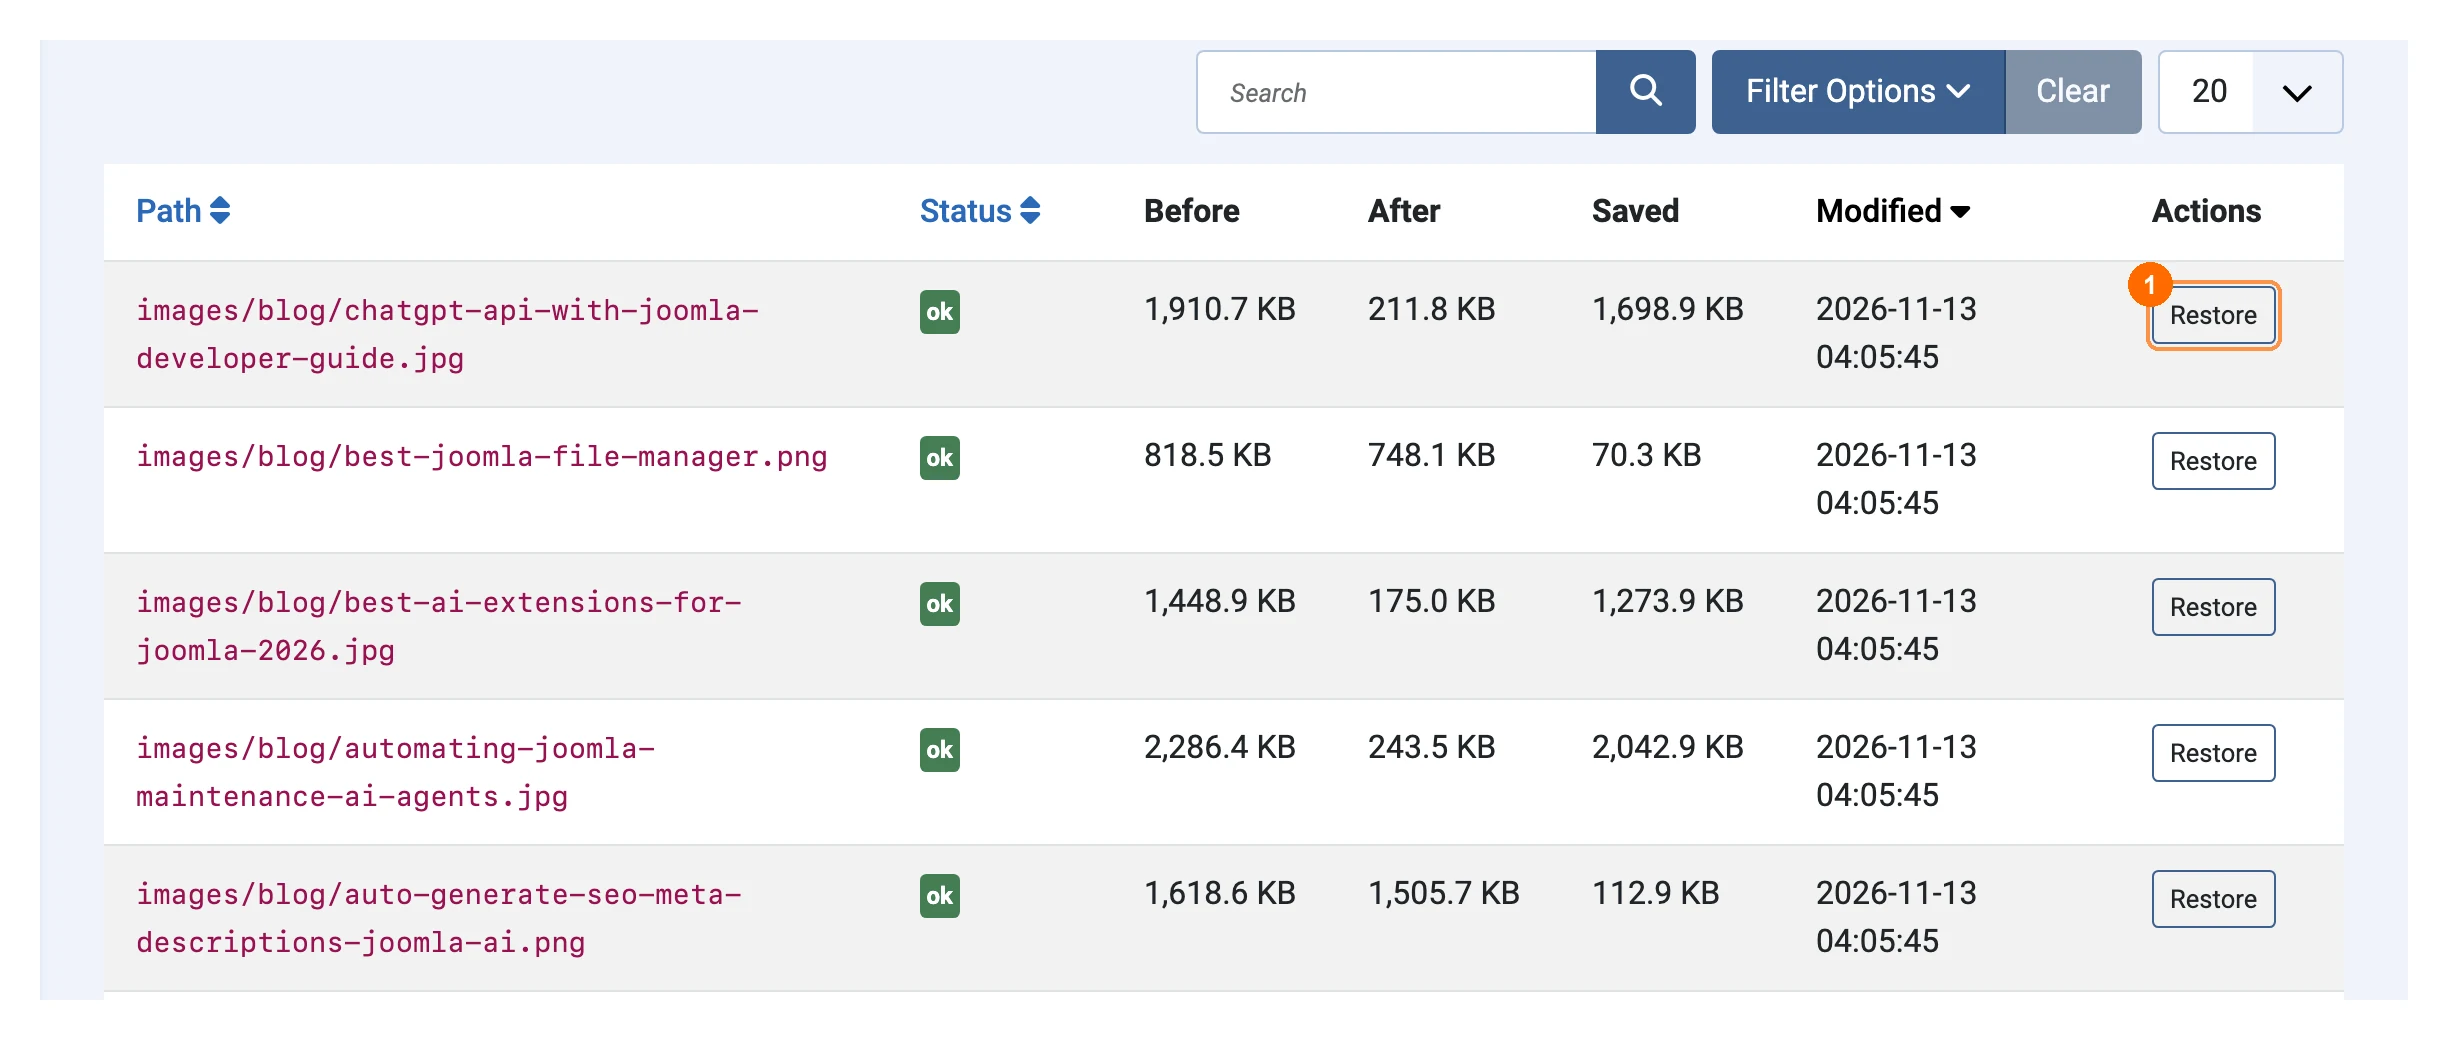
Components → PX Image Optimizer → Images lists every optimized image with its size before and after and the space saved. Search by path or filter by status. 1 Restore puts the original file back, deletes its WebP copy and removes the image from the list.
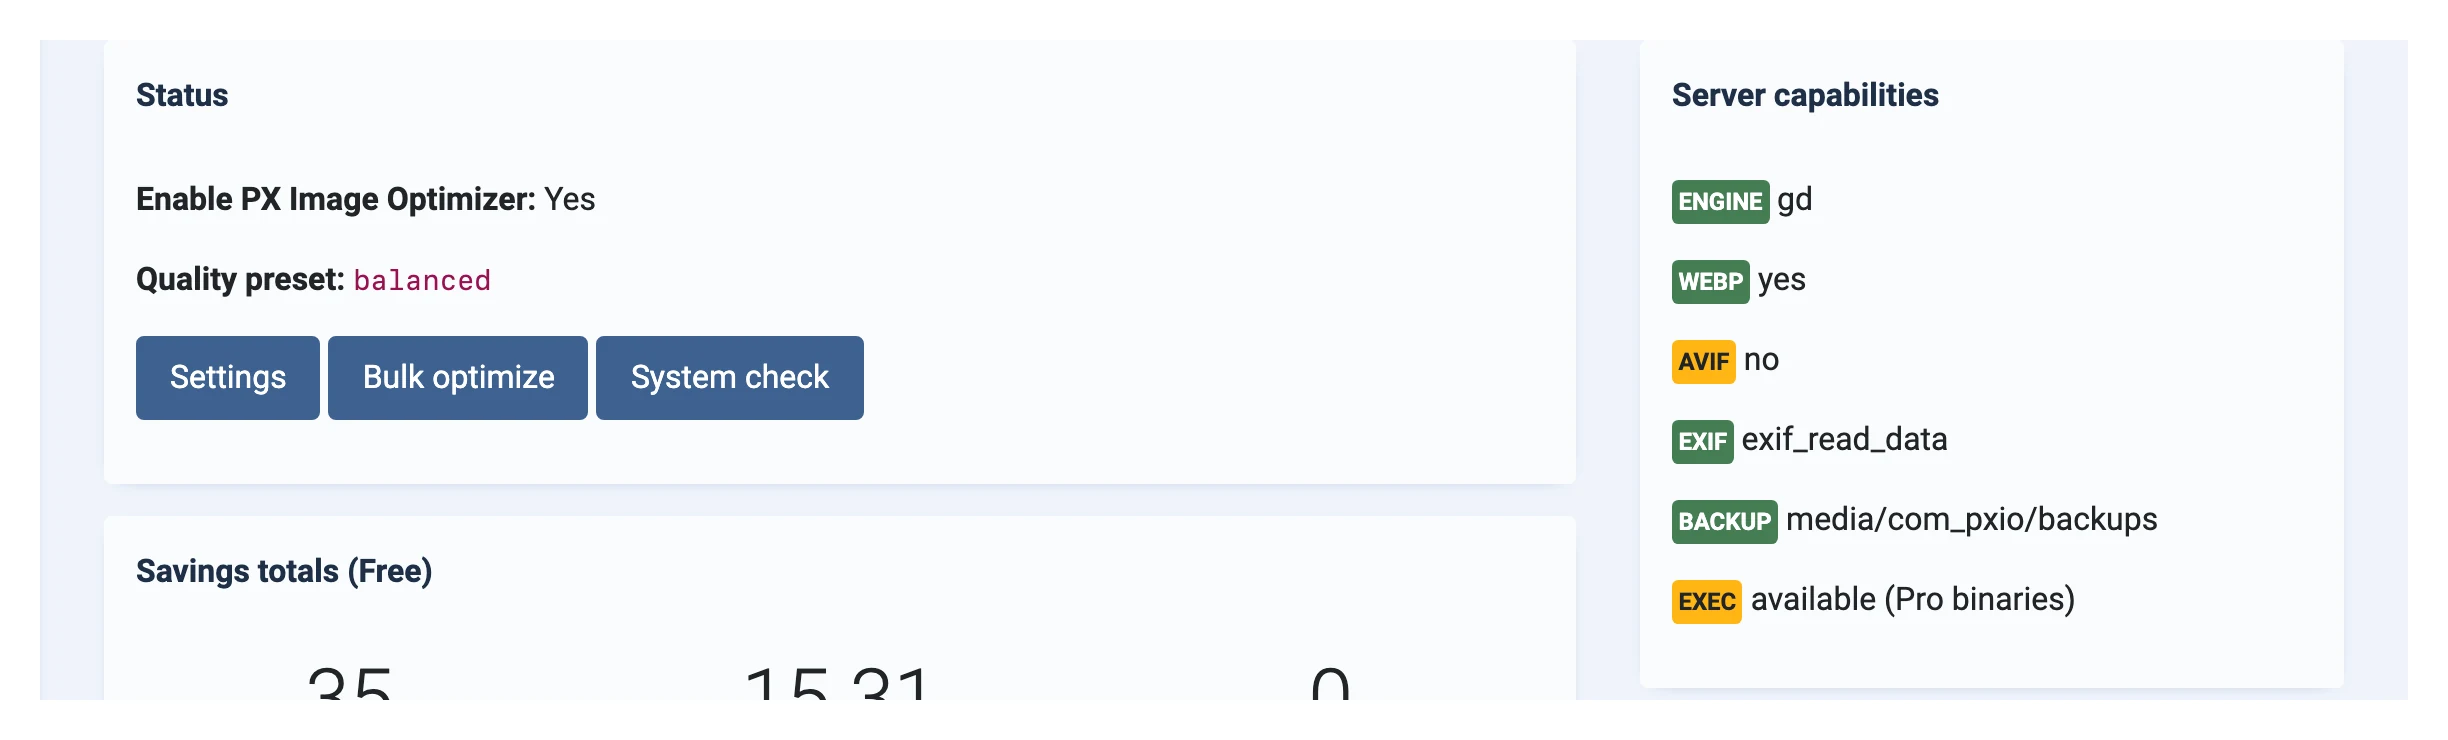
The dashboard shows the totals: images processed, megabytes saved and failures.
WebP on your pages
With Front-end <picture> rewrite on, every local image on a page that has a WebP copy is served like this:
<picture>
  <source type="image/webp" srcset="/images/blog/photo.webp">
  <img src="/images/blog/photo.jpg" alt="…">
</picture>
Browsers with WebP support load the smaller file; the others load the original. Your articles and modules are not changed: the rewrite happens when the page is sent. It leaves alone images from other sites, images that already have a srcset or sit inside a <picture>, and anything inside scripts. Add data-pxio="1" to an <img> to skip it.
System check
Components → PX Image Optimizer → System check shows which image engine is used (Imagick, or GD when Imagick is missing), whether WebP can be written, whether EXIF data can be read and where the originals are kept (media/com_pxio/backups). AVIF and command-line tools are not used by the free edition.
Troubleshooting
- Very large images are skipped: with GD, a photo needs about 5 bytes of PHP memory per pixel. PX Image Optimizer raises the memory limit when it can and otherwise skips the file (status failed, "too_large_for_memory"). Ask your host for Imagick or a higher
memory_limit. - No WebP on the page: check that the front-end rewrite is on, that the page cache was cleared, and that the
.webpfile exists next to the image. - Uninstalling removes
media/com_pxioincluding the kept originals, so restore the images you want back first. WebP copies next to your images stay on disk.