
PX Mail sends every Joomla email through one provider (SMTP, Gmail OAuth or an email API), logs each message for 7 days and checks the DNS of your sending domain. Set it up in Components → PX Mail.
Overview
PX Mail sends every Joomla email through one real email provider instead of the server's PHP mail. Contact forms, registrations, password resets and messages from most extensions go out through your SMTP account or a sending API, and each message is logged so you can see what was sent and what failed. PX Mail is free.
- One provider for all email: SMTP with presets (Gmail, Microsoft 365, Zoho, Brevo, Amazon SES, Mailgun, SendGrid) or any SMTP server.
- Gmail / Google Workspace OAuth: send through Gmail without an app password.
- Sending APIs: Brevo, Mailgun, Postmark, SendGrid, SMTP2GO and Resend over HTTPS.
- Sender rules: force the From name and address, Reply-To and Return-Path.
- Test email from the settings page, with the error text when it fails.
- Email log: status and headers of every message for 7 days (no message bodies).
- DNS check: SPF, DKIM, DMARC and MX for your sending domain.
- Privacy: log rows are included in Joomla privacy exports and removal requests.
Installation
System requirement
- Joomla 6.x
- PHP 8.3 or later with OpenSSL (outbound HTTPS is needed for API providers and Gmail OAuth)
- A MySQL or MariaDB database
Install the package
- Download
pkg_pxmail-1.0.0.zipfrom the PX Mail page (a free thepixel.dev account is enough). - In the Joomla administrator, go to System → Install → Extensions and upload the zip.
- Open Components → PX Mail.
The package installs the component and three plugins (System - PX Mail, Privacy - PX Mail and Task - PX Mail) and enables the plugins. Nothing changes for your site's email until you switch PX Mail on and fill in a provider: until then Joomla keeps using its own mailer.
Dashboard
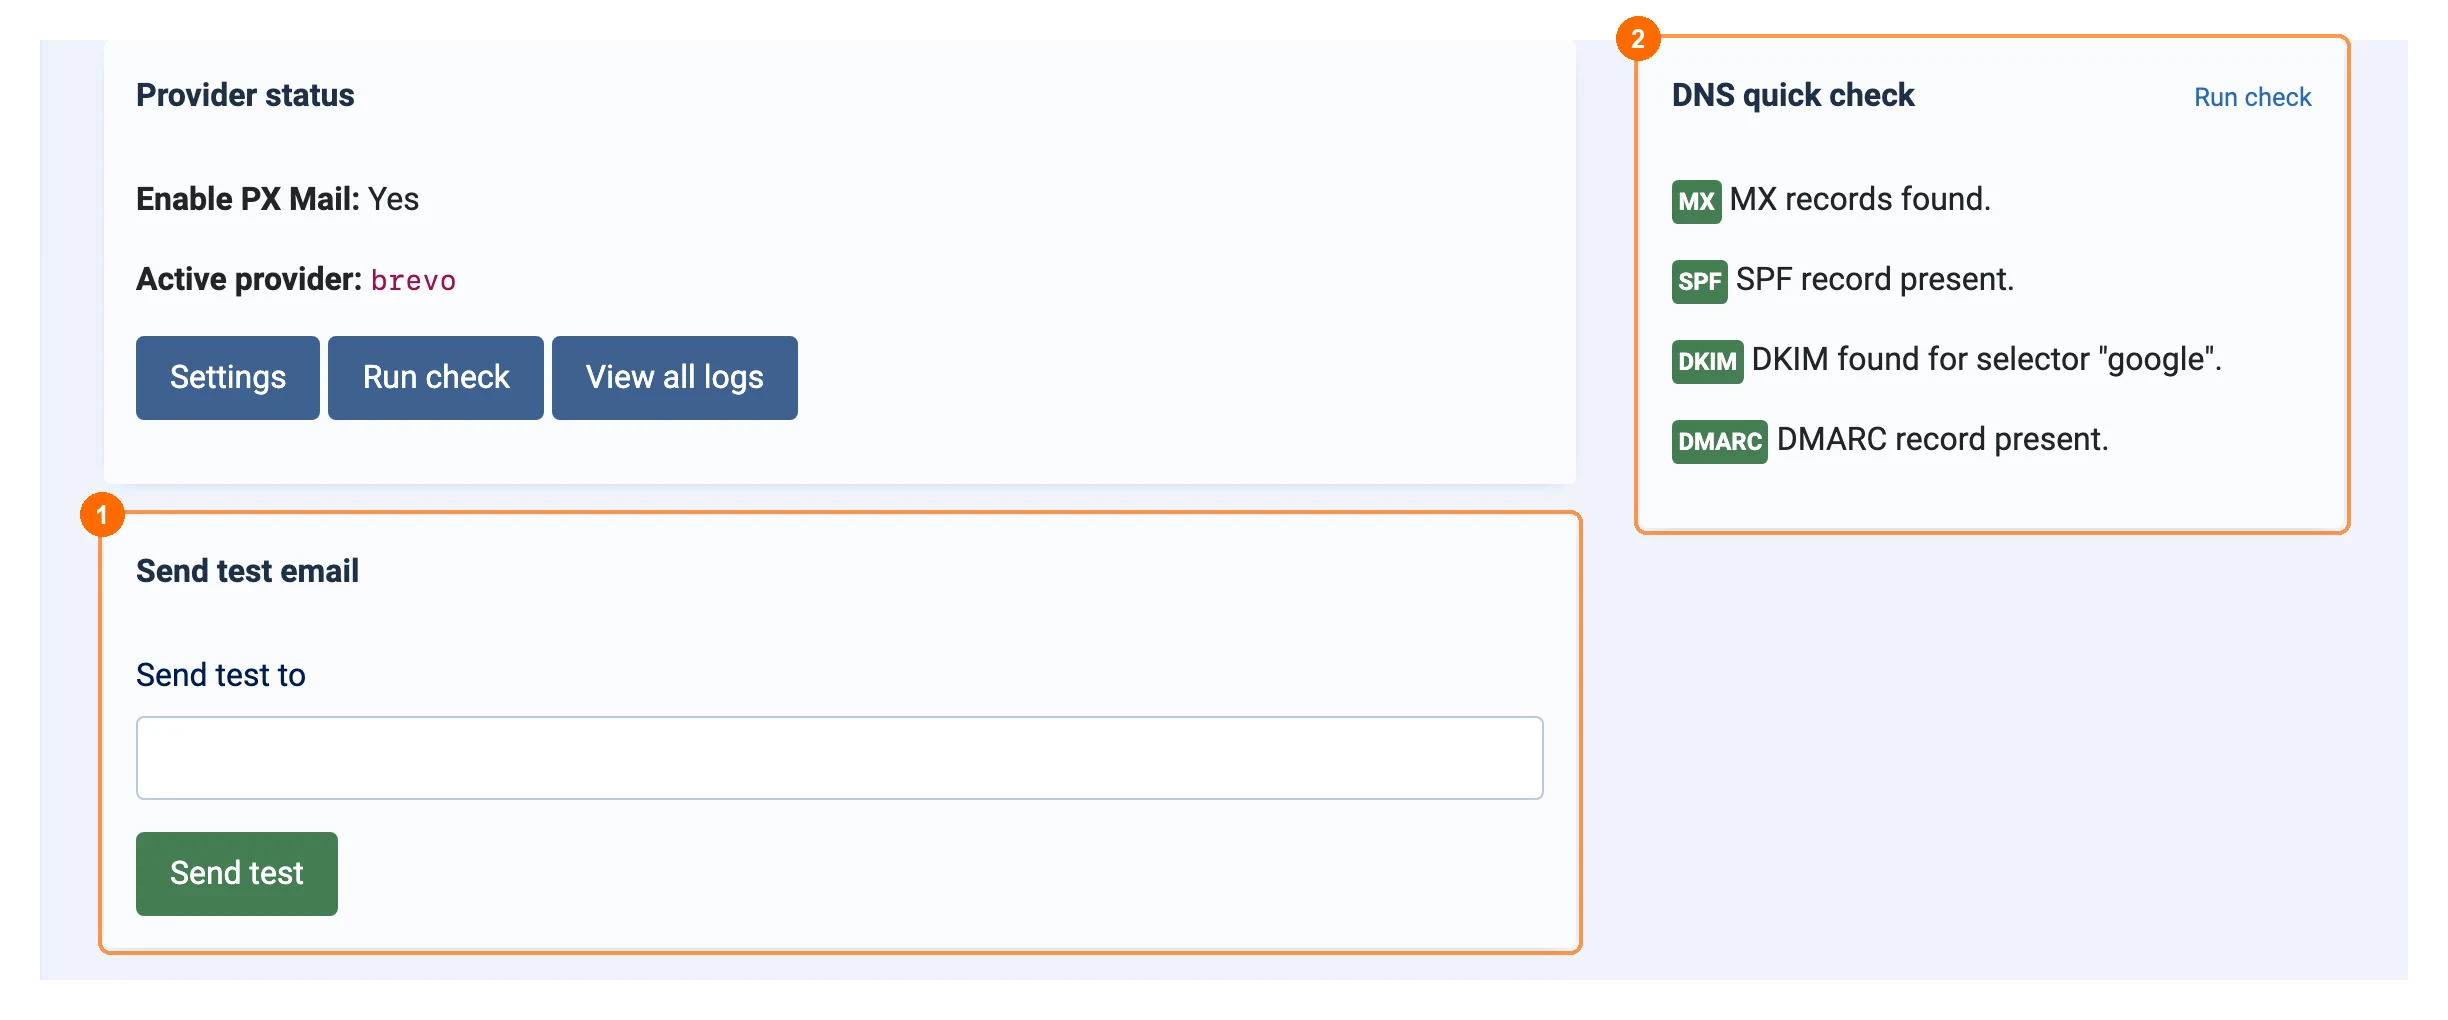
The dashboard shows whether PX Mail is on and which provider is active, a form to send a test email 1, the result of the last DNS check 2 and the latest log entries.
Choose a provider
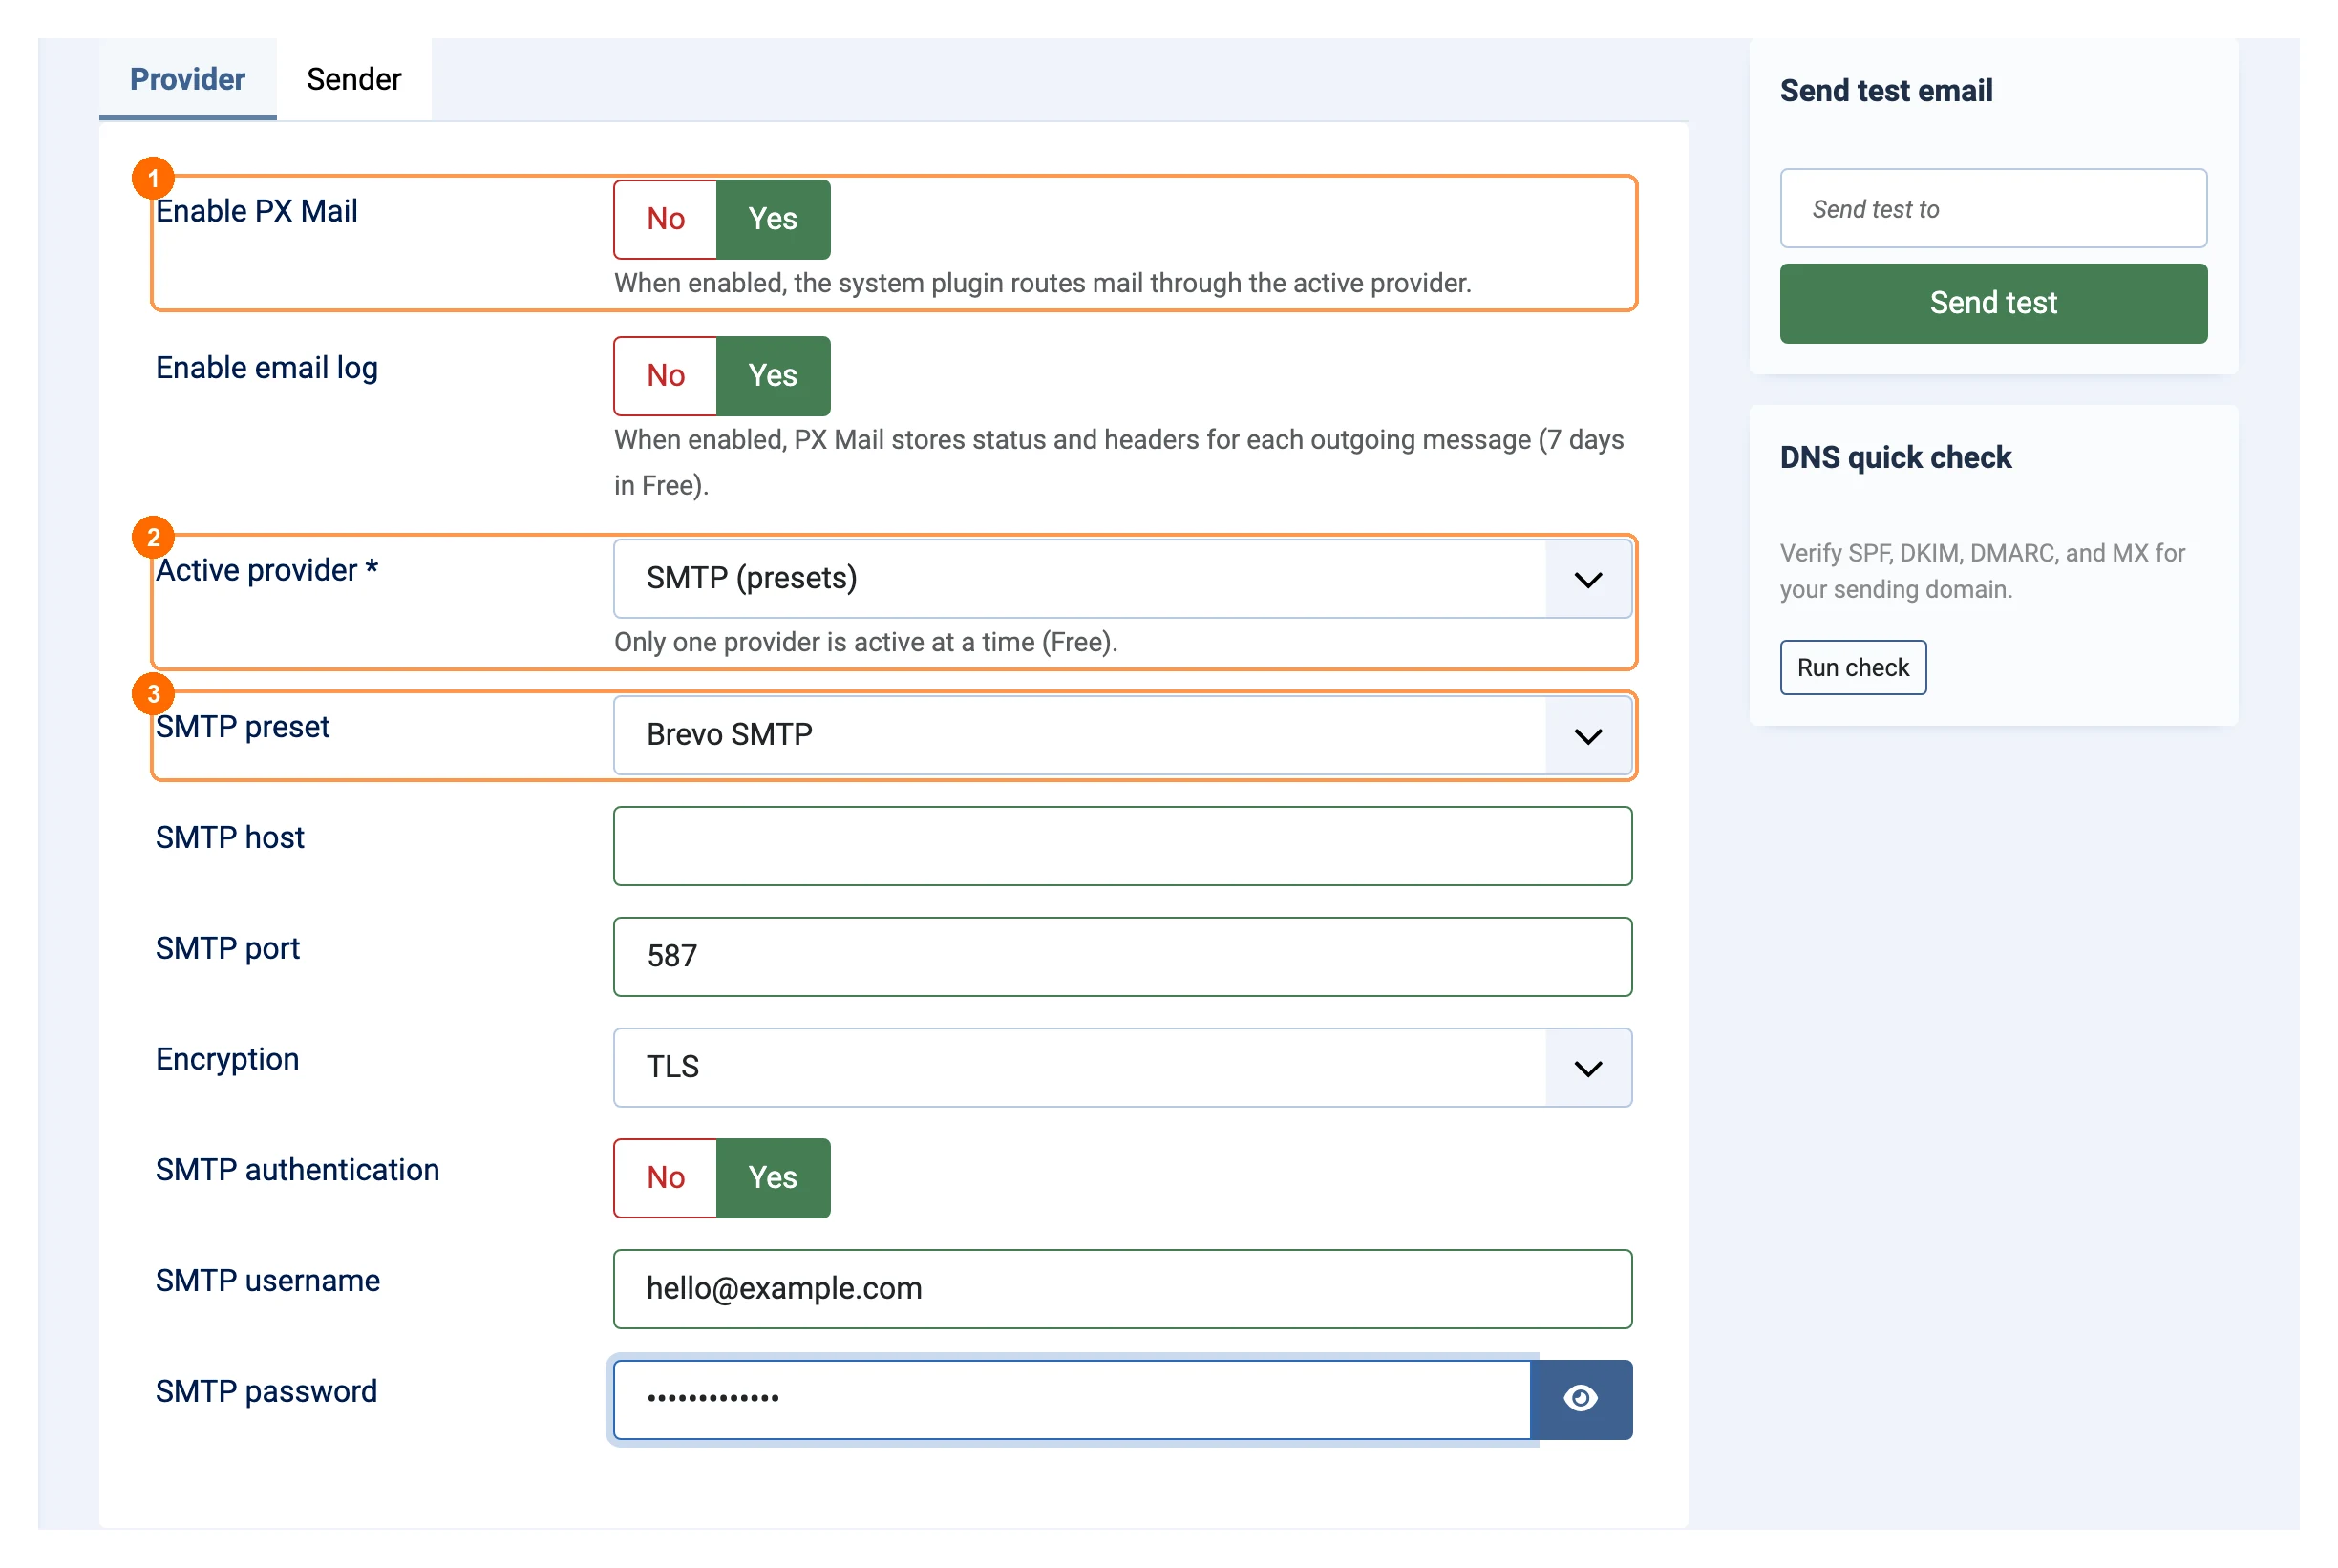
Go to Components → PX Mail → Settings, tab Provider.
- 1Enable PX Mail: Yes. The system plugin then sends Joomla's email through the active provider.
- 2Active provider: pick one. Only one provider is active at a time.
- Fill in the fields of that provider and click Save. Secrets (passwords, API keys, tokens) are stored encrypted; leave a secret field empty to keep the saved value.
- Send a test email (right-hand column) before you rely on it.
SMTP and presets
Choose SMTP (presets) and a preset 3: Gmail (App Password), Microsoft 365, Zoho, Brevo SMTP, Amazon SES (us-east-1), Mailgun SMTP or SendGrid SMTP. The preset sets the host, port and encryption, so you can leave SMTP host empty; type a host only to override it. With Custom, enter the host, port and encryption of your mail server.
Gmail / Google Workspace OAuth
- In the Google Cloud Console, create an OAuth client of type Web application.
- Add the OAuth redirect URI that PX Mail shows as an authorized redirect URI.
- Paste the Google client ID and client secret, enter the Gmail address and click Save.
- Click Connect with Google and allow access. PX Mail stores the refresh token and renews the access token by itself.
API providers
Brevo, Mailgun, Postmark, SendGrid, SMTP2GO and Resend send over HTTPS with an API key (Mailgun also needs the domain and region). Use an API key that may send email only, and verify your sending domain at the provider first.
Sender rules
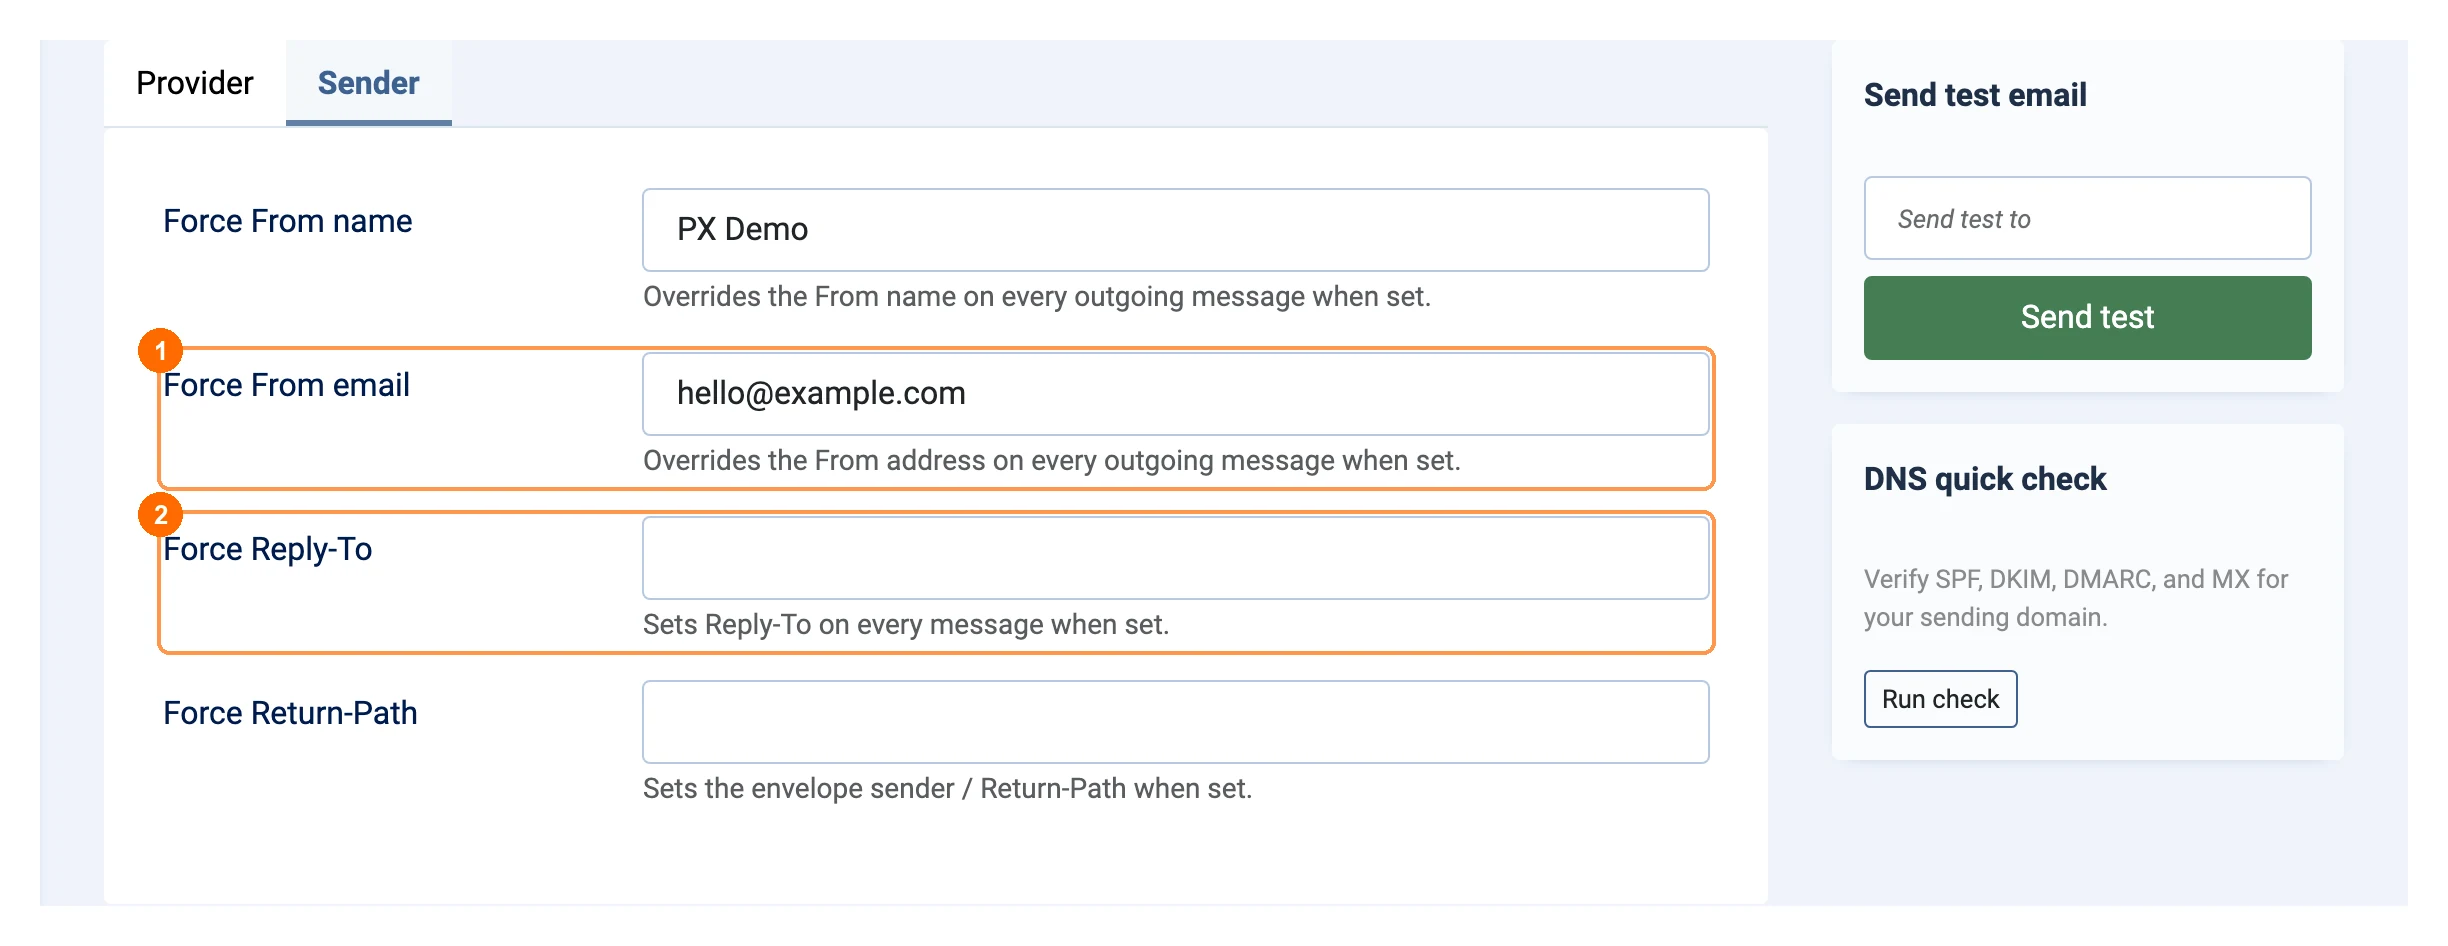
Tab Sender sets the sender of every message, whatever the extension that sends it put there. Providers often reject mail from addresses that are not verified, so set 1 Force From email to an address of your verified domain. 2 Force Reply-To and Force Return-Path are optional. Leave a field empty to keep what the sending extension uses.
Email log
Components → PX Mail → Email log lists every message with the time, status, provider, the extension that sent it, sender, recipients and subject. Use 1 Filter Options to show only failed messages, one provider, one source or a date range. Open a row to see its headers and the error text of a failed message.
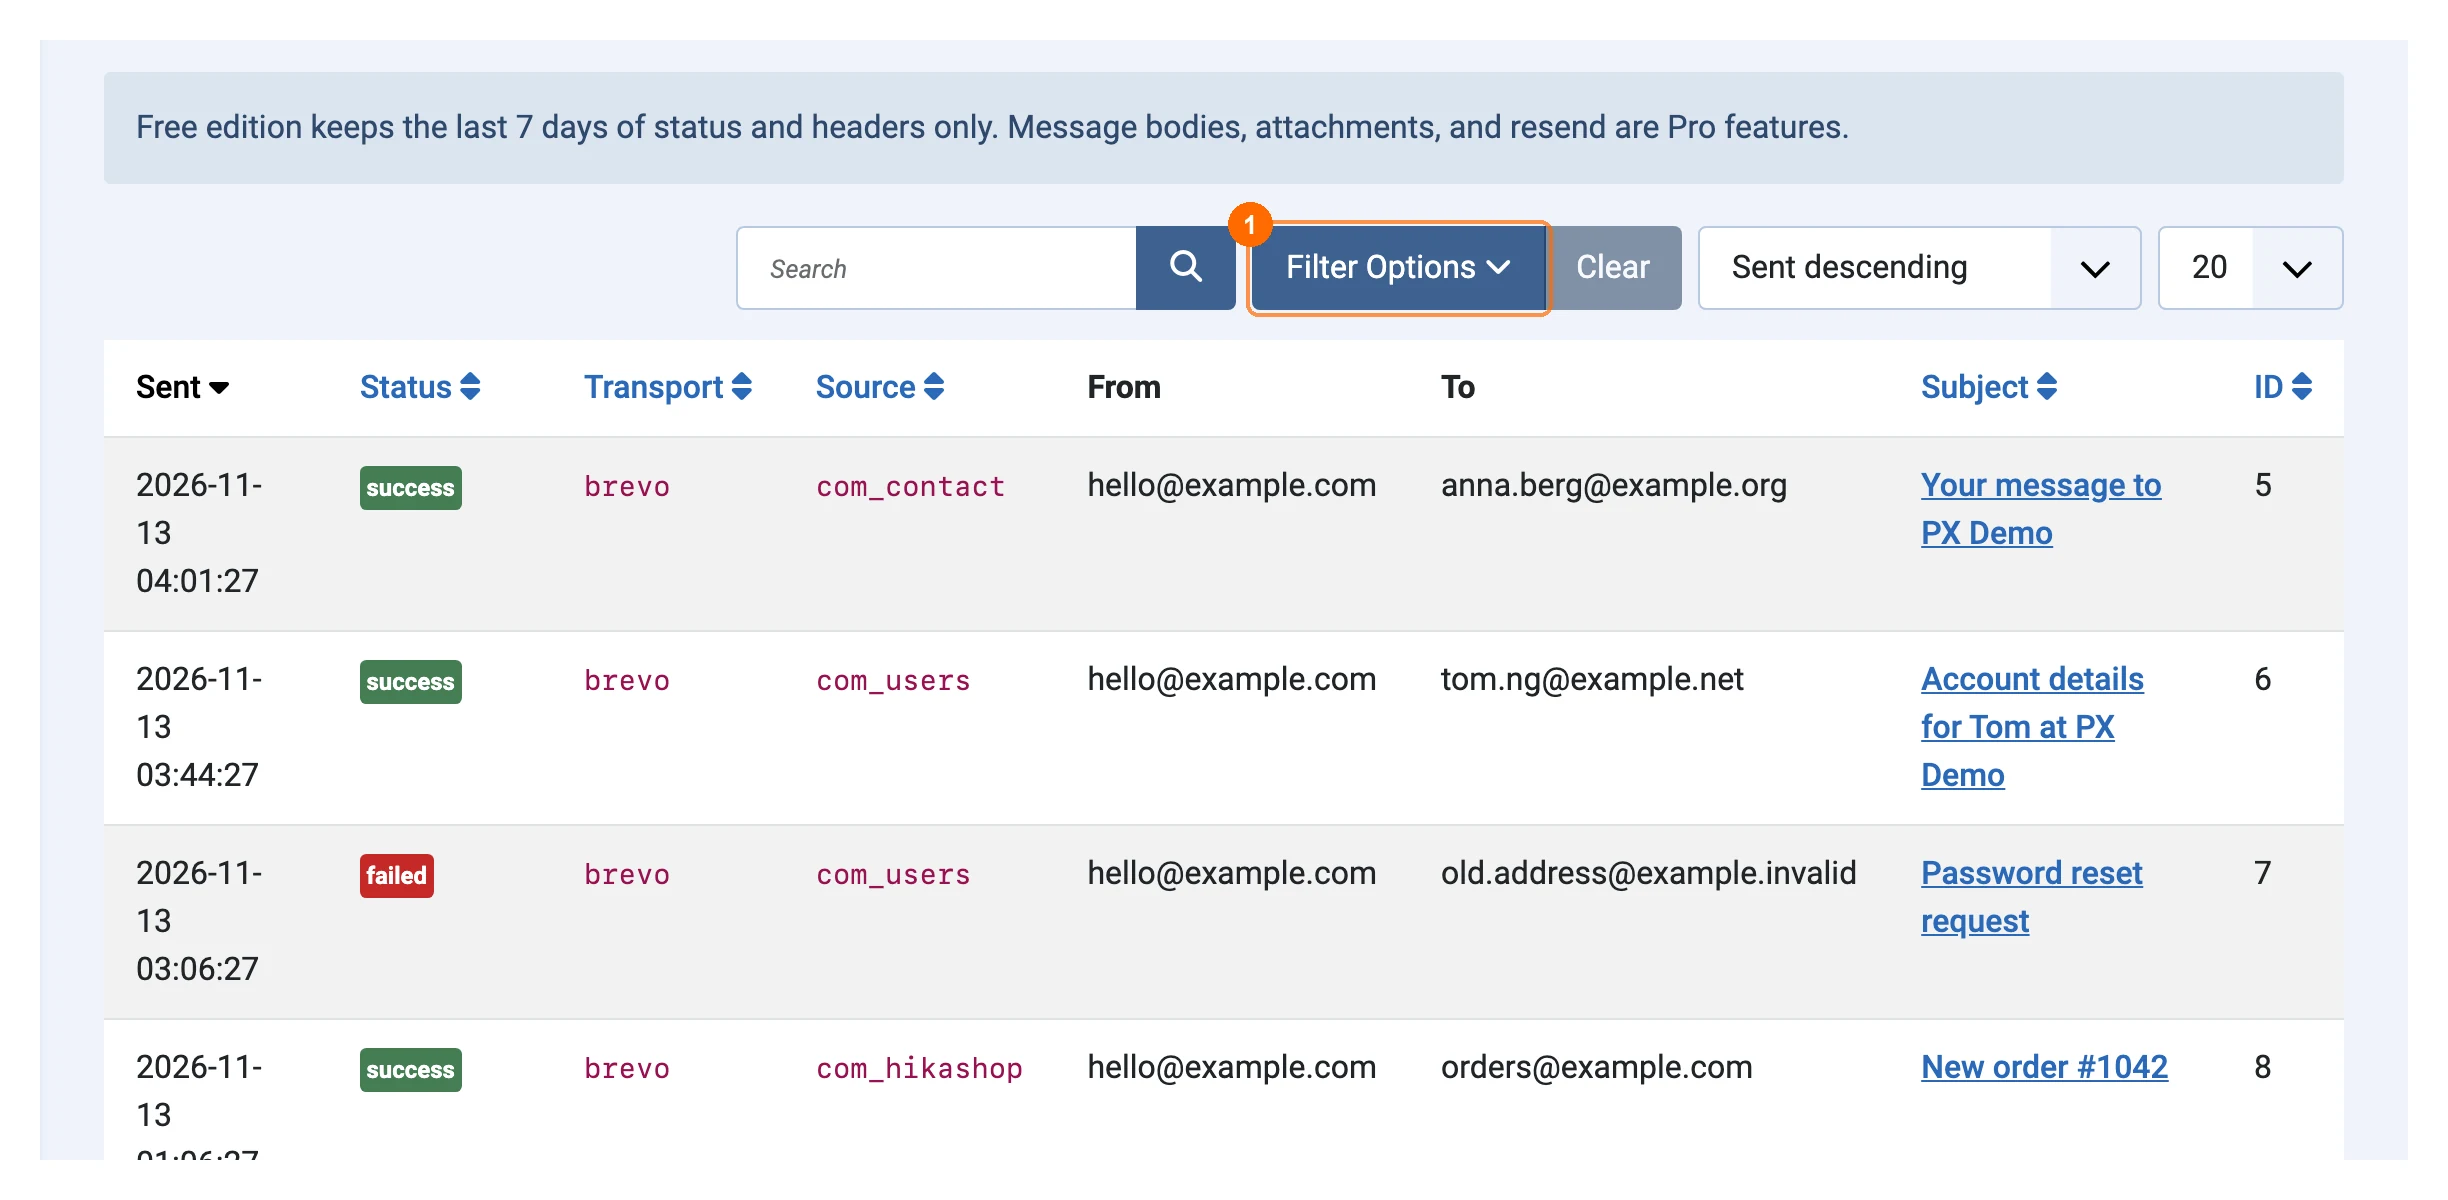
The free edition keeps the last 7 days. To delete older rows on a schedule, create a task in System → Scheduled Tasks → New of type PX Mail: Prune email log. You can turn the log off with Enable email log on the Provider tab.
DNS check
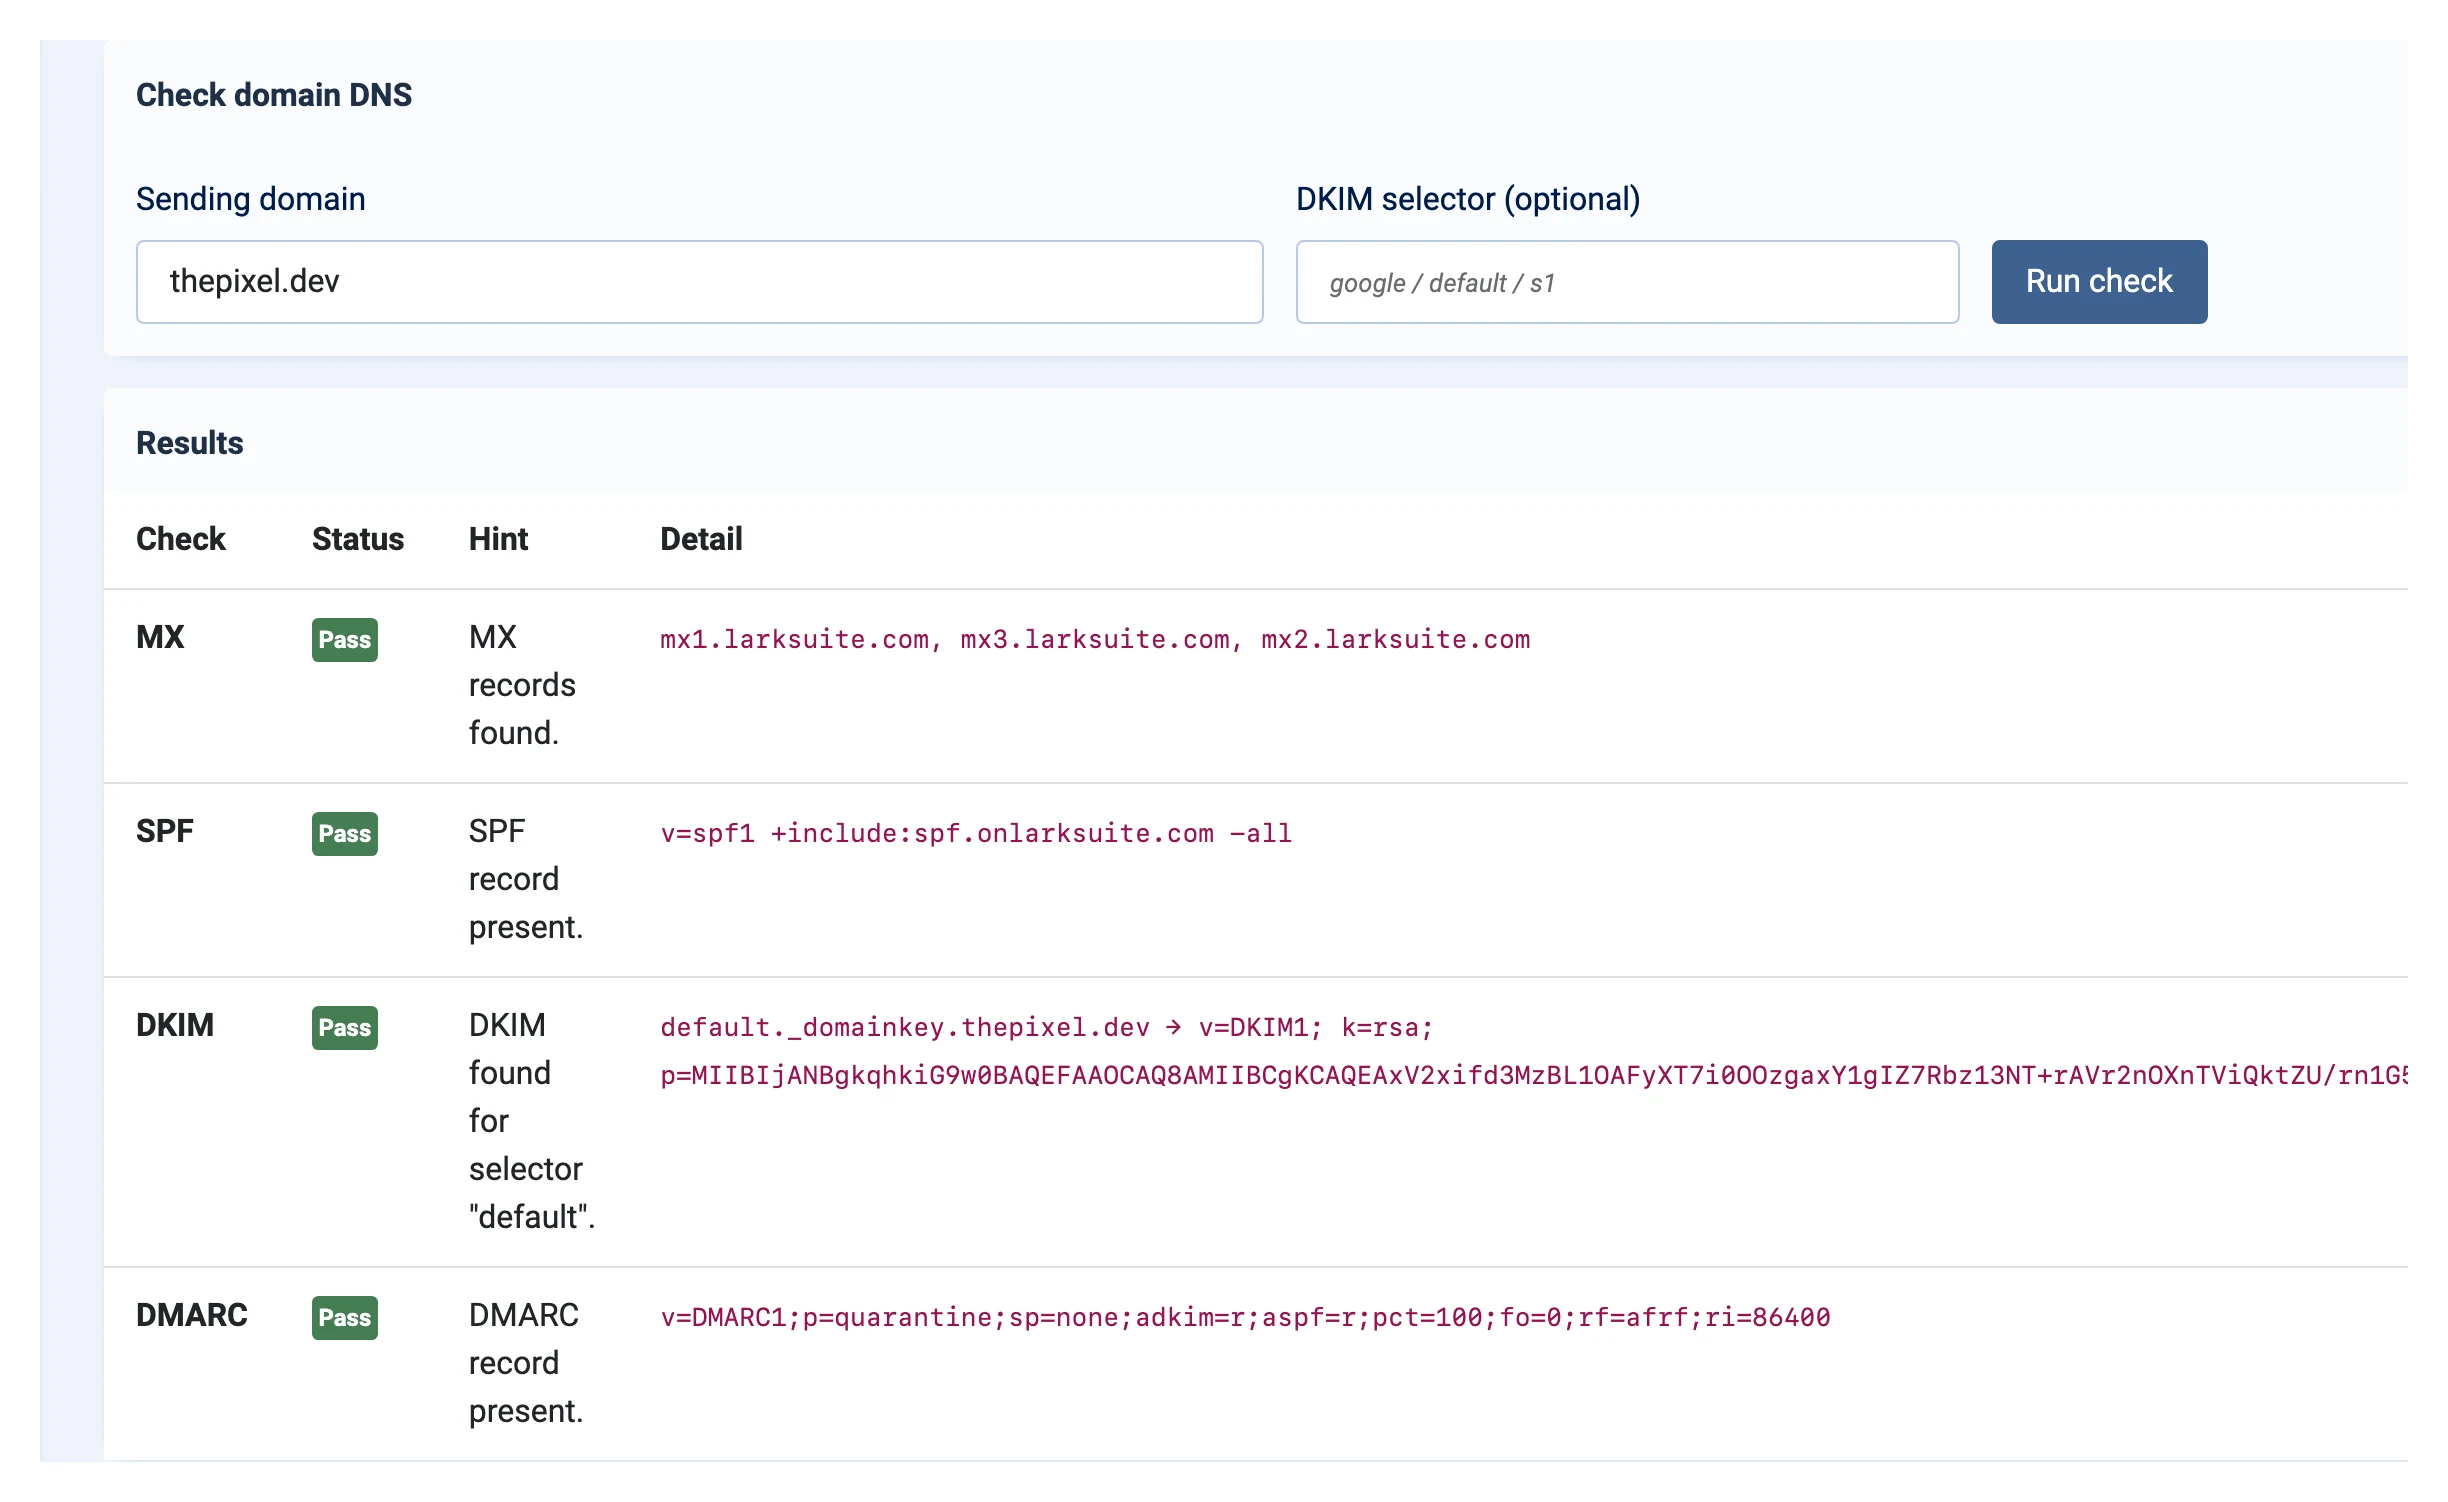
Components → PX Mail → DNS check looks up the DNS of your sending domain and tells you whether the records that decide if your email lands in the inbox are there: MX, SPF, DKIM (enter the selector your provider gives you, or leave it empty to try common ones) and DMARC. Each row has a hint when something is missing.
Which email goes through PX Mail
Everything that uses Joomla's mailer: Joomla itself (registration, password reset, Global Configuration test mail, Contact), and most extensions, for example RSForm!Pro and HikaShop. Extensions that ship their own mailer do not: AcyMailing sends with its own PHPMailer, so set the same SMTP or API account in AcyMailing's configuration.
Privacy
The Privacy - PX Mail plugin adds log rows to Joomla privacy requests (Users → Privacy → Requests): an export includes the rows sent to or from the person's email address, and a removal request deletes them.
Troubleshooting
- The test email fails: the message shows the provider's answer. Check the password or API key, the port and encryption (587 with TLS or 465 with SSL), and that the From address belongs to a verified domain.
- Email goes to spam: run the DNS check and add the missing SPF, DKIM or DMARC record at your DNS host.
- Nothing appears in the log: check that Enable PX Mail and Enable email log are on and that the plugin System - PX Mail is enabled.
- Back to Joomla's mailer: set Enable PX Mail to No. Joomla's own mail settings in Global Configuration are used again.